Anita Shackelford
Contact me  
  • Home
  • Digitized Patterns - DXF and QLI
  • Short Arm Patterns - Statler
  • Patterns in Multi-Formats
  • Made by Hand - Books, Templates, Needles
  • For sale
  • Statler Tutorials
  • Quilt Rescue
  • Red and Green Quilts
  • Kids at Work
  • About Anita
  • Contact
  • What's New
  • Store

Southern Belle

7/19/2021

2 Comments

 
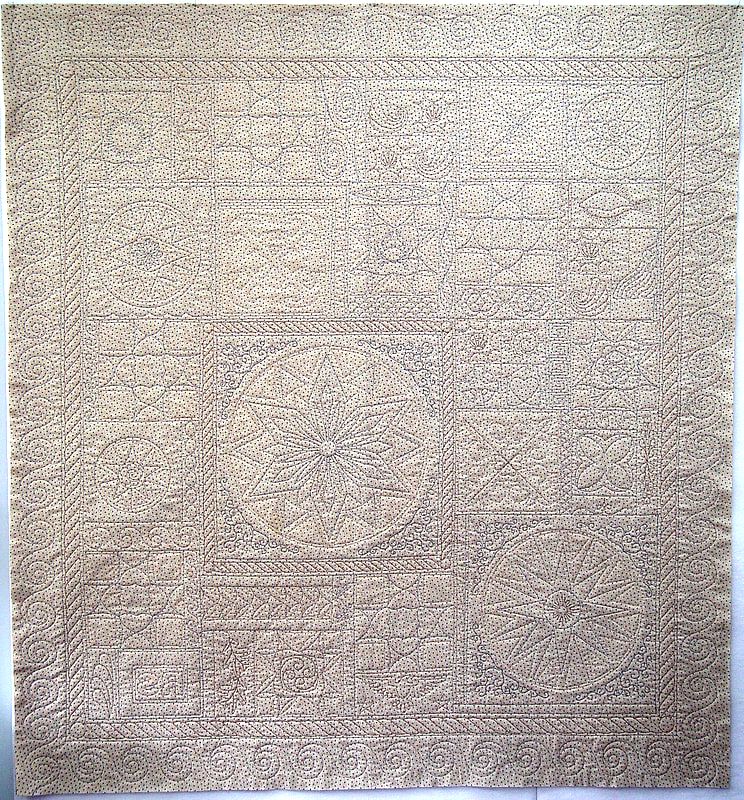
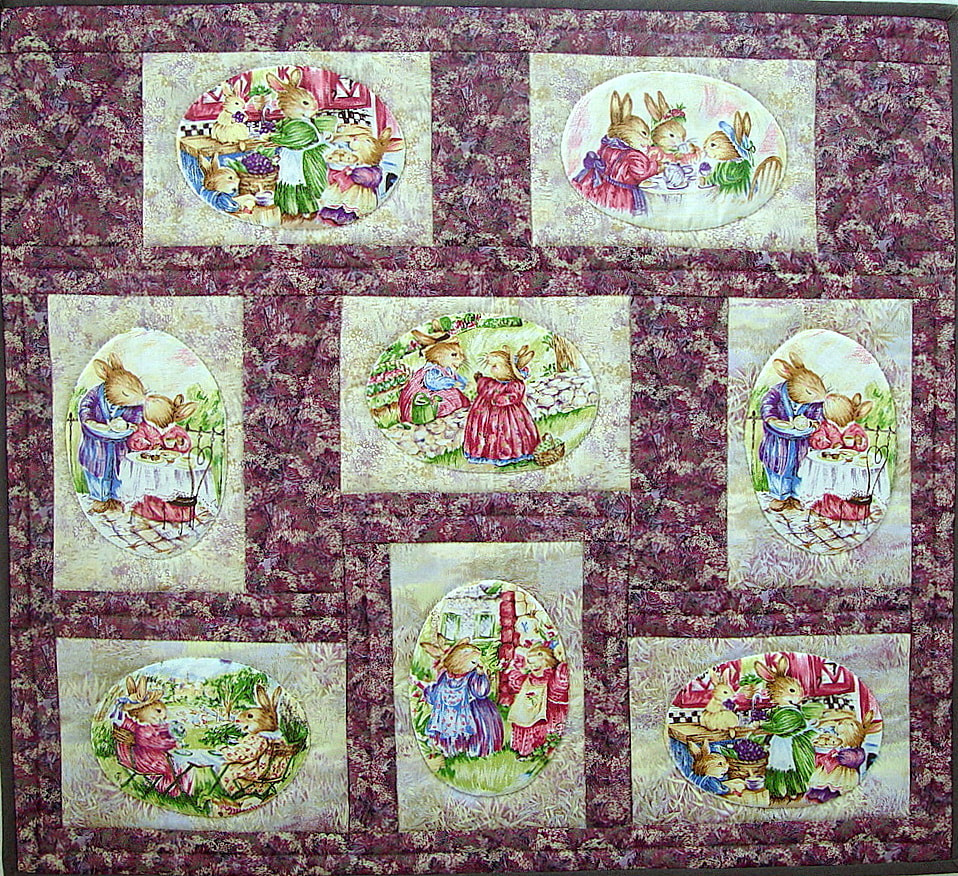
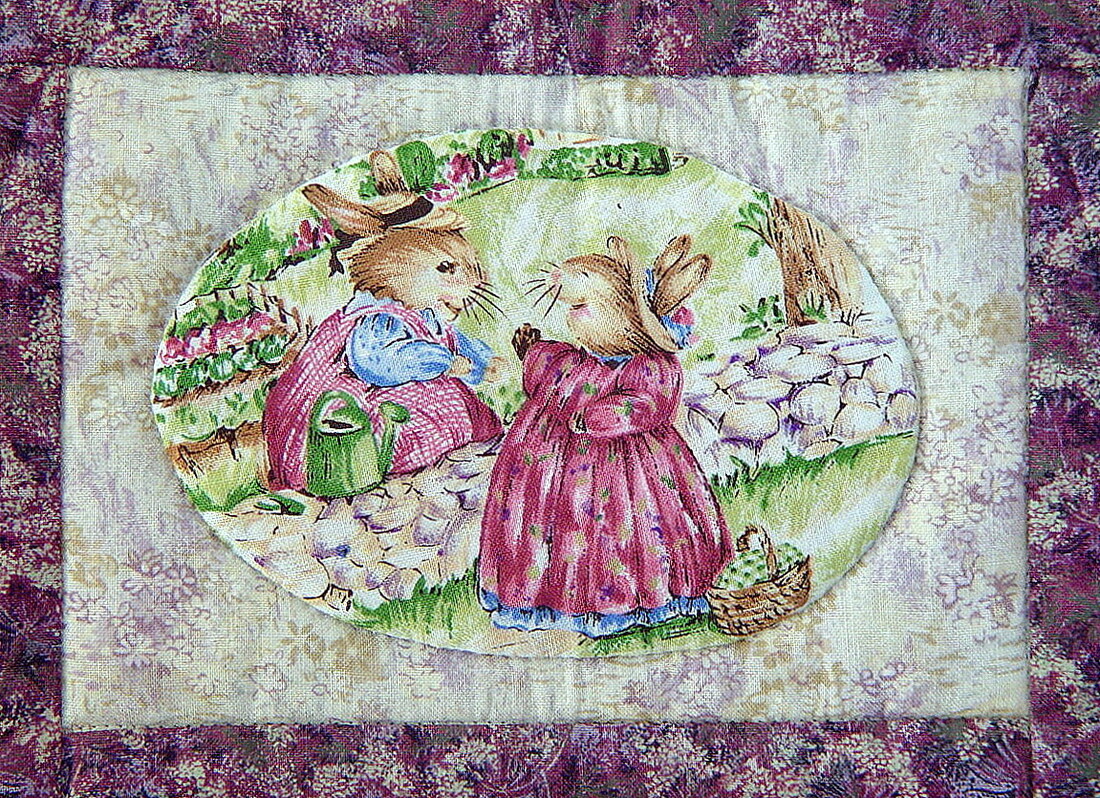
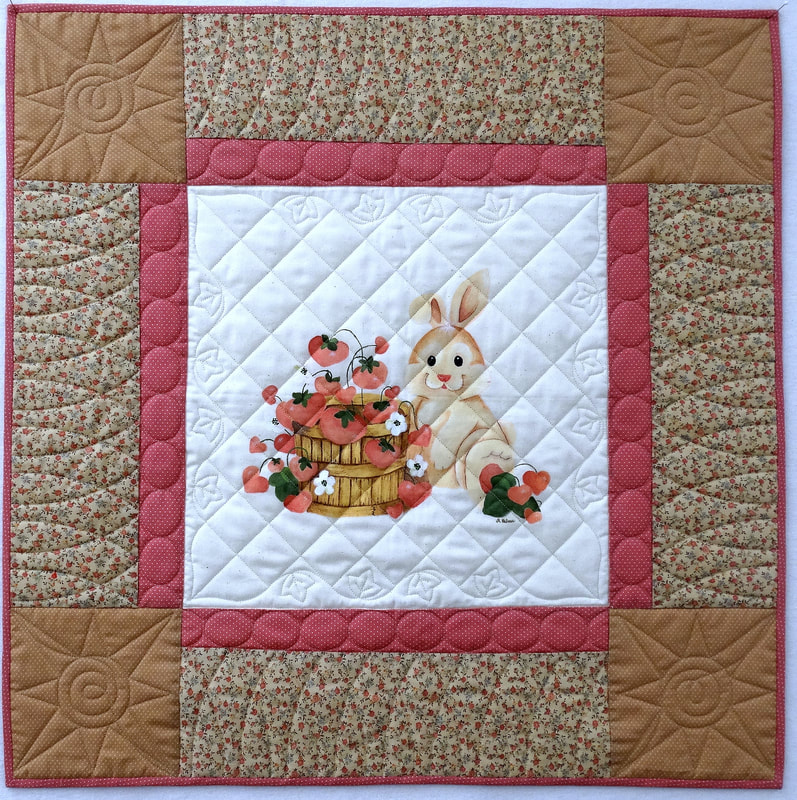
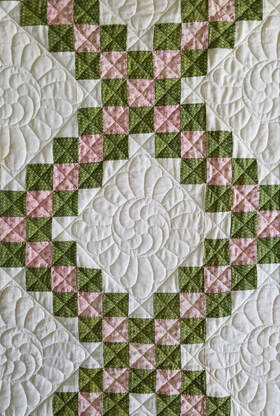
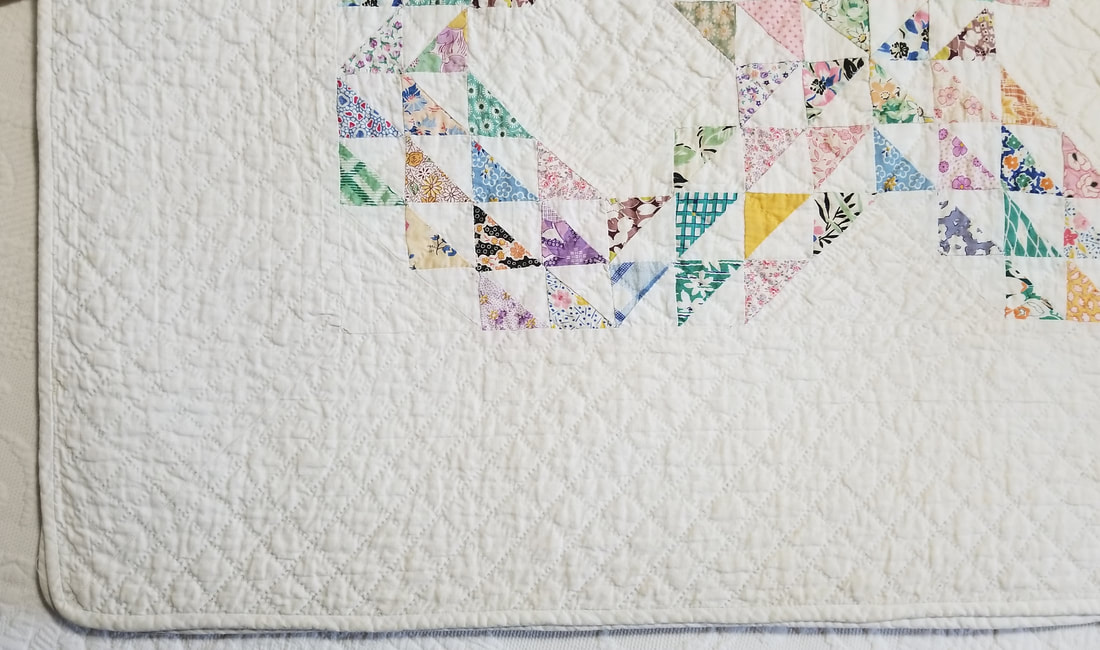
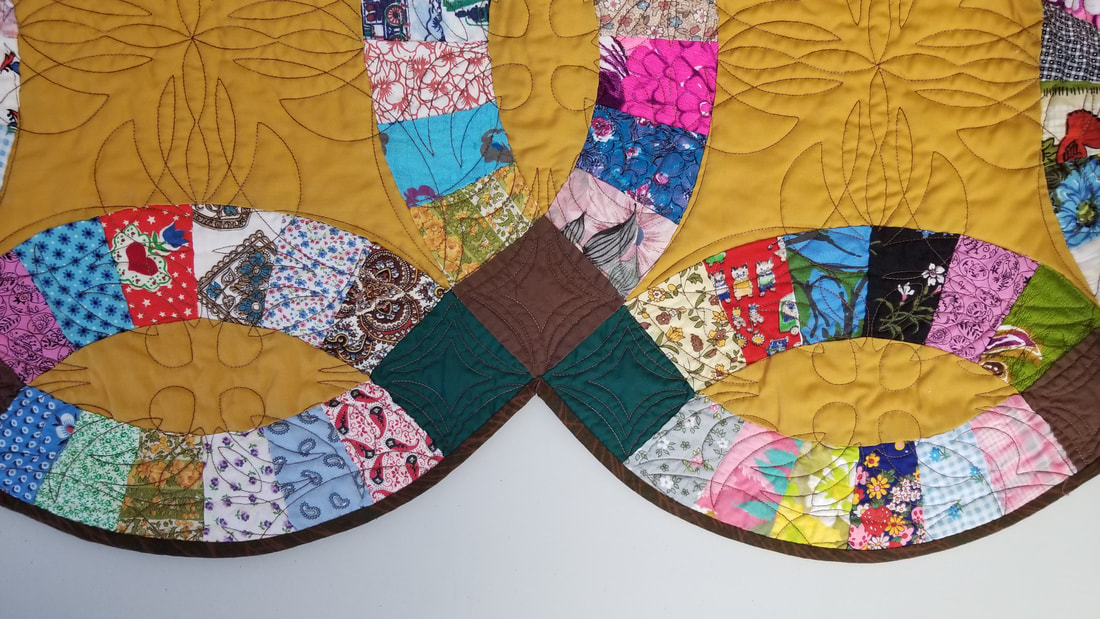
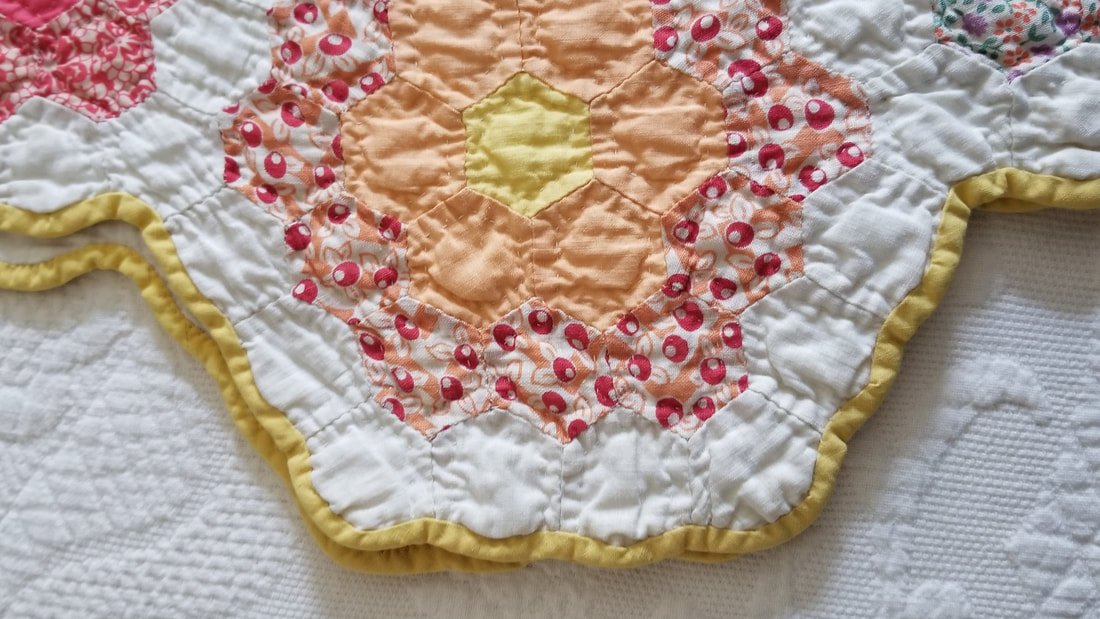
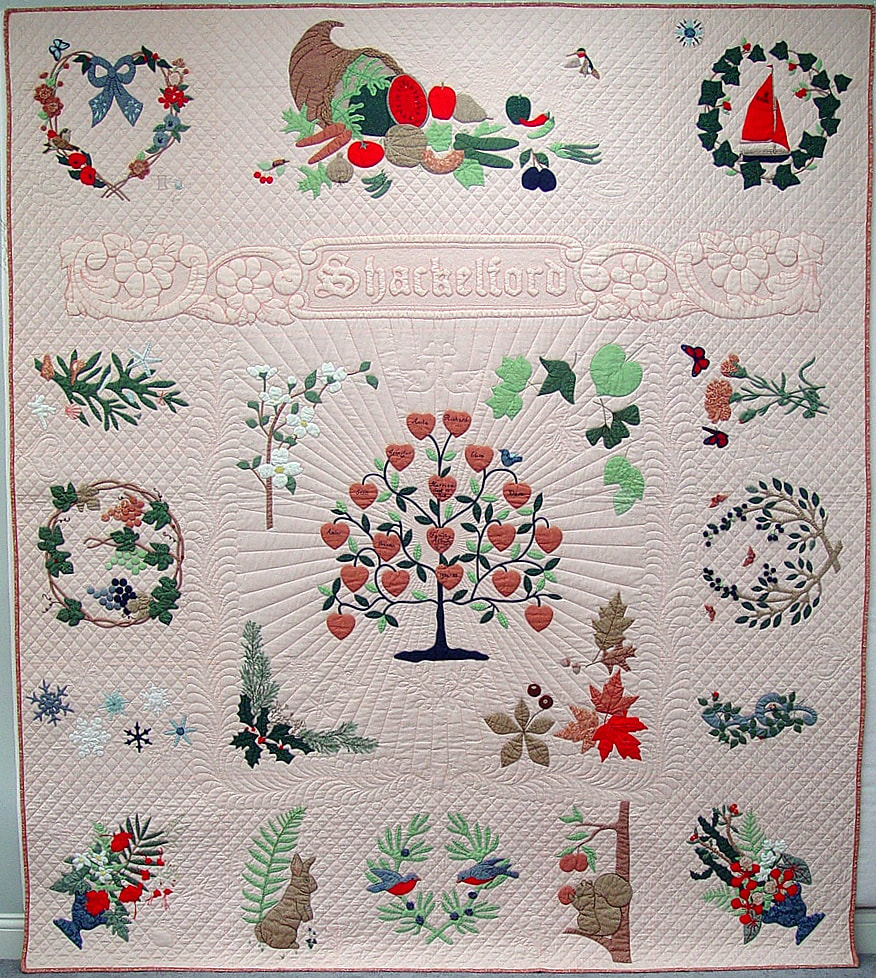
My Belle quilt is hanging in our great room right now to help celebrate Southern Belle Week.
Picture
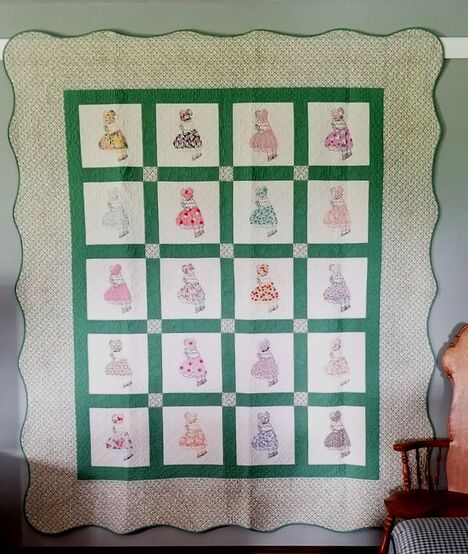
Even though I will not be at our Southern Belle conference this year, you are on my mind. Belle has always been about fun, fabric, friendship, and food, and learning how to use our Statlers! I love the friendships we've made and the family we've built and I will miss seeing you.

Since I won't be there to give you my free patterns, door prizes, etc. I'm posting a discount code here for you to use during the two weeks of Spring Belle and the week following.

All digital patterns will be -50% with the code AaB (Always a Belle) and with special attention to the pattern below.
Picture
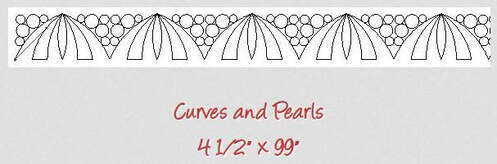
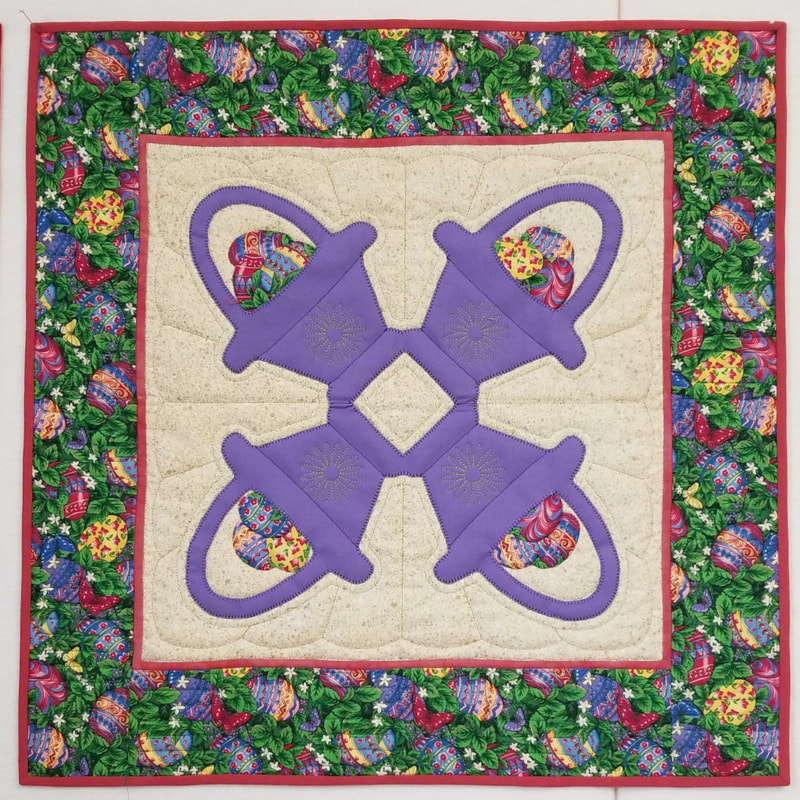
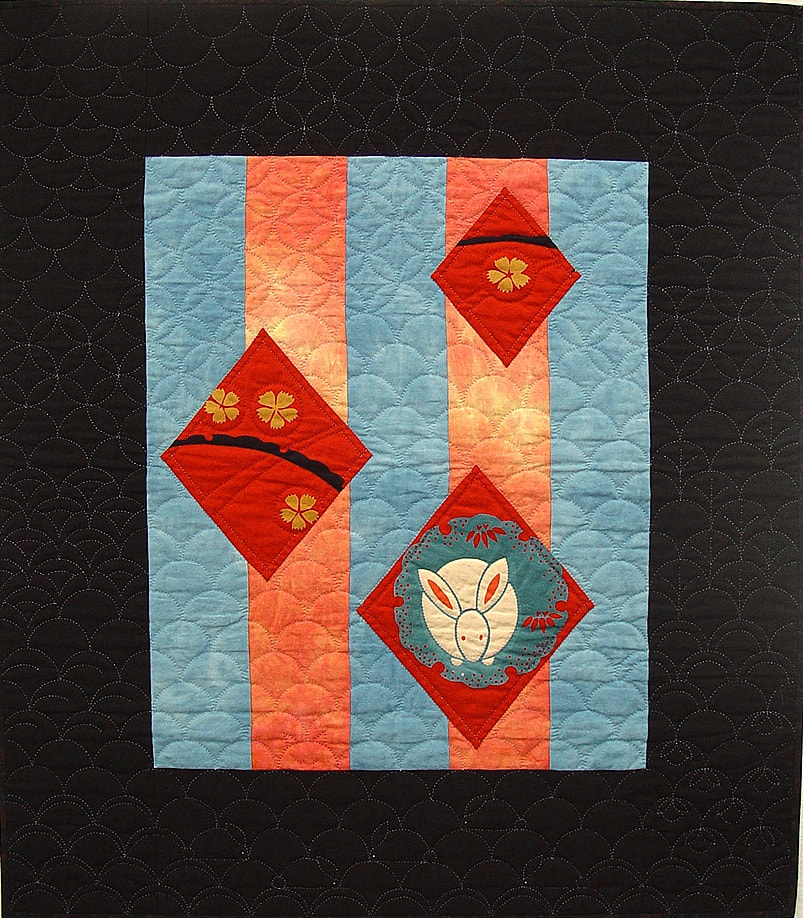
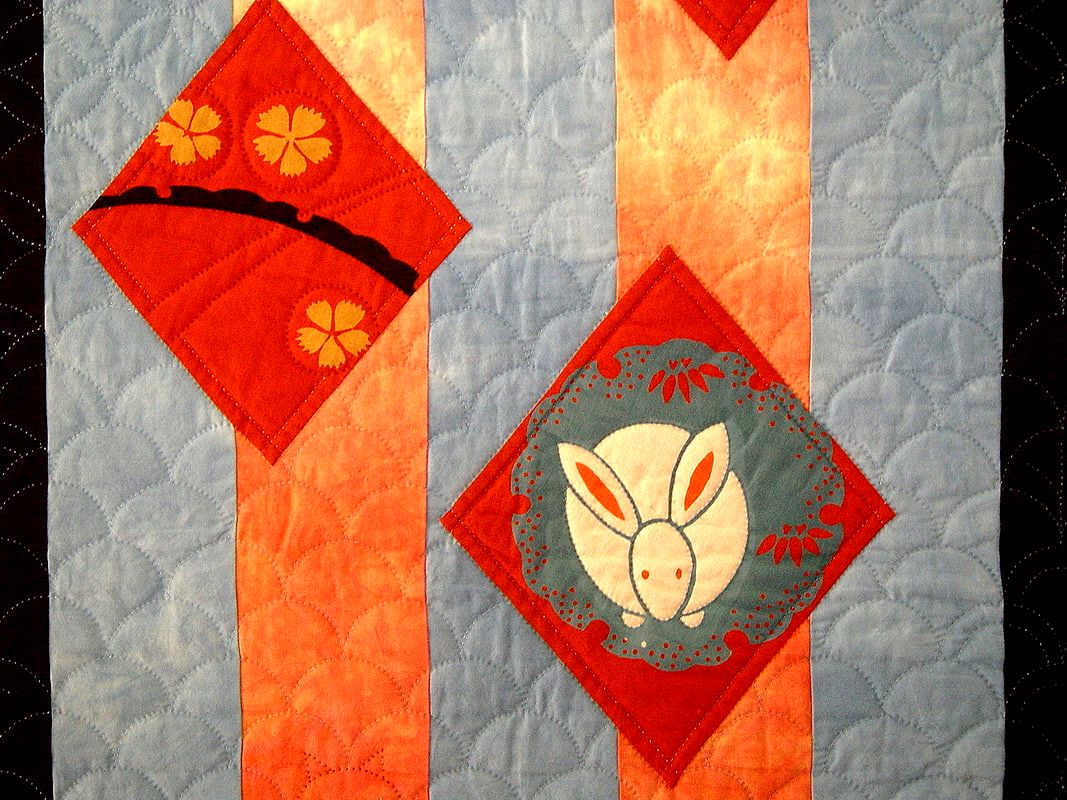
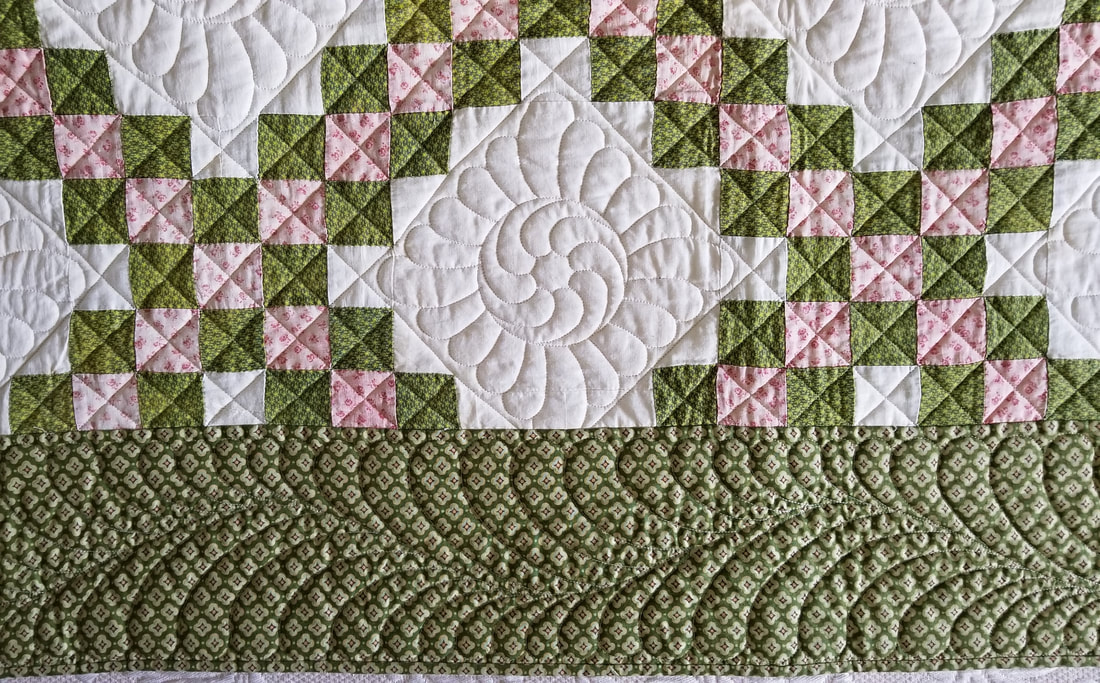
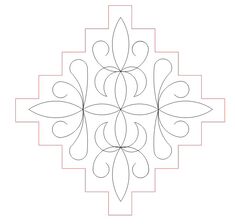
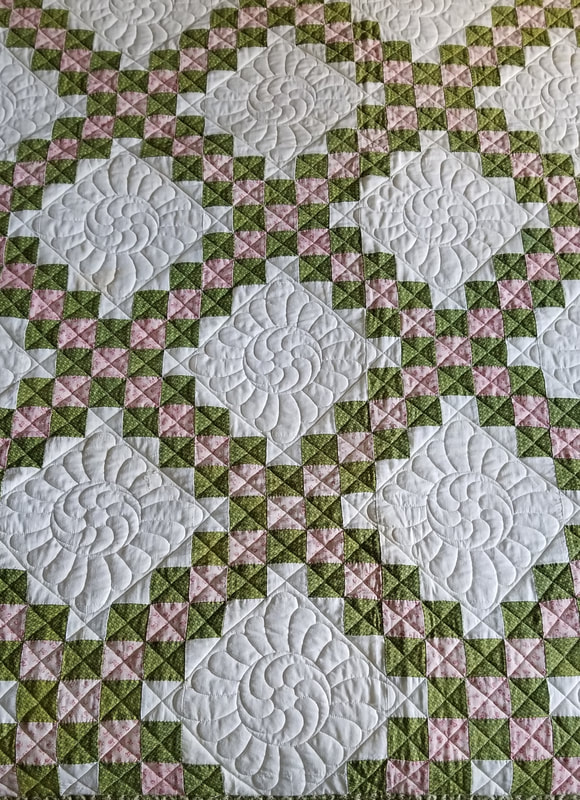
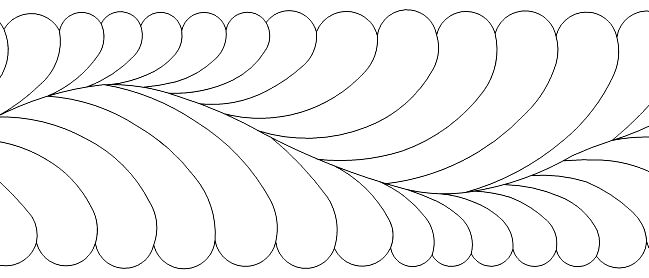
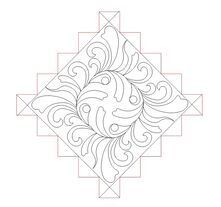
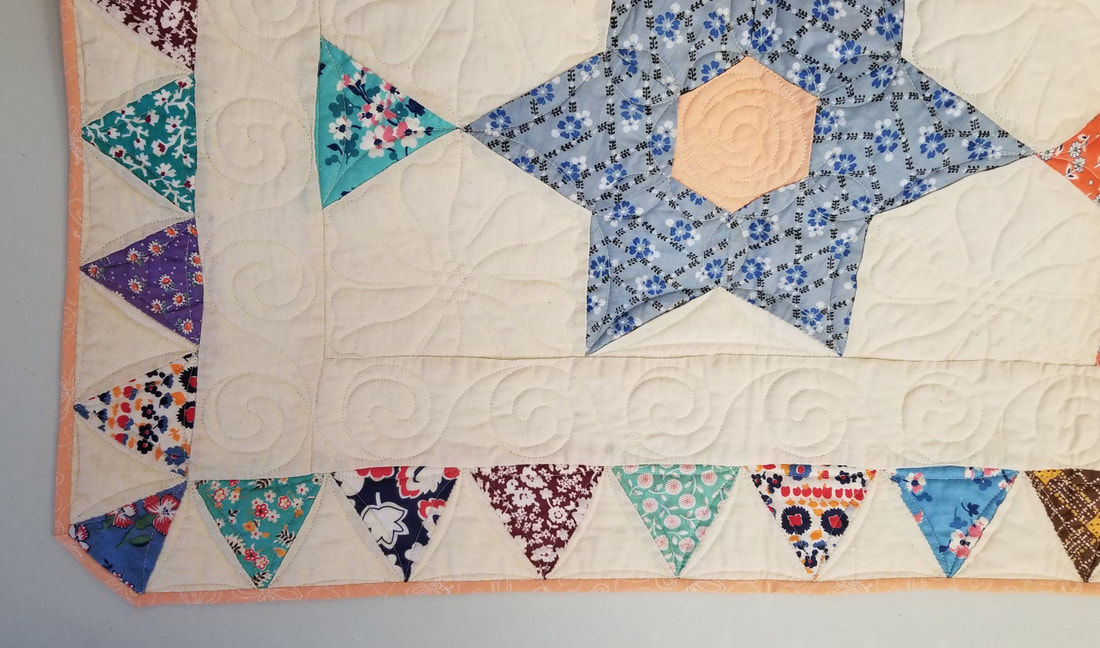
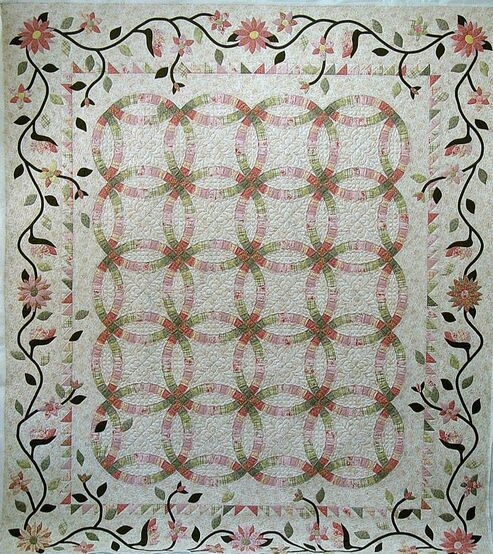
Several years ago at Belle, Corey Pearson was playing with two of my P2P patterns, plus Mirror and came up with this idea. Isn't it cute! I've made it into a full E2E pattern and will give proceeds of this pattern to Corey when the sale is over. You can find the pattern on my Short Arm Page. or in the Store. 

Sale ends August 8. Feel free to share this code with any Belles, whether they are at the conference or not.

Stay safe, have fun, learn lots, and quilt on!
​Anita

2 Comments

Judging Computerized Quilting

6/11/2021

3 Comments

 
Picture

Many longarm machines, some domestic machines, give quilters the option of quilting with a stitch regulator, if they so desire. “Wonderful, but how can we compare that to real quilting?” Some machines can also stitch a completely computer-controlled pattern. “Amazing, but is that fair?” These questions can be heard at almost every quilt show these days. As a quilter and a judge, I can easily put myself on both sides of this question.
 
I’ve been quilting by hand for more than fifty years. For me, it’s relaxing and the most beautiful work I can ever think of doing. I’ve been quilting with my sewing machine for about thirty-five years. It’s fast work, sturdy enough for grandchildren and it helps me feel I might actually be able to use up some of my stash. Over the past fifteen years, I’ve been quilting on a Gammill longarm with a Statler Stitcher. This machine seems to me to be a miracle of modern quilting.
 
Working first on the computer, I can open a quilting design and make it any size I want, limited only by the working space between the rollers. I can set a pattern to fill a block of any dimension, to follow a vertical line, a horizontal line, or rotate it to any angle or any position. The computer will repeat patterns to fill a calculated space, so that borders or pantographs come out even. I can choose from thousands of available designs or use a CAD program to create my own. And yes, it does have a stitch regulator for free-motion quilting, when I choose to work that way.
 
And so, the questions come, “Is it fair to have computer guided quilting in the same category or the same show as other quilts?” This sounds like the same argument we have answered before about hand quilting vs. machine quilting, domestic machine vs. longarm, stitch regulated or not. Instead of fair or not, the question in a judged competition should be “Is it well done or not?”
 
Computerized machines are amazing, but can they do the quilting all by themselves? I have invited several people to come and try my machine. If I say, as we stand in front of it, “Go ahead and quilt whatever you like” of course they say they don’t know how. So then, why would anyone think that using a machine of any kind will guarantee perfect results? Knowledge, practice, and experience are necessary to help every quilter improve his or her skills no matter what technique or style of quilting. And when a quilter reaches that point of perfection, that’s when the ribbons are awarded.
 
It seems surprising that I would find myself in the position of defending a computerized longarm quilting machine, when it is as far away from my traditional hand quilting roots as anything could be. But, as judges, we have to separate ourselves from our own style of work and look for the “best of the best” regardless of how it was done.
 
When judges evaluate any type of quilting, what do they look for? Even stitches, balanced tension, clean starts and stops, good design, no distortion in the quilt top or back, straight lines and/or smooth curves would be on the list. Those things can be done well with computerized quilting, or they can still be a problem. It depends on the skill and knowledge of the quilter. I am happy to see that most quiltmakers and quilt show organizers have accepted computerized quilting just as they have all other forms of work. And judges will do their job, as always, looking beyond “how” the quilt was made and concentrating on “how well” the work was done.
3 Comments

A Modern Mix -              Hand and Machine Quilting in the Same Quilt?

5/28/2021

1 Comment

 
Picture
"Island Beauty"  Anita Shackelford
Quilted by hand and with a domestic sewing machine
Picture
Picture

I remember waking up, early in the morning, to the sound of my grandmother’s wringer washing machine. It had a pounding rhythm, a churning, swishing sound that told me what she was doing. I would find her standing by the washer, watching it work. She fed the clothes by hand, through the wringer into the rinse water; then again, through the wringer, before putting them into the basket and hanging them to dry. Grandma also made her quilts by hand.
 
My mother’s generation was thrilled with the technological advances that gave them the automatic washing machine. No more hand work! She could even walk away from the machine and do something else. What a time saver. Today, we take an automatic washing machine for granted but still, there are those few things that I like to wash by hand.
 
Next came the clothes dryer, and although my mother had one for a long time, she still preferred to hang her clothes outside to dry. It was nice to have the choice, depending on the particular garment, the weather, or her energy that day.
 
My generation has had the choice of washing dishes by hand or using a dishwasher. I was slower to accept this machine, thinking that it was too much of a luxury. But I still remember the first evening that I used it. I was sitting on the front porch, when a neighbor went by and asked what I was doing. “Washing the dishes!” was my quick reply. I still wash a number of things by hand – fragile items, good knives, large sticky pots – but the majority of the work is done by machine.
 
I’ve been quilting by hand since the late 1960s. I love hand quilting; it’s a calm, relaxing process and I have finished more than 200 pieces this way. I’ve been using a sewing machine since I was a teenager, making clothing and home decorator items, but I didn’t used it on my quilts. The purchase of a new sewing machine in the mid-1990s gave me the option of quilting with a walking foot. I started experimenting with quilting in-the-ditch and simple line patterns in borders. I discovered (as many already knew) that it was a quicker way to finish a few things. Although I never took the time to learn free motion, I found that I could quilt simple flowing designs with the walking foot. I learned that some areas were quicker and easier to quilt by machine and some were still easier by hand. It made sense to use the technique that fit the situation and gave me a good finished product.
 
Our new generation is fortunate to have many different ways to quilt. Together, my daughter and I have been quilting with a longarm machine. Jennifer knows how to hand quilt and I hope she will quilt some pieces that way. But quilting by machine can help her make more quilts and also allow her to spend more time with her family. We are not choosing one technique over the other because one is better than the other. We are happy to have so many options at our disposal. The decision is not about which method is right, or better, or faster, or easier, but how to achieve the effect we want. By combining hand and machine quilting in the same piece, we can have the best of both worlds.
 
We have many options in the methods we choose to create our quilts. We can use hand piecing, machine piecing, hand appliqué, machine appliqué, hand quilting, or machine quilting. Most quilters have a favorite way of working. We like to piece by machine, now that we have new methods to make it easy and accurate. Hand piecing has also found a new audience, but often those hand-pieced blocks are set together by machine. And many of us wouldn’t hesitate to combine machine piecing with hand appliqué. We should choose the techniques that make us comfortable with the work and give us the best results. A mix of quilting techniques can serve us in the same way. There are many ways and many good reasons to combine hand and machine quilting in the same quilt.
______
If we are happy with our work the way it is now, why would we want to change, and quilt our quilts with more than one technique? Perhaps to save time. Everyone knows that machine quilting is faster than hand quilting. The needle stitches faster. Combining hand and machine quilting in the same piece can finish a quilt in a shorter time than hand quilting alone. Machine quilting alone would be even quicker, but there are many other good reasons for combining hand and machine quilting in the same quilt.
 
From a practical point of view, hand quilters might ask themselves, “How many quilts can a hand quilter finish in a lifetime?” Whatever the number, it seems it will never be enough. There is always the next great design or beautiful fabric calling to us. Working with a combination of hand and machine quilting can help us make more quilts. We can “save” our hands by putting only measured amounts of hand work into each quilt. 
 
If you have good skills in more than one technique, why not show them off in the same quilt? Just as a mixed technique quilt can show skill in both patchwork and appliqué, a combination of quilting techniques can add visual interest to a quilt and showcase your many talents.
 
Most of us make quilts for our family to use or to keep. I have made both kinds of quilts for my children and grandchildren. I want them to grow up knowing and loving quilts. The heirloom quilts are hand quilted, but I would not put that much time into a quilt for them to use everyday. It makes sense to make sturdy machine quilted quilts for children to use. But, at the same time, think about including some hand quilting for them to see. Most of us feel a strong sense of connection to the hand writing and hand work of a previous generation and we can touch future generations in the same way. As a variation on this idea, think about machine quilting the quilt and hand quilting a pillow or two to go with it. Or, hand quilt the front of a pillow and machine quilt the back.
 
Perhaps working with a friend will be the reason you choose to put hand and machine quilting into the same quilt. Working with a partner can be fun. If you each have different quilting skills, why not combine them? Think about ways to combine hand quilting and sewing machine, hand quilting and longarm, or sewing machine and longarm quilting.
 
Maybe the cost of hiring a quilter will be the deciding factor. If you do some of the quilting yourself, you will pay a fee only for the part that’s hired, whether it’s by hand or machine.
 
To get more quilting time out of your day, think about machine quilting in the daytime and hand quilting at night. This combination uses different muscles, different skills, and may double the time you can work on a quilt.
 
Perhaps you will find yourself working in a time or place without electricity. This might be a planned or an unplanned event but you can find ways to make it work for you. You may want to take your quilting with you on vacation, to an appointment, or a sporting event. With careful planning, machine quilting can be done at home and the hand quilted areas can be saved for times when you are away. Quilting can even be done through power outages – as long as we have enough light to see, stitching can be done by hand.
 
Once you begin to think about reasons to combine quilting techniques, chances are you will find many more combinations and good ways to use them. Let's be open to all of the possibilities and get those quilts quilted! 

Picture
Read more about combining quilting techniques in my Modern Mix book.
1 Comment

The Accidental Machine Quilter

5/14/2021

1 Comment

 
Picture
Hand quilting and free motion machine quilting in the same quilt.

Sometimes when I begin a lecture I ask how many people in the audience quilt by hand, how many quilt with their sewing machine, how many use a longarm, and how many are computerized? Surprisingly, I can answer “yes” to all of those.
 
I’ve been sewing by machine since I was 14, making my own clothes and home dec items. I have been making quilts by hand since 1967 and I never thought those two kinds of sewing would ever cross paths. In the 1980s, I bought a Bernina and at first I was somewhat of a “closet” machine quilter - hoping no one would notice if I put a line of machine quilting in the ditch to save a little time in an otherwise hand quilted quilt. But, I love my Bernina, and I soon began to use it more and more, adding swags and cables, stars and fancy work to both large and small quilts.
 
I never intended to own a longarm. For years, people have shown me longarm machines at quilt shows. I always smiled politely while I watched, but I wasn’t really interested. And I knew that a big machine like that wouldn’t fit anywhere in my house.
 
Then a few years ago a man named Todd Brown wrote to ask permission to digitize my Infinite Feather designs for use on a Statler Stitcher. This was a man I had never met, asking me to get involved in something I’d never heard of. Surprisingly, the letter didn’t go directly into the spam folder; I was intrigued by the possibility that quilting designs could be digitized. My daughter, Elisa, does commercial machine embroidery with digitized patterns, so I had some idea what that might mean. I was not going to buy a machine, of course; just intrigued by the idea of offering a few patterns. And what could be bad about offering my feather designs to a new group of quilters? The request came near the end of the year and we were busy with Christmas preparations and the anticipation of finishing and moving into a new house, so I put it off for a while. I would think about it after the new year, when my life settled down.
 
You know, things never settle down. In the spring, I found myself deep into my workshop commitments and trying to cope with crutches and a broken foot. I asked my daughter Jen to travel with me to manage all the suitcases and teaching supplies for a weekend retreat and then we planned to go on to the MQS show. I thought I should meet this man face to face before I decided to sign a contract. The trip would also give us a chance to see what was happening in the world of longarm quilting. And, as they say, one thing led to another...
 
We met Todd Brown, Kim Diamond, and Paul Statler and we saw the Statler Stitcher in action. I have to say, I was amazed at what it could do and excited about making my patterns available in this format. It was a good idea. Todd and I agreed to work together and I had done what I came to do.
 
By the second day, Jen and I were already planning what we could do with a machine like that. We could go into business quilting together, or Jen could quilt for others and I could just play with the machine and quilt a little for myself. The hook was set. I went home just babbling about this incredible machine and how much fun it would be…..
 
I should mention I have the perfect quilter’s husband. He not only understands and enjoys this art, he also helps in so many different aspects of my business. He is my webmaster, bookkeeper, shipping department, etc. etc. I convinced him that his part in this new adventure could be to take a class on digitizing with me. After all, he was the computer expert in the house and I thought I would need him to explain it all to me when we got home. But, after a short time, I was digitizing patterns for my own use and for sale and teaching Autosketch classes to others.
 
I’m not sure if it was coincidence or karma, but our new house had a perfect spot in the basement, just waiting for something BIG to arrive. Jen and I quilted two quilts the first day the machine was delivered, and at the same time we could see what a huge learning curve was ahead of us. We spent the early weeks quilting for ourselves, taking baby steps, and learning the Precision Stitch software, but there were several moments that made me take huge leaps and forced me to do something new.
 
I was teaching at a show in Washington state and was told after I arrived that one evening would include a dinner and auction for local breast cancer charities. I wasn’t aware of the auction ahead of time, but on the spur of the moment, I felt like I should offer something. After all, I had had my machine for 2 months; certainly I could do something! When I offered to donate my quilting services, I said “Please say I’m a beginner.” Instead the auctioneer said, “We’ve just had a fabulous offer!” and included other words, such as “famous, award winning quilter”, and “I’m sure she’ll fill it with feathers...” I was terrified when the bid went to $600! In talking with the winning bidder, I again reminded her I was new to the longarm. She sent a sweet little nine patch quilt and I did fill it with feathers. It was the first quilt I quilted for someone else.
 
Another early request was to quilt a Coxcomb wall quilt, made from my Coxcomb Variations book. The woman needed to have it finished in a couple of weeks to take to a friend in France. No pressure there, right? I hadn’t quilted anything appliquéd and didn’t have much in the way of free motion skills, so I convinced my husband we needed to digitize designs to fit those spaces. It was an interesting adventure and we polished up our digitizing skills in a hurry.
 
Also, in those early months, a second donation of quilting services brought a request to design and quilt a wholecloth quilt. A publishing deadline resulted in the need to do free motion quilting to fill the background of a full size sunflower and basket quilt. And a large, random sampler I made for my husband was my training piece for stitch-in-the-ditch. Each of these circumstances pushed me far beyond what I thought I could do and I learned so much more than I would have if I’d stayed in my comfort zone.
 
My quilting now includes quilts for myself and my family, workshop samples, and custom quilting for others. I always make time for a little pro bono work and have quilted for organizations such as the Alzheimer’s Art Quilt Initiative, National Quilting Association Grants and Scholarships, the National Quilt Museum in Paducah, North American Mennonite Relief Sale, and Quilts Of Valor.
 
I suppose most quilters make a more gradual transition, but for me it seems to have been a big leap from traditional hand quilting all the way to computerized longarm work. People have been worried that I won’t continue to quilt by hand, but I love hand work and can’t imagine ever giving it up. I guess I’ll be something of a hybrid quilter, using whichever technique seems right for the quilt – hand, domestic sewing machine, free mothion, or computerized – and frequently I mix them all together in the same quilt. My philosophy is that the technique we use to quilt things is not nearly so important as the fact that we DO get them quilted. It’s all good.

 
Picture
Picture
"Ready to Sail" was one of my first custom quilts
1 Comment

Bunny Quilts

4/3/2021

0 Comments

 
I've put together a collection of bunny quilts I've made over the years, to share with you on this Easter weekend.
The cutwork quilts are part of my on-going Block of the Month class, and the Picture This! is another class now included for my Journal subscribers.
Enjoy the photos and Happy Easter!
Anita
Picture
Bunnies and Baskets is a Cutwork Applique project.
​The pattern is available here:
Picture
Easter Baskets is my Block of the Month May Baskets, filled with pretty eggs.

Picture
Picture
Rabbits in my Garden is a Picture This! quilt, with a slightly non-traditional block and sashing set.

Picture
Picture
Beware the Fox! is a Picture This! quilt, made with a small piece of Japanese yukata and sashiko quilting.

Picture
This bunny quilt was painted by my Uncle Ray Palmer. I quilted it with my Ivy Grid and Frame, my Olive and Leaf Border, and P2P Sun blocks in the corners.
0 Comments

Irish Chain Quilts

3/24/2021

0 Comments

 
Picture

Before March is over, I thought I'd take a minute and talk about patterns for an Irish Chain quilt. People often are in search of a pattern designed to fit inside the blank square, with all of it's pointy edges. The patterns shown below, are drawn to fit that way.

Picture
Jen's Irish Chain is a typical block with pattern extending into all of the little corners.
Picture
The Irish Chain Fill block extends into the corners and has an open center to accommodate blocks with applique or embroidery in the center.

But when I quilted the quilt shown here, I wanted to use more traditional feathers. By quilting straight lines through the chain and another line into the white areas, I changed the open space from pointy to a simple square and my Square Feather block fit perfectly. And since my Amish Feather Border matches it, I only had to make two design decisions for the whole quilt. Using a block and a border from the same set is a Quick Custom idea and I'm very happy with the traditional look of this quilt.
Picture
Picture

Here are the patterns I used in this quilt.
Picture
Infinite Feathers
​Large Square Feather
Picture
Infinite Feathers Amish Feather Border and Corner

These two would work as well.
Picture
Leaf and Feather Set
large block
Picture
Leaf and Feather Border

I hope you'll keep this idea in mind for when an Irish Chain quilt top comes your way.
​Anita

0 Comments

20th Century Bindings

3/19/2021

0 Comments

 
Moving into the 20th century, we can find quilt bindings that are the same as in earlier times and some that are different.

Shaped edges were popular on Double Wedding Ring and Grandmother's Flower Garden quilts. Other quilts were shaped simply as a design statement.

Most bindings I've seen from this period were finished by hand, but machine stitching can also be seen on some.

In 1987, I finished an Amish style quilt with a faced edge, wrapped around to create a border on the front. I don't remember now why I did it that way, and I'm pretty sure I had never seen the technique, but it worked well for me. As I was looking through quilts to photograph for this blog, I was surprised to see this same finish on an early quilt in my collection.

You will also see a rescue quilt that I set together in the 1990s. I was sure I saved fabric for binding, but... I didn't want to add a different fabric to it, so I added a narrow facing strip and turned it to the back.

And finally, there is a photo of a wide blanket style edge finish. Again, I don't know why I did it, but it did give me the opportunity to repeat all of the fabrics used in the body of the quilt, so that worked ok, from a design standpoint. 

So many ways to finish our quilts and Hurray! when they are actually finished :)


Straight Edges

Picture
Simple straight edge, straight grain binding, square corners, finished by hand.
Picture
1930s Ocean Waves with straight edges, bias binding, slightly rounded corners, finished by hand.
Picture
1930s Rescue quilt, straight edge, bias binding, mitered corners, finished by hand.
Picture
1920s sateen applique, with straight edges, intentionally rounded corners, bias binding, finished by hand.

Shaped Edges

Picture
1930s Double Wedding Ring with curved edges, bias binding, applied by machine.
Picture
Rescue 1970s DWR quilt with curved edges, bias binding, finished by hand.
Picture
1930s Grandmother's Flower Garden with shaped hexagon edge, bias binding, finished by hand.
Picture
1929 pieced quilt with deeply curved edges, bias binding, finished by hand.
Picture
1930s Rescue GFG quilt with shaped hexagon edge, bias binding, finished by hand.
Picture
1930s Rescue quilt with new border, curved edges, bias binding, finished by hand.
Picture
1930s Texas Star Rescue quilt with a pieced border, bias binding, shaped and mitered corners, finished by hand.

Faced Edges

Picture
Picture
Applique quilt with wide facing strips, turned to the front to create a border with mitered corners, finished by hand on the front.
1987 Amish style quilt with a wide facing strip, turned to the front to create a border with square corners, finished by hand on the front.
Picture
1940s Rescue quilt with a new border, bias facing strip, turned to the back, finished by hand.

Blanket Edge

Picture
1988 wall quilt with a wide pieced strip, stitched to the front, turned to the back with equal amounts showing, finished by hand on the back.
0 Comments

19th Century Bindings

3/16/2021

3 Comments

 
A question arose this morning about how vintage quilts were bound. I decided to photograph and share some of my earliest quilts here. I think you might be surprised at the variety of ways quilt edges were finished. Clearly, there was no one right answer. I'm sure they vary somewhat by date, region, family influence, skill and preference of the maker. I hope you enjoy seeing them. I'll take a look at 20th century quilts another time.
Picture
c1840 Chintz. 1/8" binding rolled back to front.
Picture
Early Trapunto quilt.  Knife edge with cording.
Picture
Red and green applique with straight grain binding and rounded corners
Picture
Turn of the century with bias binding and rounded corners
Picture
Mid 1800s Applied straight grain binding, square corners
Picture
Mid century red and green Knife edge and quilted twice
Picture
Red and green pieced with straight grain binding and rounded corners

Picture
Late 19th century with bias binding and mitered corners
Picture
Early 20th century with a straight grain applied facing, turned to the back.
Picture
Late 19th century with bias binding, mitered corners, applied by machine.
3 Comments

How Long Did That Take?

3/13/2021

3 Comments

 
I found myself reflecting on the most common question quilters are asked about their work whenever it is shown - “How long did that take?” I rarely keep track of the number of hours that go into the making of a quilt. Watching the clock and keeping tabs on my quilting makes it seem like work. Even though I make my living with my quiltmaking and teaching, I want the quilting time to be relaxing and enjoyable. But still, the question continues.
 
It would be simple, perhaps, to answer in “calendar time.” I made it in a week, or it took six months, or I worked on it for years. But with several quilts in progress all of the time and pieces overlapping (or “resting”), this is not a very accurate measure of the work involved.
 
Years ago, in an effort to answer this question and to make the point to a group of non-quilters, I used this analogy: “I quilt an average of ten stitches to the inch and I used a little over two and a half spools of thread in this quilt. There are 250 yards of thread on a spool so that would be about 700 yards of thread in this quilt. If you want to consider how long that would take....imagine quilting ten stitches every inch, along the full length of a football field, seven times.”
 
Or.......Even more interesting and perhaps more obsessive.......how many stitches are in the quilt? Again beginning with the figure of ten stitches to the inch and considering a few inches lost in knot and tails, a reasonable figure would be ten times 30 inches or 300 stitches made from each yard of thread. I know that I put between two and five spools of thread into my large quilts; let’s take an average of three spools, times 250 yards or 750 yards of thread. Multiplying the 750 yards times 300 stitches per yard will give us the grand total of 225,000 stitches per quilt. Nearly a quarter million!
 
Multiply that times the number of quilts that have been made by you, by your friends, by quilters around the world....The answers will be staggering!
 
I’ve heard it suggested that the time it takes to finish a quilt should be measured from the time one first learned how to quilt. Every quilt teaches us something, develops a new skill, a fresh approach, a better appreciation for this art we love. And this new quilt is the culmination of all that we know right now.
 
How long did it take? Any way you measure it, it’s long, it’s wonderful and it’s worth it.
Picture
Although I wrote this piece for QNM many years ago; this is the quilt that inspired it.
The Shackelford Family Album Quilt
1989
Original design, hand appliqued, and hand quilted
3 Comments

Invest in Yourself

3/12/2021

0 Comments

 
Picture
It seems the first comment we hear about longarm custom quilting is always “you can’t make a living doing custom work” and that may be true. Most longarm quilters are quilting to make a living or to add something to the family income. In the short view, it doesn’t make sense to spend a week on one quilt, instead of finishing one or more every day.
 
Unless, we want to consider a challenging quilt an investment in skill building. Most quilters feel challenged by the opportunity to do some custom quilting and hopefully more confident about it when it is finished. My earliest custom quilts included a lot of stitch in the ditch, and I felt more comfortable with it after each one. I think the same holds true for each new skill we try. I can't say “practice makes perfect” but time spent does improve the process and hopefully each time is faster/easier/better.
 
Even if the dollar per hour appears to be a loss, I’m going to challenge you to invest the time. Perhaps once a month, take on a new challenge. Make yourself learn how to do something new.
 
In the end, you’ll gain confidence, not only in using a new skill, but the reputation for a new level of work, and finally, the confidence to charge what that new skill is worth.
Picture
0 Comments
<<Previous

    Author

    Anita has a long background rooted in traditional handwork and quiltmaking, which she still enjoys.

    Often, these days, you'll find her digitizing patterns for the Statler Stitcher and other computerized longarm quilting machines. 
     
    Her summer days are spent in the garden and she loves finding new ways to prepare good veggie-based meals.


    She's always in search of a way to balance all of those activities and find time to share with others who are passionate about the same things.

    This page is a sneak peek into what's happening in her world right now.

    Archives

    July 2021
    June 2021
    May 2021
    April 2021
    March 2021
    February 2021
    January 2021
    December 2020

    Categories

    All
    Binding
    Christmas
    Country Living
    Handmade
    Kitchen Garden
    Landscape
    Meatless Monday
    Pottery
    Quilting
    Quilt Rescue

    RSS Feed