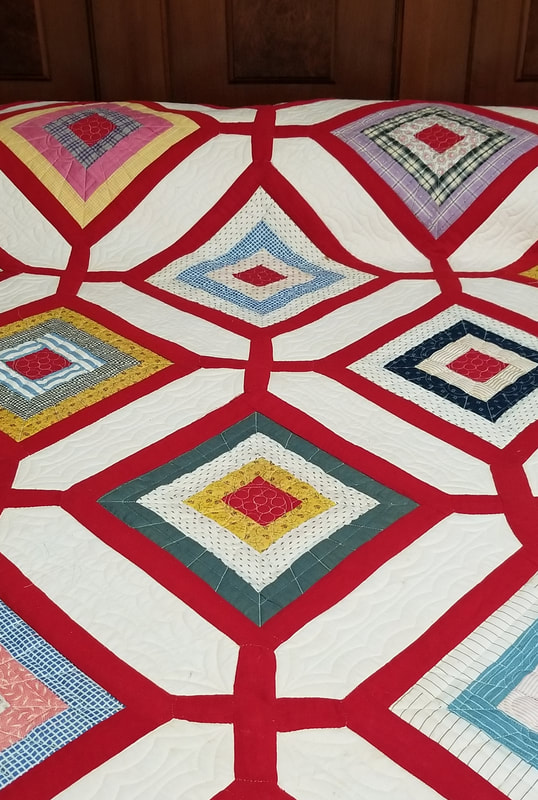
Quilt Rescue
Collecting Antique Quilts
Collecting antique quilts has been a long-time passion of mine. I didn’t grow up with quilts in the house, but from an early age, I was attracted to them. I fell in love with their softness and their color and pattern. I continue to be charmed by the stories connected to antique quilts and their makers. I enjoy my small sampling of nineteenth century quilts and am always looking for that next wonderful piece to add to my collection.
There are many good reasons to consider collecting antique quilts. For years, people have known the comfort and beauty of displaying quilts in their home. Simple scrappy quilts can add charm to an antique or country-style decorating scheme. For others, quilts are a trendy decorator item, displayed on the wall as any other piece of fine art would be. Antique quilts come in a great variety of patterns and colors; with a little searching, you should be able to find one to suit your style.
Quilts also have value beyond simple decoration. Quilting instructors often have a collection of antique quilts for their own study and for examples to be used in the teaching of others. The patterns and techniques used in the last century can often inspire new work being done today. Collectors and dealers buy quilts for the investment potential that they hold. I have used this rationale a few times during the purchase of a more expensive piece, but my husband reminds me that it is only an investment if you sell it again.
A good place to begin looking for quilts may be right at home. Many people find that quilt collections begin quite innocently with quilts given to them by family or friends. Perhaps your relatives have quilts that have come down through the family. Has someone expressed an interest in caring for these pieces? Volunteer to document their history, have them appraised and store them in a safe place. Let friends know that you are interested. As surprising as it may seem, many people are not interested in old quilts and quite often they are willing to give them to someone who will care for them and enjoy them.
Some people begin a collection by acquiring quilts as they come along, with no particular plan. Garage sales, flea markets and auctions are sometimes a good source for finding old quilts. If you have the time to spend, and are interested in a variety of styles, you may begin or add to a collection in this way.
If you are a more serious collector, your quilts may have a specific focus; perhaps you are in love with red and green applique, scrappy turn of the century darks, or the light and airy look of the 1930's pastels. Antique dealers, especially those dealing in antique quilts, can be the best source of quilts for those collectors interested in specific styles. The price will be higher, but you may be able to find just what you want.
Prices for antique quilts have risen and fallen over the years. How can you begin collecting and be able to afford the quilts that you want? Study the market so that you know what you are looking at. Condition is probably the most important factor in determining the value of a quilt. Quilt appraisers figure the monetary value of a quilt based on its condition and known history. Good advice is to buy the best that you can afford. For many collectors, sentiment can also play a big part in the importance of a quilt. Buy what you like. As your collection grows you may decide to skip the purchase of several of lesser price in order to buy a more expensive one. Another idea is to trade up; sell off several of the less valuable pieces and use the money to purchase that really special piece.
If you are interested in collecting quilts, the first step is to start looking. Whatever your interests, you will be able to find quilts that will fit your budget, fill your needs and satisfy your soul.
Restore, Rescue, Restyle
How many thousands of antique quilt tops are out there, waiting to be finished? And how many more are we adding to that pile every day? One of the biggest questions might be…should we try to catch up on the backlog from previous quiltmakers or just try to keep up with our own?
There are several good arguments in favor of finishing antique tops:
~ Quilting will make the quilt top stronger
~ A finished quilt will be enjoyed, while an unfinished top is usually hidden away
~ Our grandmothers meant for them to be finished
And you will probably hear arguments against doing it:
~Antique tops should not be quilted if the quilt top is historically significant or of museum quality, a rare sample of a style or technique, or if the fabrics are so fragile that they won’t hold up to quilting. If you are unsure about the value of the antique top you own, contact an expert in your area.
~ The top will lose its antique status. Appraisers will tell you that a recently completed quilt must be documented with its finish date.
And, trust me, there are problems:
Many tops were not finished for a good reason. Some of the problems I’ve encountered over the years include:
` An unfinished top that seems like it would look better with a border. Can/should we work in period style? Is there vintage fabric available or can we find a good reproduction piece?
~ Single blocks or parts of a quilt may need to be set together. Sometimes parts are included, sometimes pieces must be added. Again are there vintage fabrics available or will you look for new?
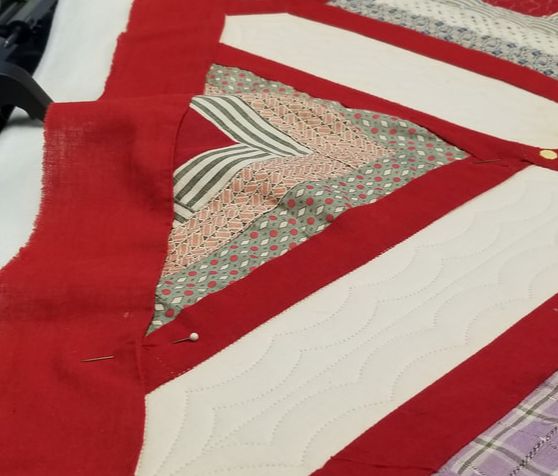
~ Quite often there are damaged areas that will need repair or restoration. Many old tops are poorly pieced. How much will you correct before trying to quilt?
Undoing, straightening, squaring up. If you start, when do you stop? Possible situations here include:
~ Restitching open seams
~ Replacing small pieces that have been damaged. Again, look for period fabrics, if possible, or carefully selected reproductions
~ Trimming blocks to the same size
~ Re-fitting borders that are too long/wavy
Some antique tops are just not visually pleasing. Can/should we remake them? How much should we do and how much time will it take?
Problems I’ve seen include:
~ Too much background or negative space behind applique or embroidery
~ Sashing not in scale with the blocks
~ Setting fabrics that distract from the main blocks
And so, it becomes a balance between the workmanship and the design element of the original piece and what I think it needs. After many years of Quilt Rescue work, I’m sure it’s the challenge I enjoy the most; making the quilt into what it was meant to be.
There are several good arguments in favor of finishing antique tops:
~ Quilting will make the quilt top stronger
~ A finished quilt will be enjoyed, while an unfinished top is usually hidden away
~ Our grandmothers meant for them to be finished
And you will probably hear arguments against doing it:
~Antique tops should not be quilted if the quilt top is historically significant or of museum quality, a rare sample of a style or technique, or if the fabrics are so fragile that they won’t hold up to quilting. If you are unsure about the value of the antique top you own, contact an expert in your area.
~ The top will lose its antique status. Appraisers will tell you that a recently completed quilt must be documented with its finish date.
And, trust me, there are problems:
Many tops were not finished for a good reason. Some of the problems I’ve encountered over the years include:
` An unfinished top that seems like it would look better with a border. Can/should we work in period style? Is there vintage fabric available or can we find a good reproduction piece?
~ Single blocks or parts of a quilt may need to be set together. Sometimes parts are included, sometimes pieces must be added. Again are there vintage fabrics available or will you look for new?
~ Quite often there are damaged areas that will need repair or restoration. Many old tops are poorly pieced. How much will you correct before trying to quilt?
Undoing, straightening, squaring up. If you start, when do you stop? Possible situations here include:
~ Restitching open seams
~ Replacing small pieces that have been damaged. Again, look for period fabrics, if possible, or carefully selected reproductions
~ Trimming blocks to the same size
~ Re-fitting borders that are too long/wavy
Some antique tops are just not visually pleasing. Can/should we remake them? How much should we do and how much time will it take?
Problems I’ve seen include:
~ Too much background or negative space behind applique or embroidery
~ Sashing not in scale with the blocks
~ Setting fabrics that distract from the main blocks
And so, it becomes a balance between the workmanship and the design element of the original piece and what I think it needs. After many years of Quilt Rescue work, I’m sure it’s the challenge I enjoy the most; making the quilt into what it was meant to be.
Scroll down and read from the bottom to the top, to see my earliest work first.
email me at [email protected]
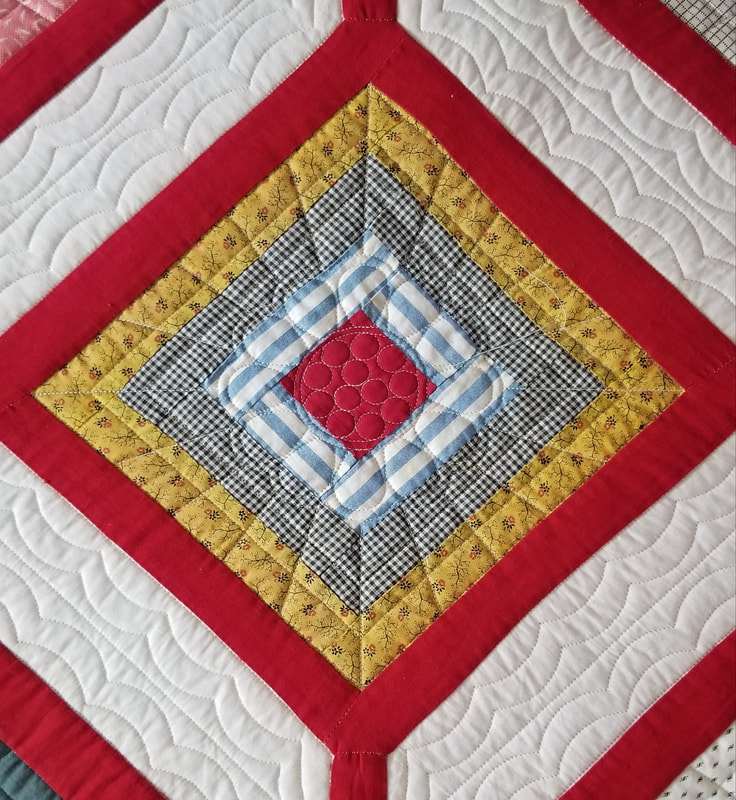
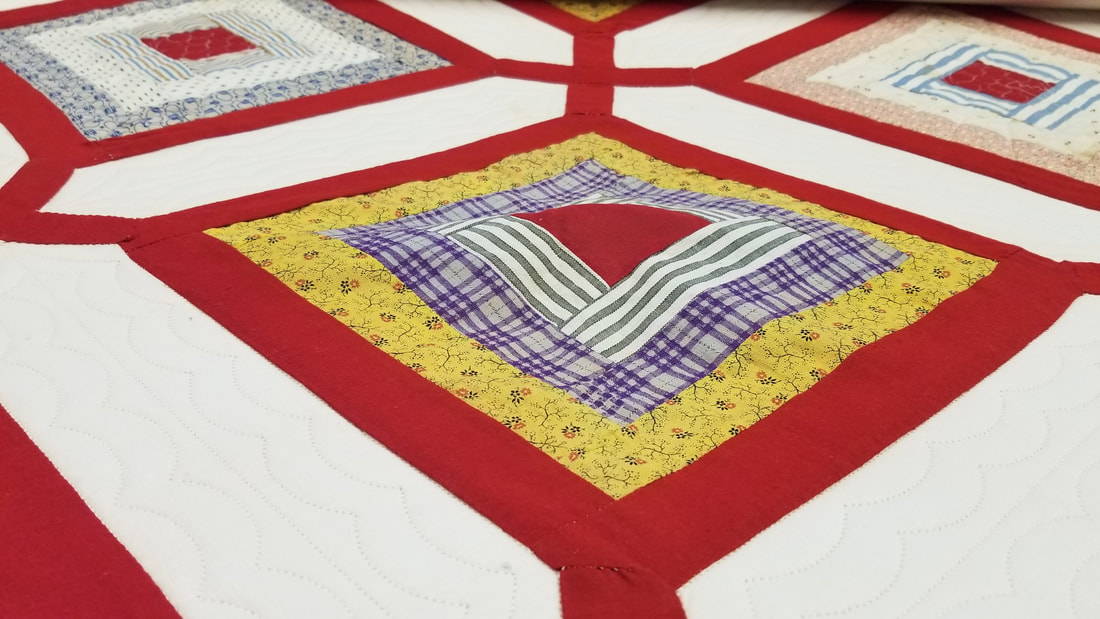
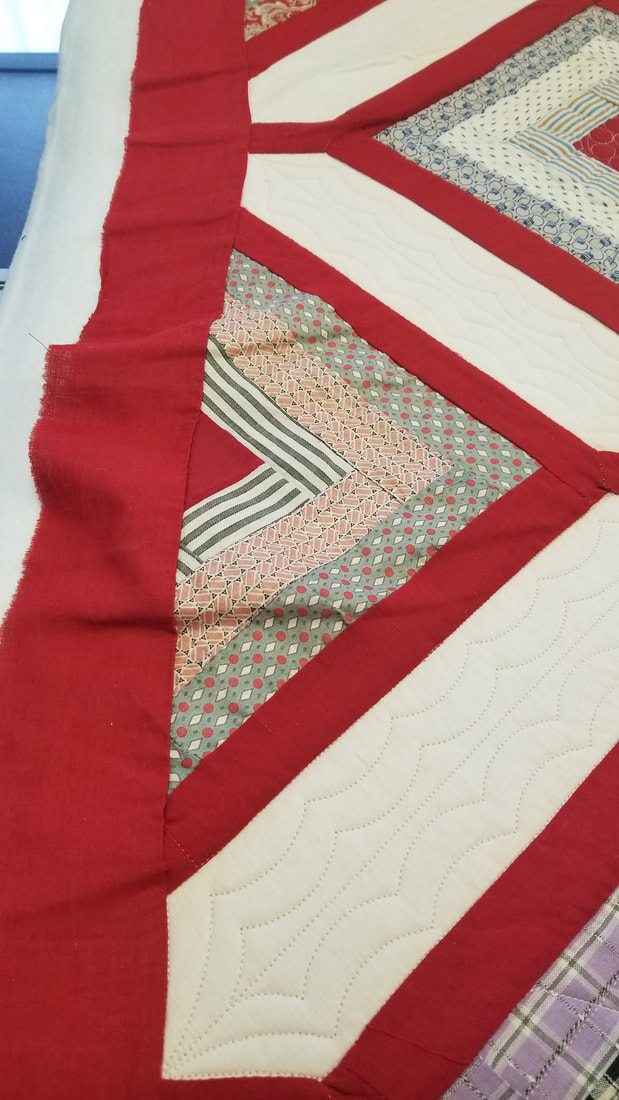
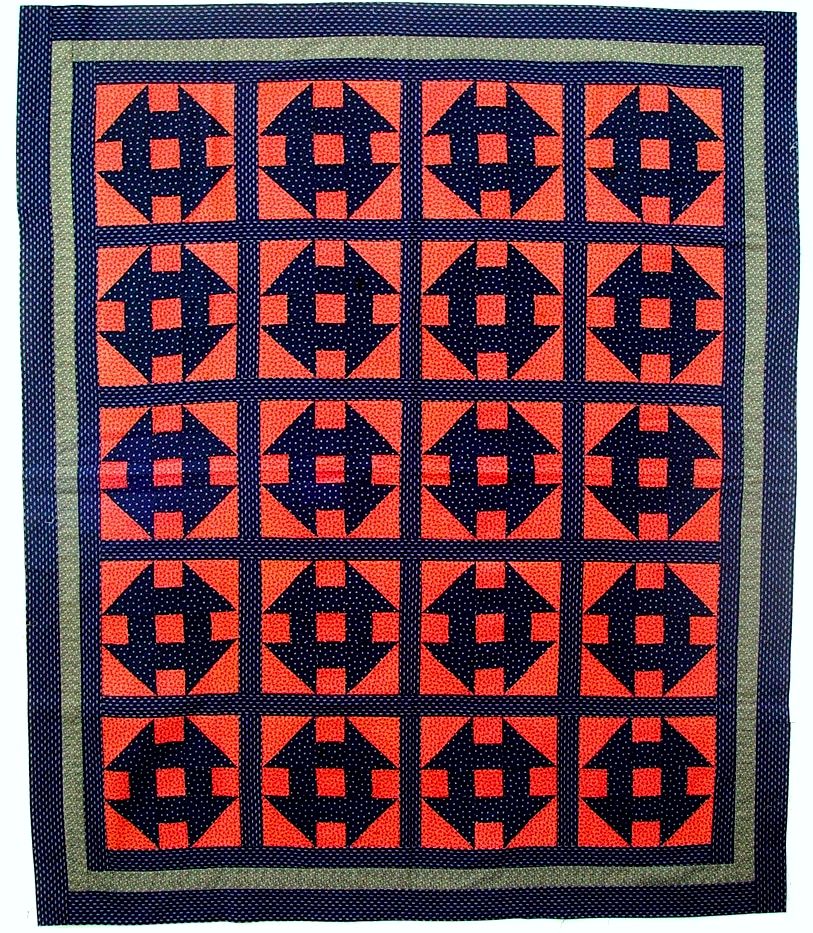
Goose Tracks
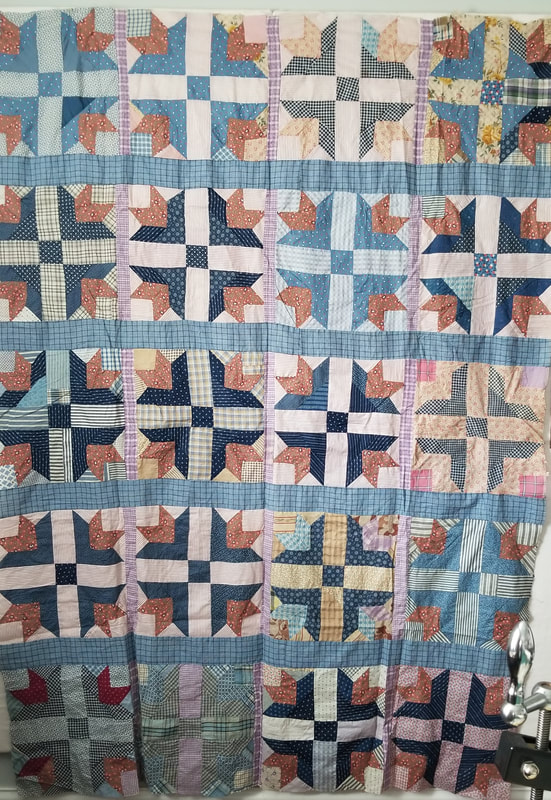
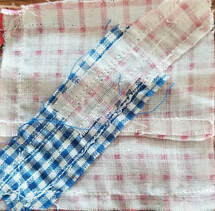
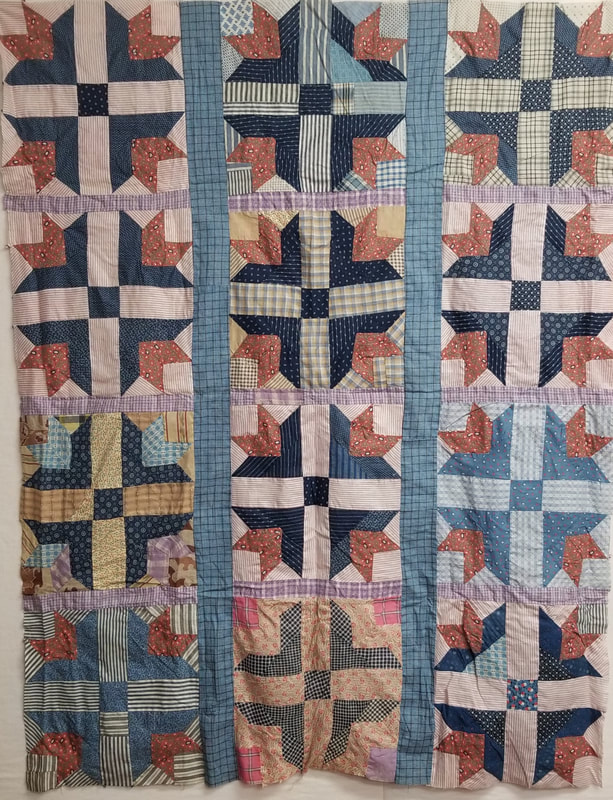
The original top was made of 20 Goose Tracks blocks, set in horizontal rows with a purple gingham in between them and wider blue plaid strips separating the rows.
|
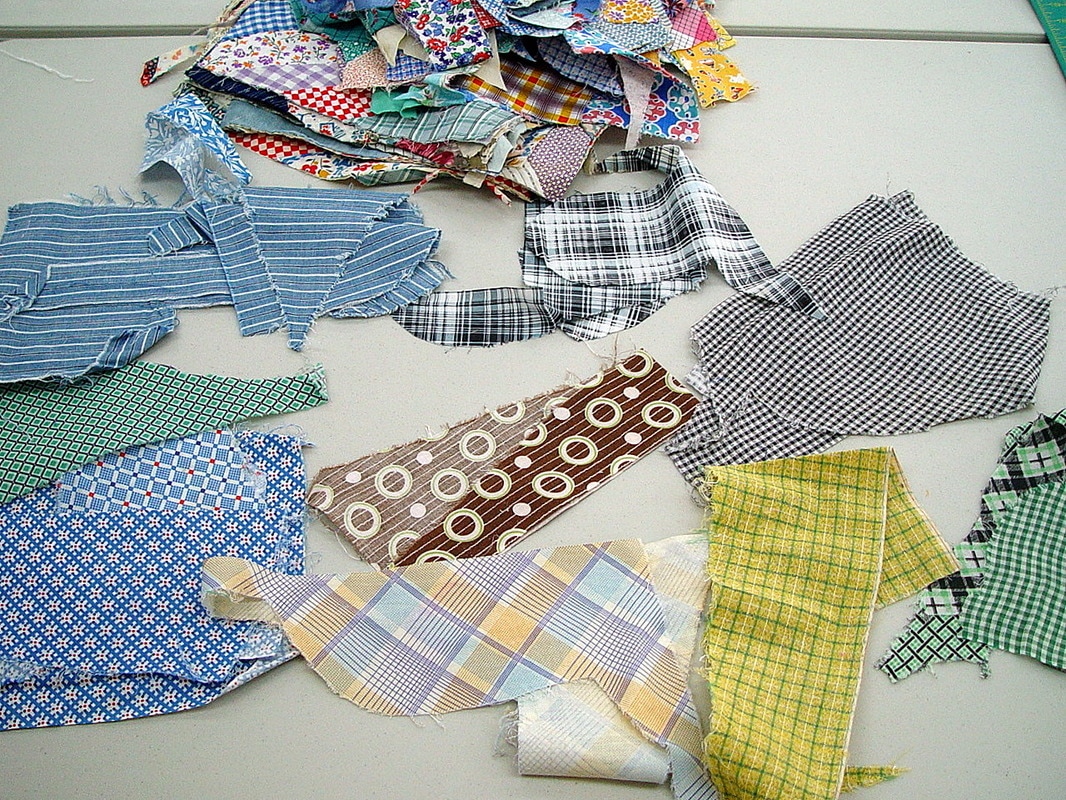
The fabric choices were scrappy and the piecing included many make-do areas.
|
|
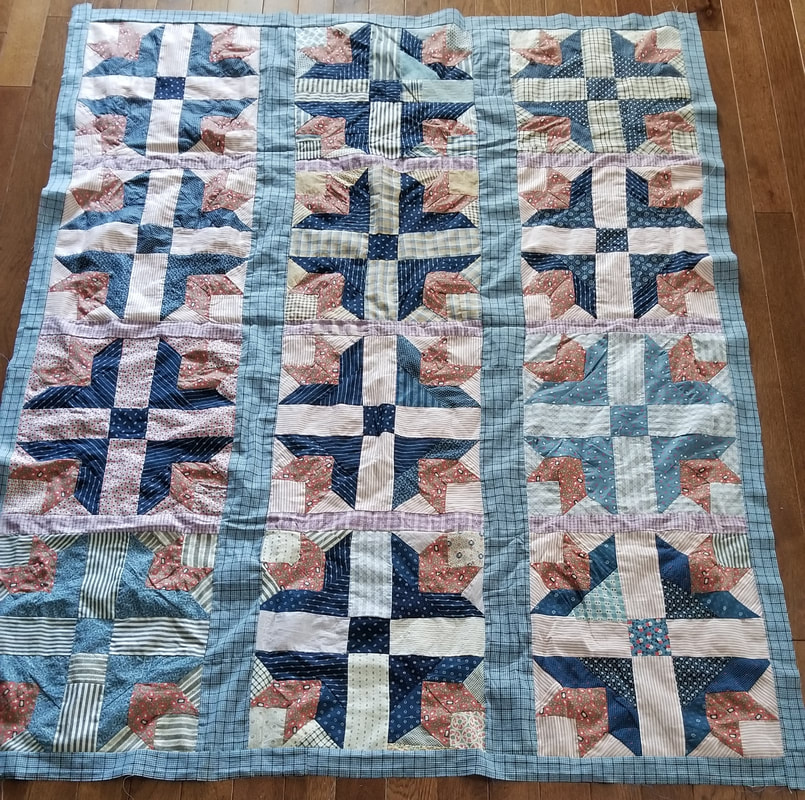
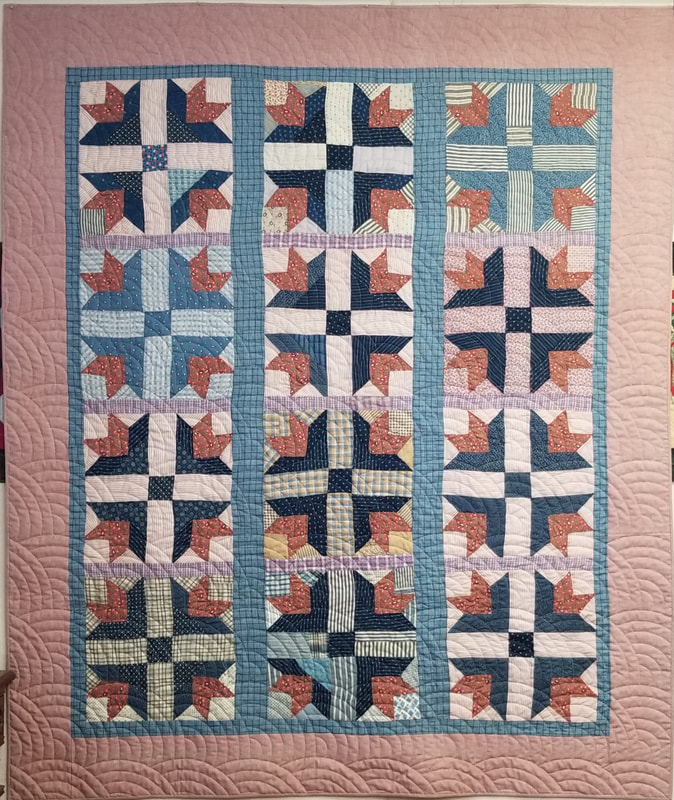
The 12 good blue and orange blocks appealed to me the most so I decided to use those in the new quilt. I turned two blue sashes vertically and cut the other two to be used as an inner border all around.
|
|

Finding a perfect final border took a while (thinking it should repeat the dark blue) but instead I found the perfect fabric at home in my stash!
It's a woven red and white that works surprisingly well with the colors in the blocks. I was also very happy to find a shirting type print in similar colors for the back. |
Because the top had some fullness and was a bit wonky, I thought
custom quilting would be too much trouble. Instead, I chose a traditional,
overall fan pattern, which still felt right for the piece.
And I repeated the border fabric for the binding.
I really love this little quilt and was happy with the change I was able to make.
custom quilting would be too much trouble. Instead, I chose a traditional,
overall fan pattern, which still felt right for the piece.
And I repeated the border fabric for the binding.
I really love this little quilt and was happy with the change I was able to make.
Vintage Garden Maze
|
This quilt top is c1930, but the red Garden Maze set gives it a very Modern feel. It appeared to be fairly straight and flat, except for the block in the lower right, which I took apart and resized before I started the quilting. Along the way, other problems "popped up" and I had to deal with them as I was quilting.
|
I chose patterns I thought would complement the modern style of the quilt, but still be something I thought a 1930s quilter might do by hand - straight lines, circles, petals, and scallops.
|
When the quilt was loaded on the bars, I began to see other areas that were going to be problems...
My approach was to straighten the red sashing strips as much as possible and quilt the muslin patches all the way down the quilt. The pattern I used is Echo Wave Sashing from Joyce Lundrigan
The second step was to quilt the square blocks that were flat. Some were easy and some required a little surfing with both hands to ease in fullness.
The pattern I used in the blocks is my Modern Daisy with Geo Background.
|
Most blocks were flat but not exactly square.
I used Stretch Pattern to Boundary, with .05 margin and they quilted beautifully. |
|
Other areas had some serious fullness! I tested the red fabric with a wet Qtip and found that it was not colorfast, so that eliminated the idea of spraying with water or starch...

|
|
Many times, quilting all around a block with fullness will help it lie flat, but this one was definitely a problem. It's one of several that I had to take apart and resize.

Working with the quilt laid flat on my kitchen island, I spread out the center section underneath the white frame and pinned it into place.
|

Rather than lifting the entire block out of the quilt, I decided the open the seams between the yellow and white strips

I hand appliqued the white strips to the yellow and it was ready to quilt!
|
This block is in the very center of the quilt and is now as well behaved as the others.
|
|
|
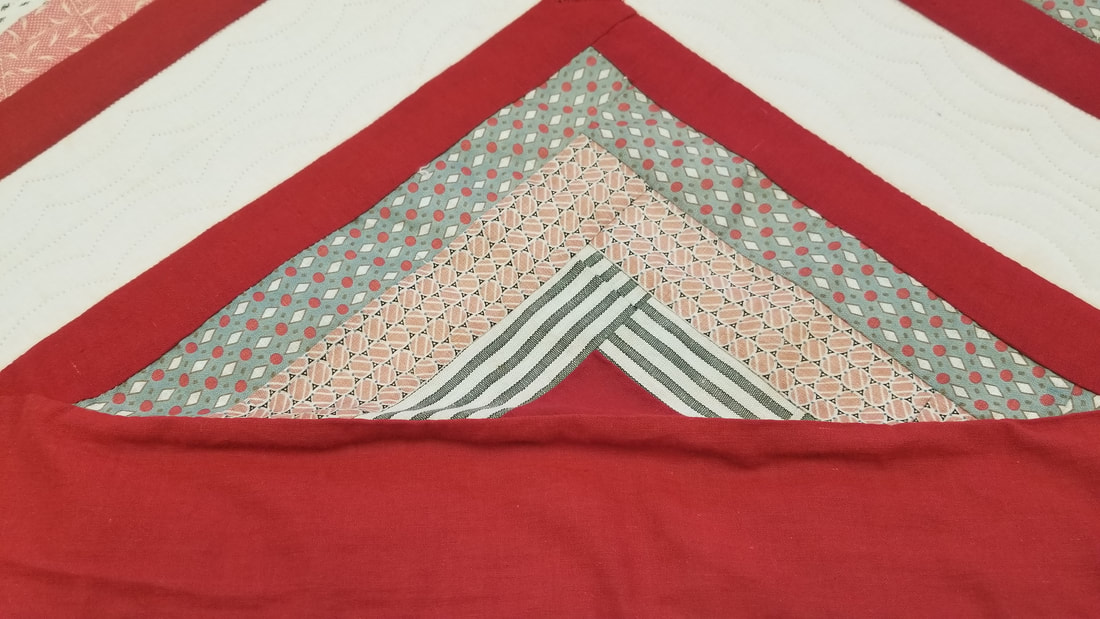
Four blocks along the edges looked like this! Pulling them to the outside would take out some of the fullness, but made the border very crooked (and didn't really solve the problem).
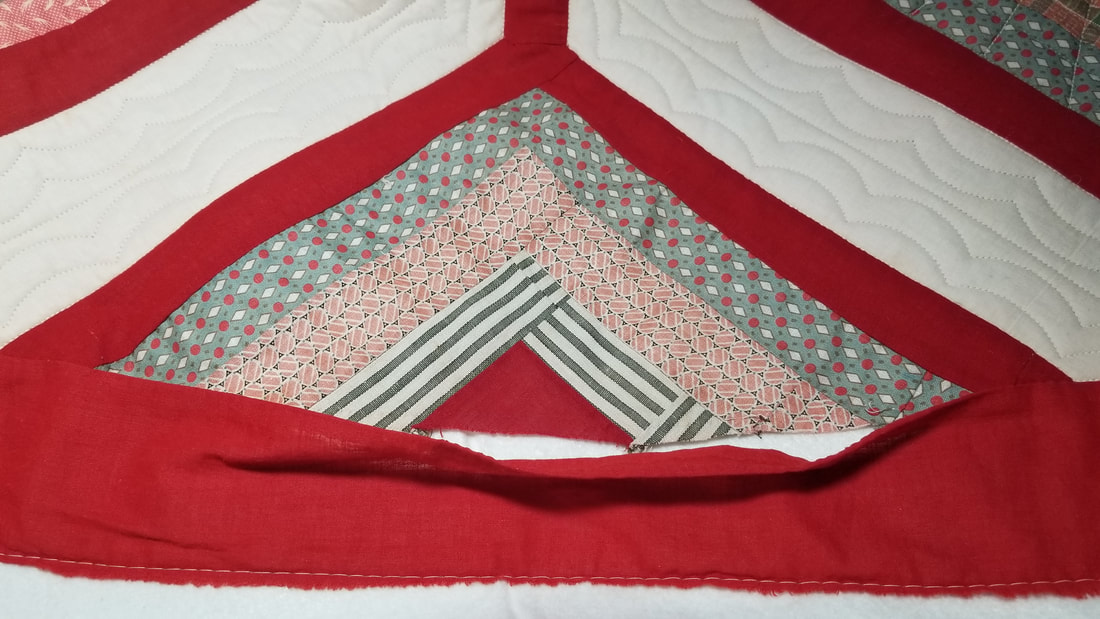
I unstitched the border seam and tucked the base of the triangle under about 1/2" beyond the original seam line. You can see that the red triangle is smaller in the finished block.
I also took a 3/4" tuck in the length of the border and restitched it by hand. A small seam in the border of an antique quilt doesn't look out of place, and honestly, it barely shows at all. |
Straightening the border, created this wrinkle between the two.
Ready to quilt.

Finished.
|
This triangle had even more fullness than the others and had to be removed completely and all 3 edges spread out underneath the red sashing and the border. I took a 3/4" tuck in the border here, too.
|
Finished.
|
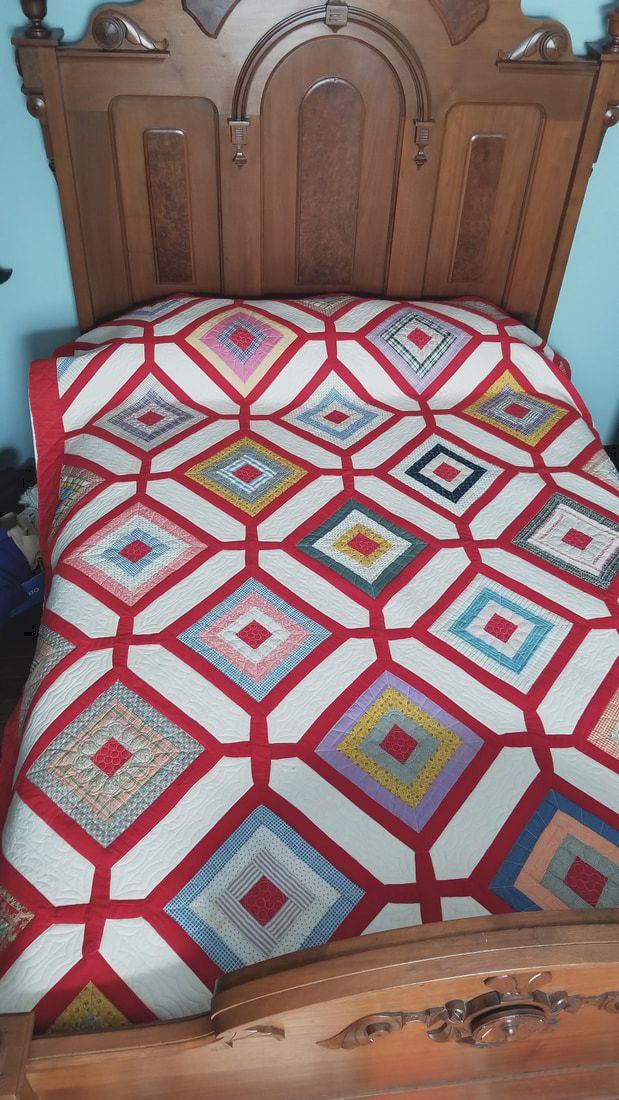
I love the visual impact of this quilt
and am happy I was able to add to its story.
and am happy I was able to add to its story.
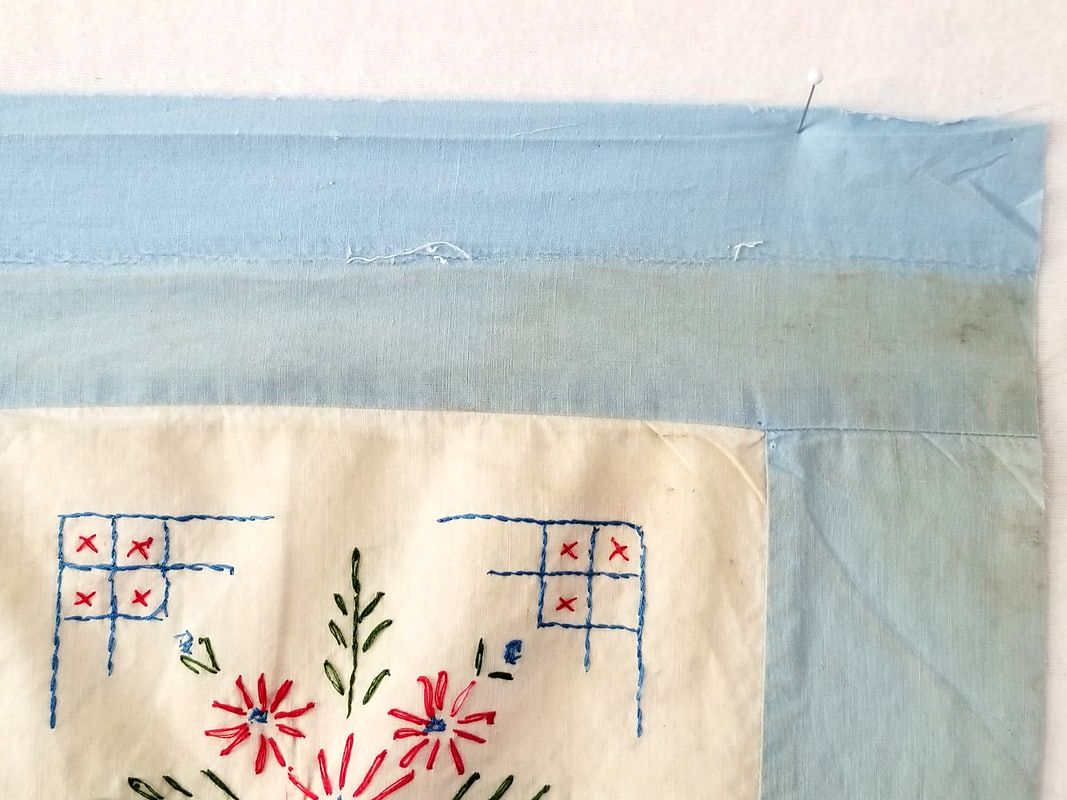
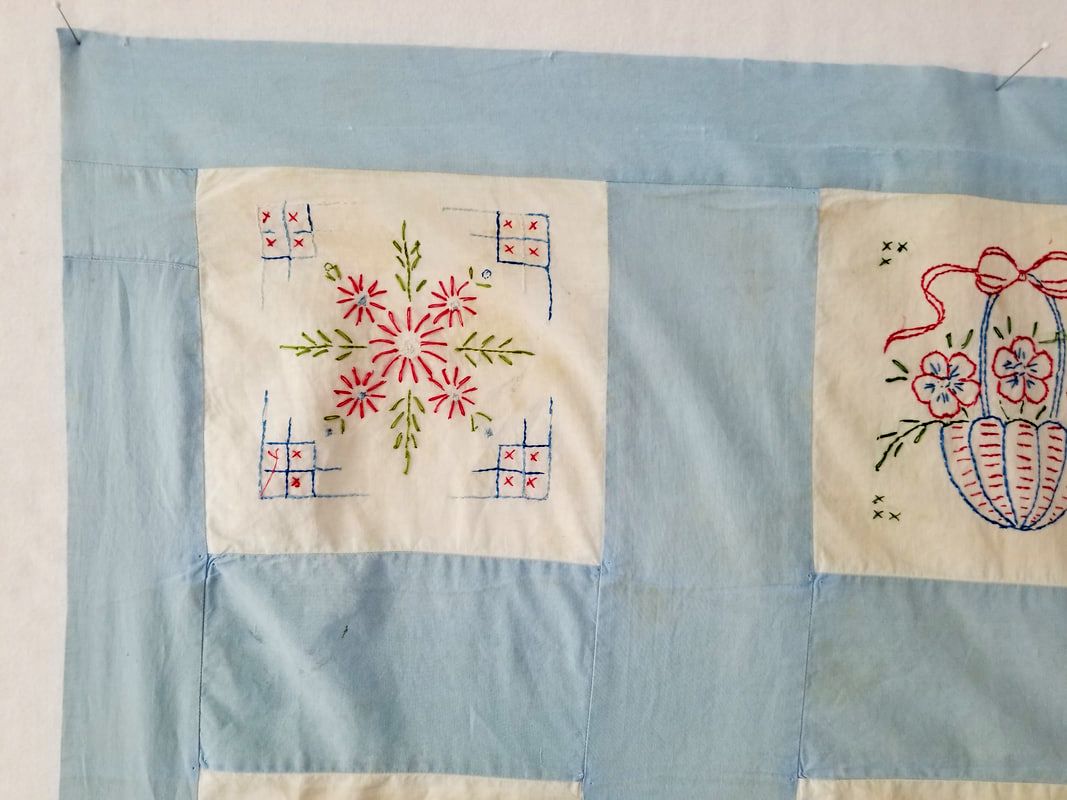
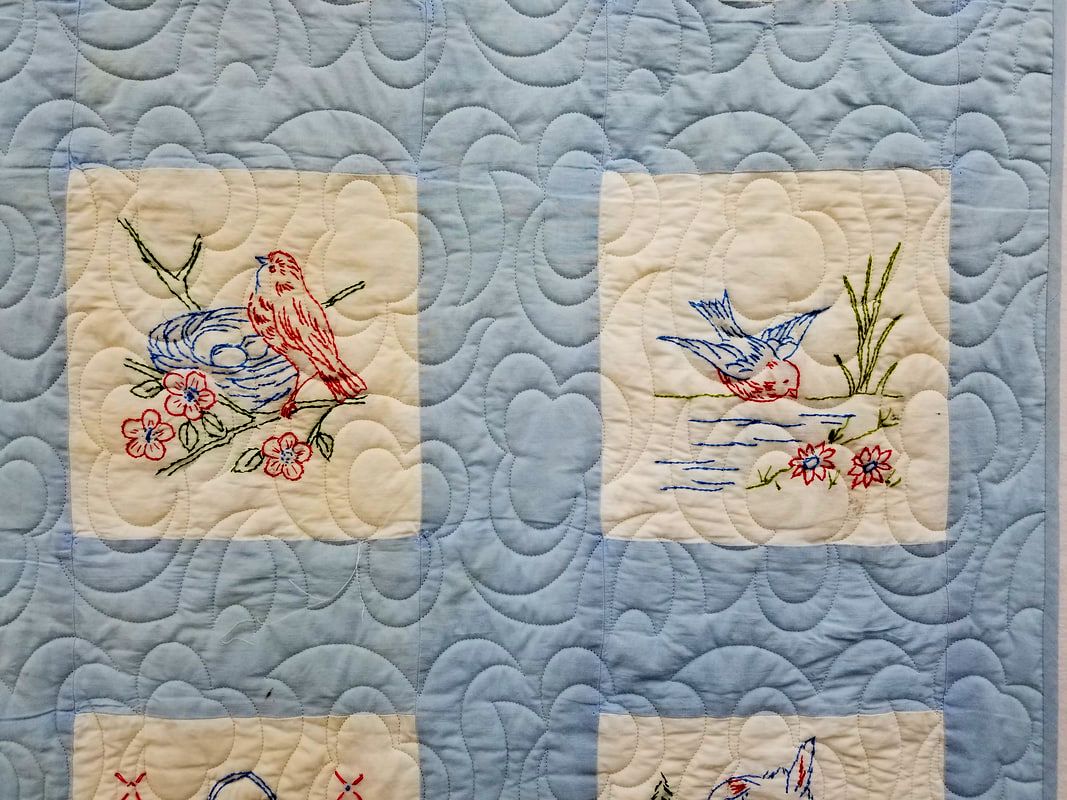
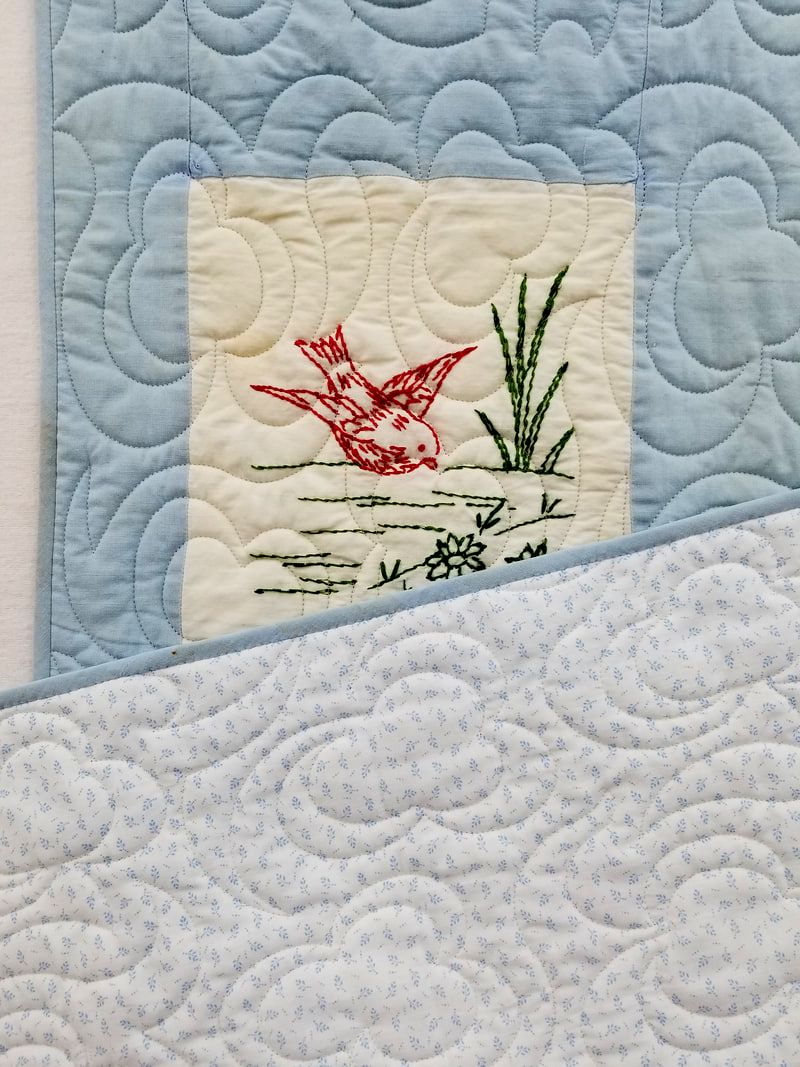
Baby Quilt Rescue
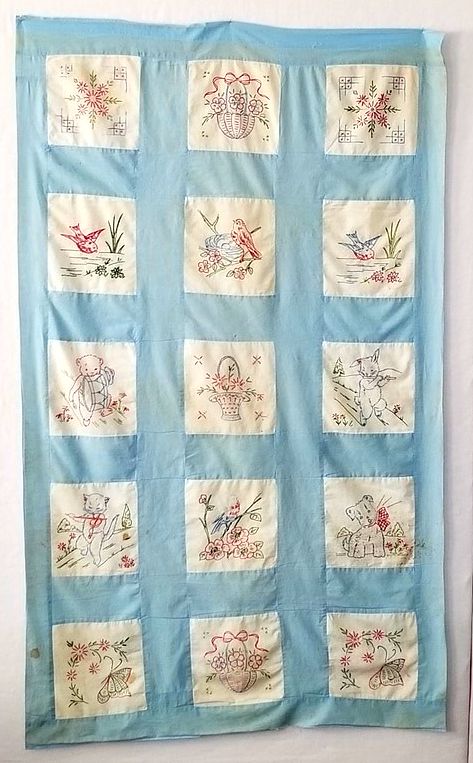
This baby quilt was made by a woman who is now 93 years old. I was asked to repair it, so it could be passed on to other family members.
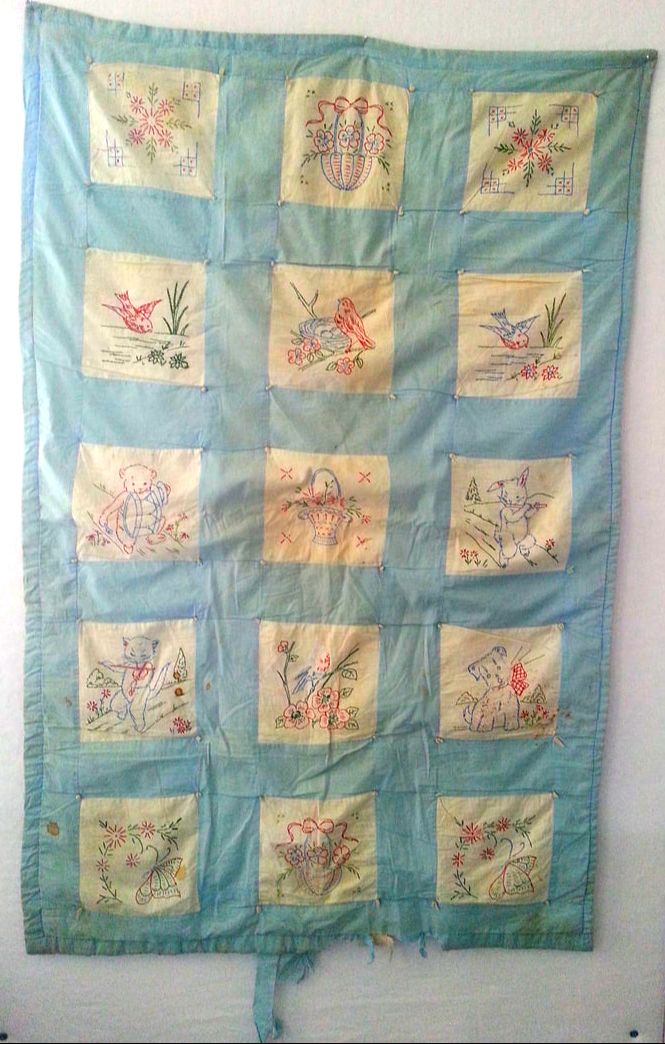
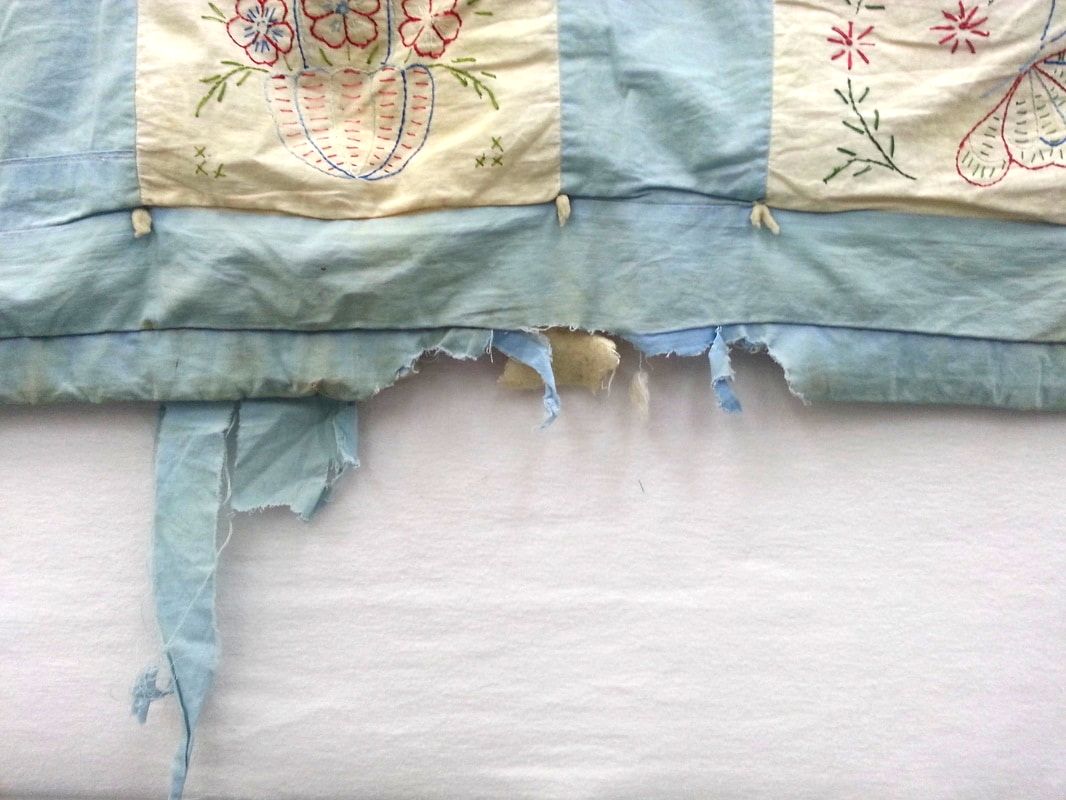
The layers had been tied only at the block corners. The batting was a heavy felt that had shrunk when washed. There were also large damaged areas on the edge and the back. But the embroidery and most of the top were in good condition.
|

|
I offered two suggestions:
I could take the top completely apart and set the blocks with new sashing and borders, batting, and back.
Or, to keep it as close to original as possible, I could use the backing fabric to repair the top and just add a new batting and back. The family liked the idea of keeping as much of the original quilt as possible.
|

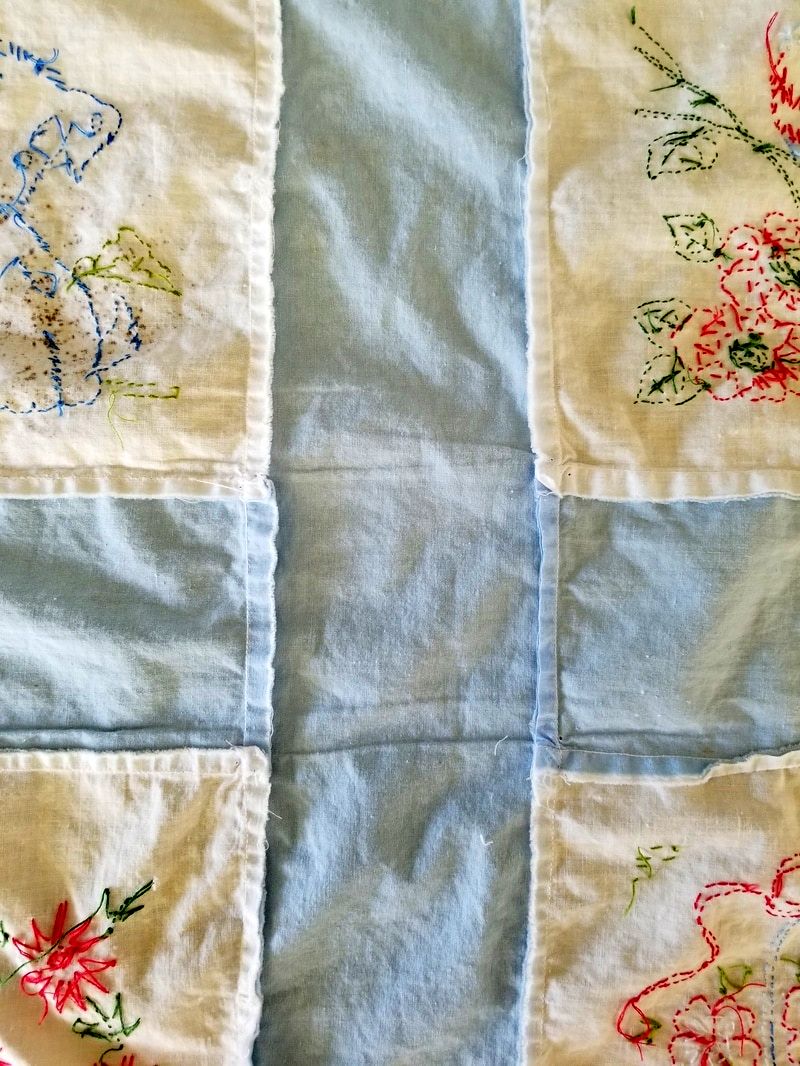
Inside I found lots of stray threads and some extra fabric in seam allowances, so those were cleaned up.
|
The top was reasonably straight and flat after I took the layers apart (just a little longer on the left).
|
|
|
The top border showed a major color change in the area that had been turned inside for a knife edge binding.
|
I cut a new top border from the backing fabric and, of course, it was a perfect match.
|
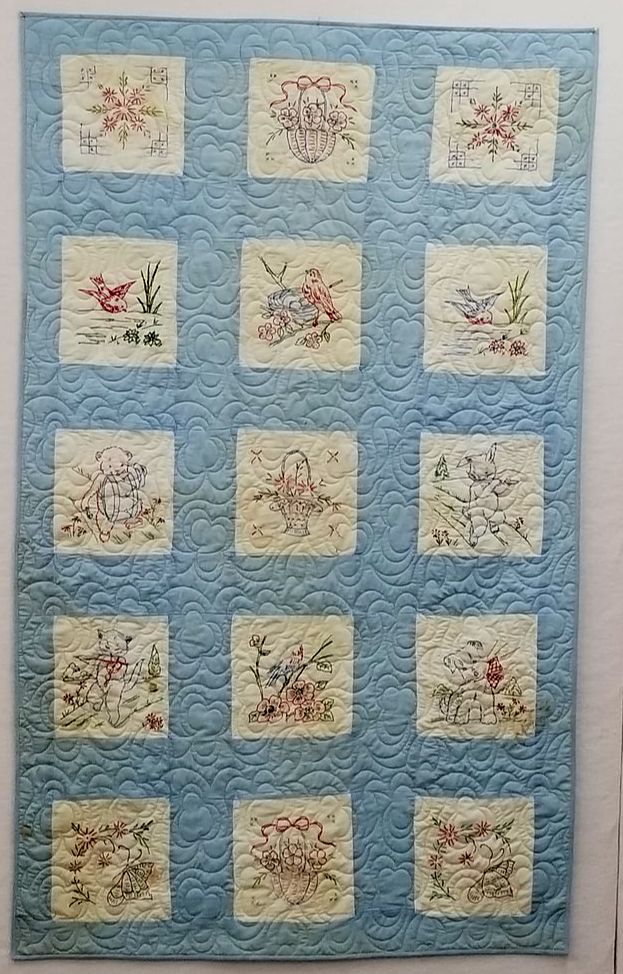
It's a sweet quilt that deserved to be rescued and the family was very happy to have a family heirloom still intact.
|
The quilt was quilted with a simple panto. I added a backing of vintage fabric and cut bias binding from the remaining backing fabric, so everything looks coordinated and "almost" original.
|
Album Patch
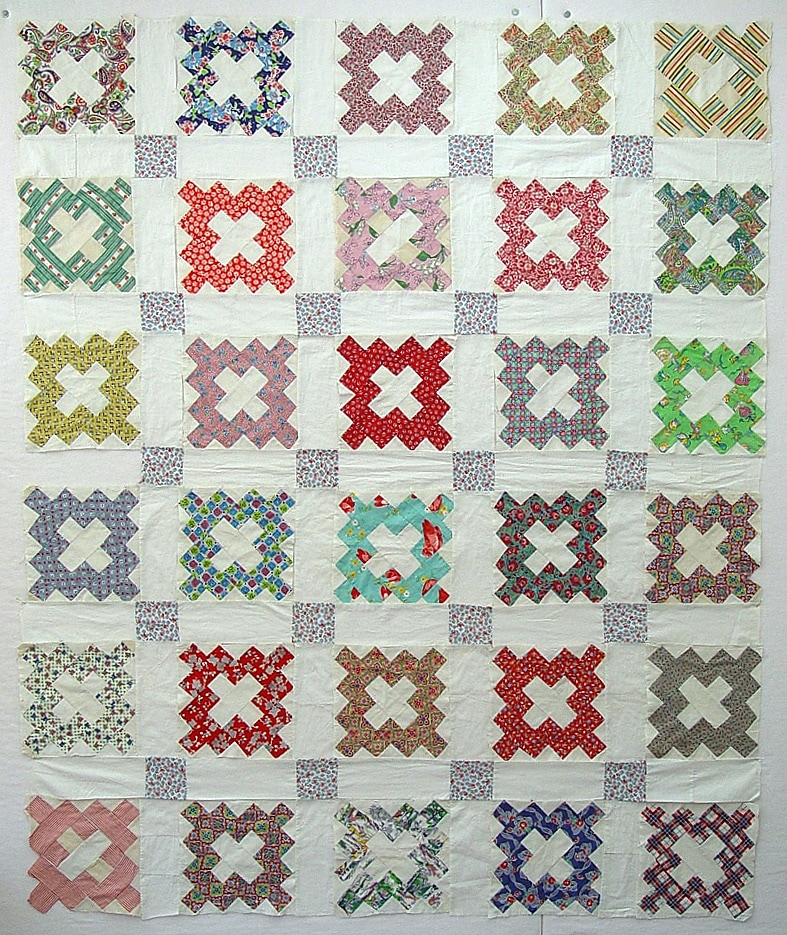
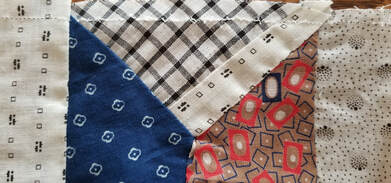
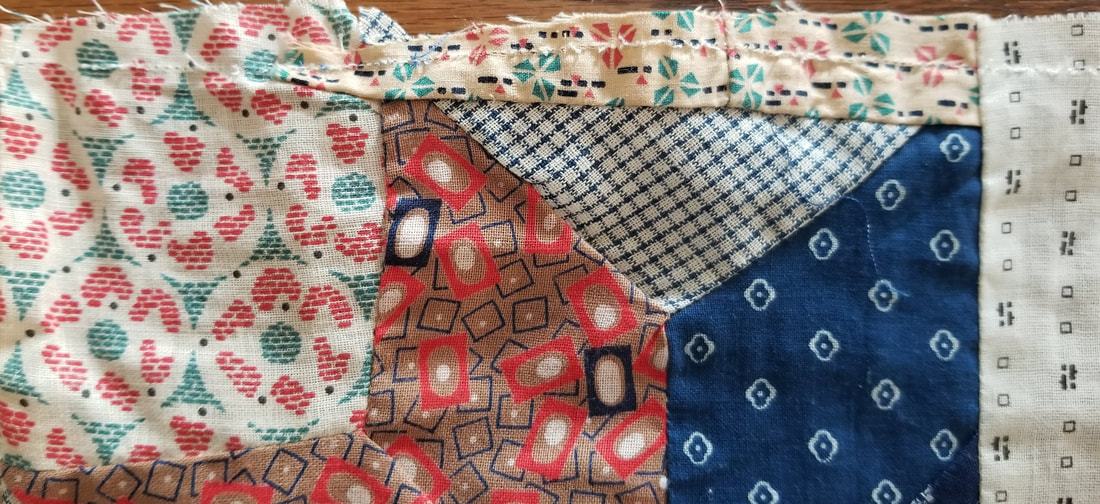
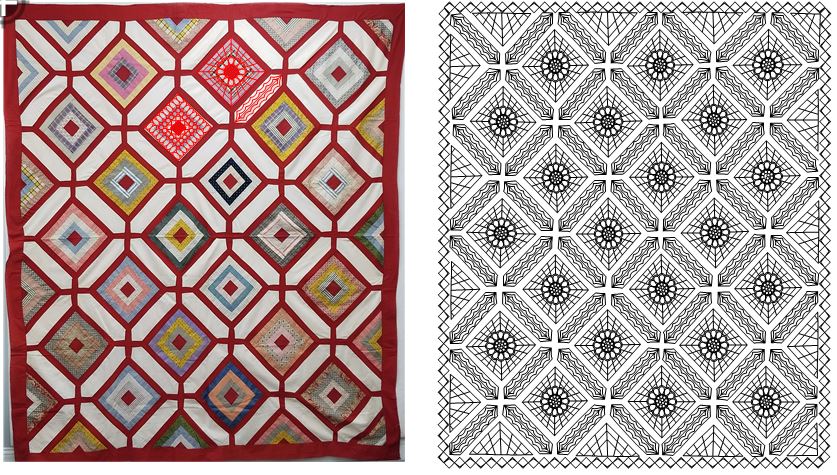
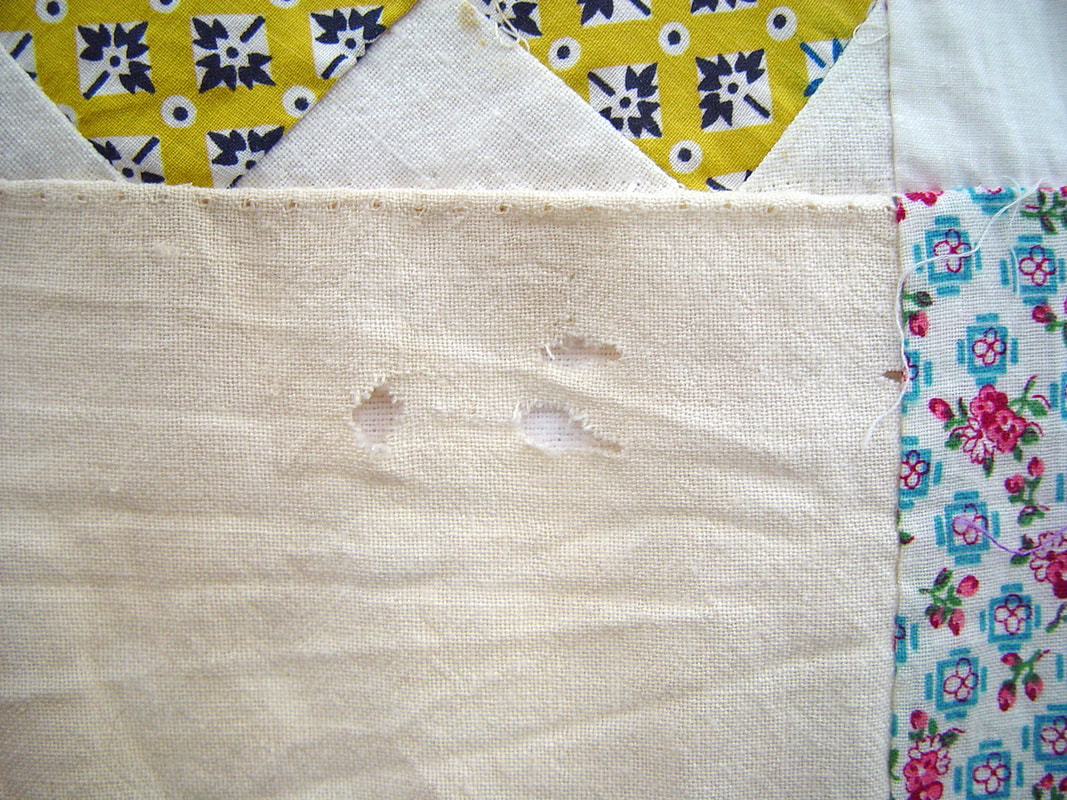
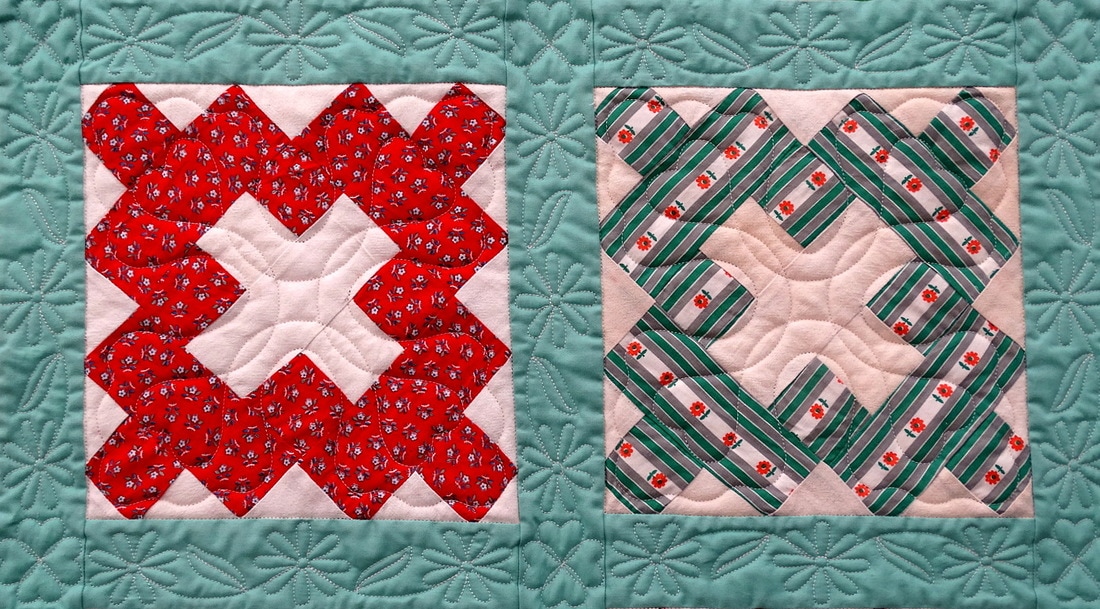
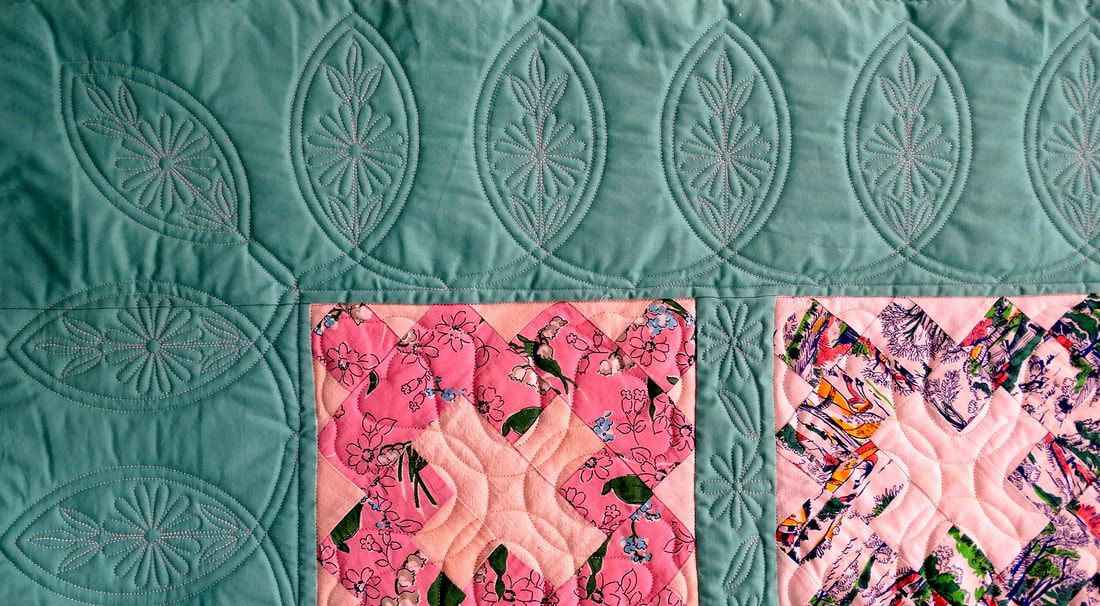
I bought this as a full quilt top. The block pattern is called Album Patch, as it was often used for a friendship or signature quilt. These blocks were not signed and they had been set together with white sashes and print cornerstones. The piecing was generally well done. I found damage in some of the sashes and also felt that the white did not add much to the overall visual impact.

|

|
|
|
Blocks were pieced from
1930s-40s prints and a variety of white fabrics. |
Some sashes were damaged and cornerstones were from a later time.
|
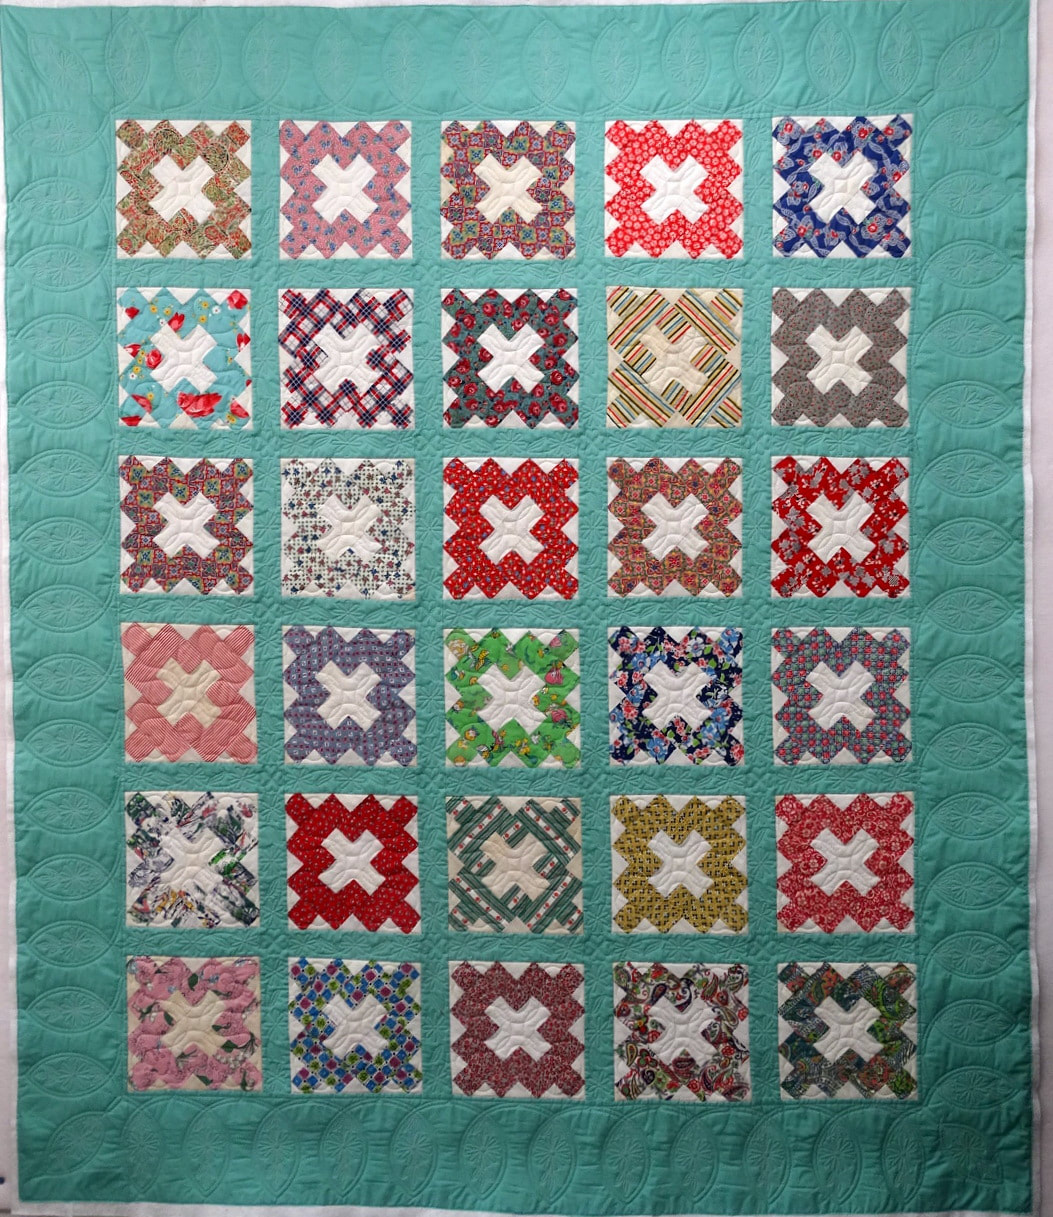
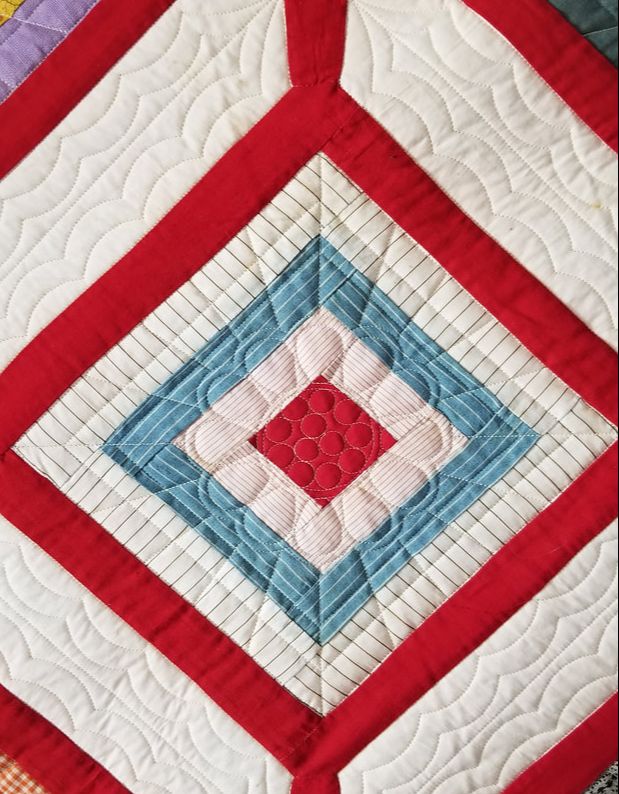
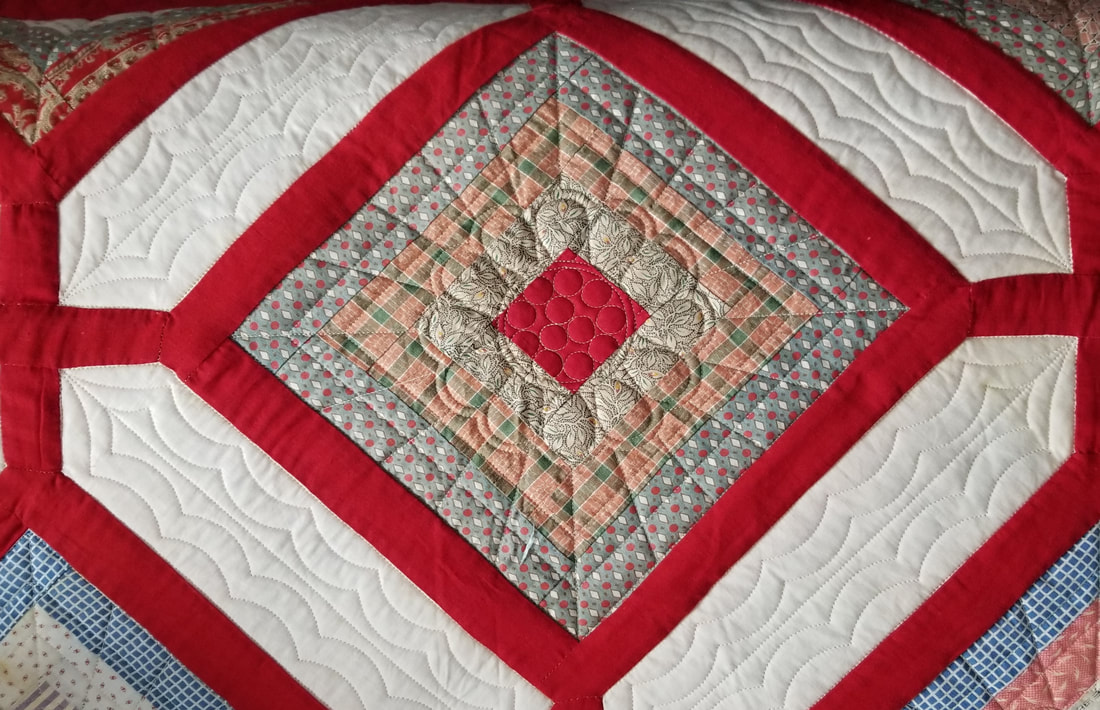
Narrow sashes in a rich green and a large border all around were my solution for this one. The change in color really makes the blocks shine!
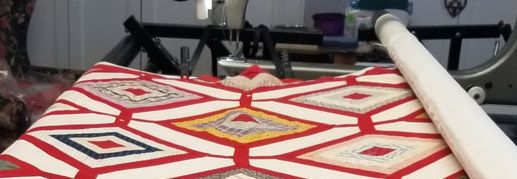
Machine pieced. Quilted on my Statler Stitcher.
Machine pieced. Quilted on my Statler Stitcher.
|
|
|
The blocks were quilted with a pattern called Hearts and Flowers.www.anitashackelford.net/blocks.html
Triple Daisy Sash and Four Hearts cornerstone complete the look.www.anitashackelford.net/sashes-and-cornerstones.html |
And the border continues the floral theme with Loop and Daisy Border. www.anitashackelford.net/borders.html
|
Complete Restyle
Sometimes my Quilt Rescues take on a life of their own and even I am surprised
by how different the end result is from where it started.
by how different the end result is from where it started.
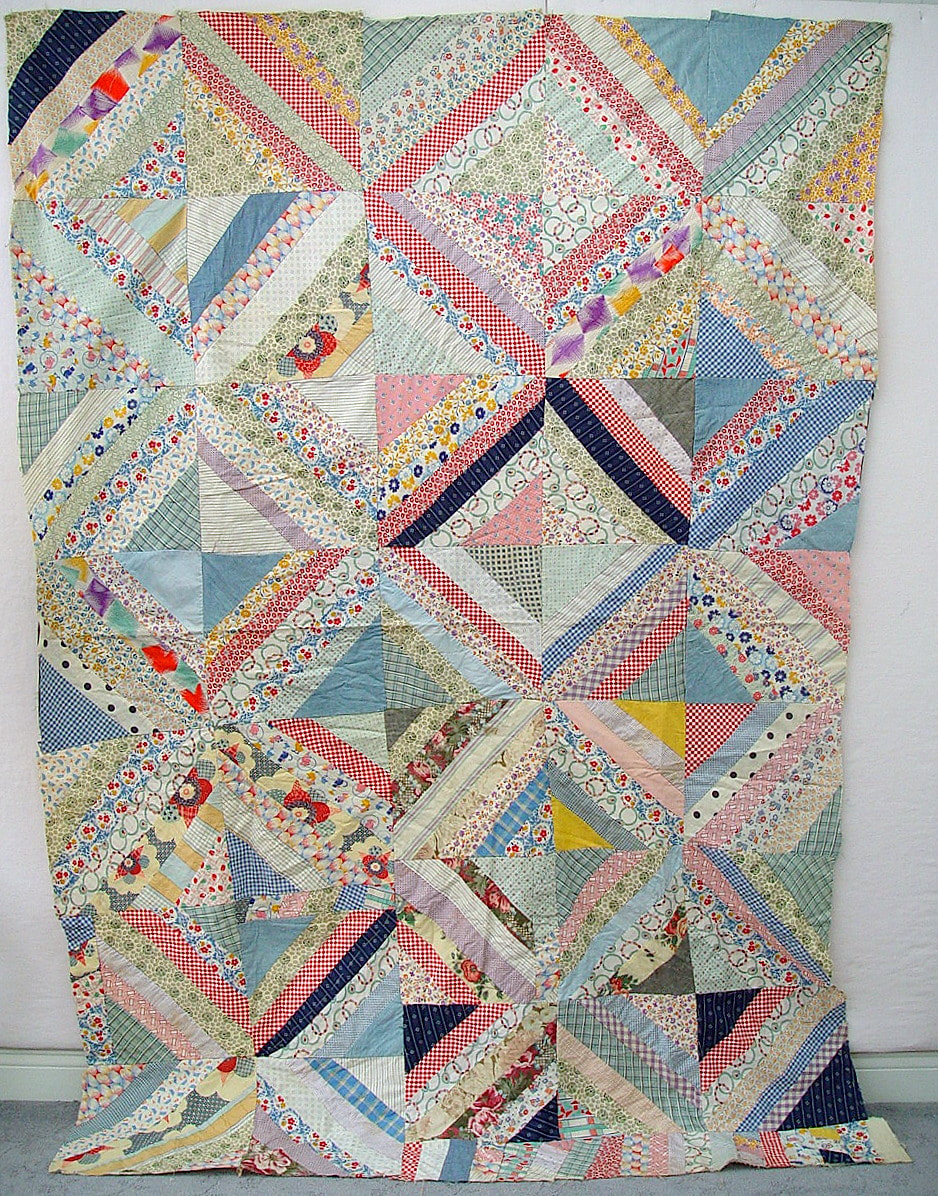
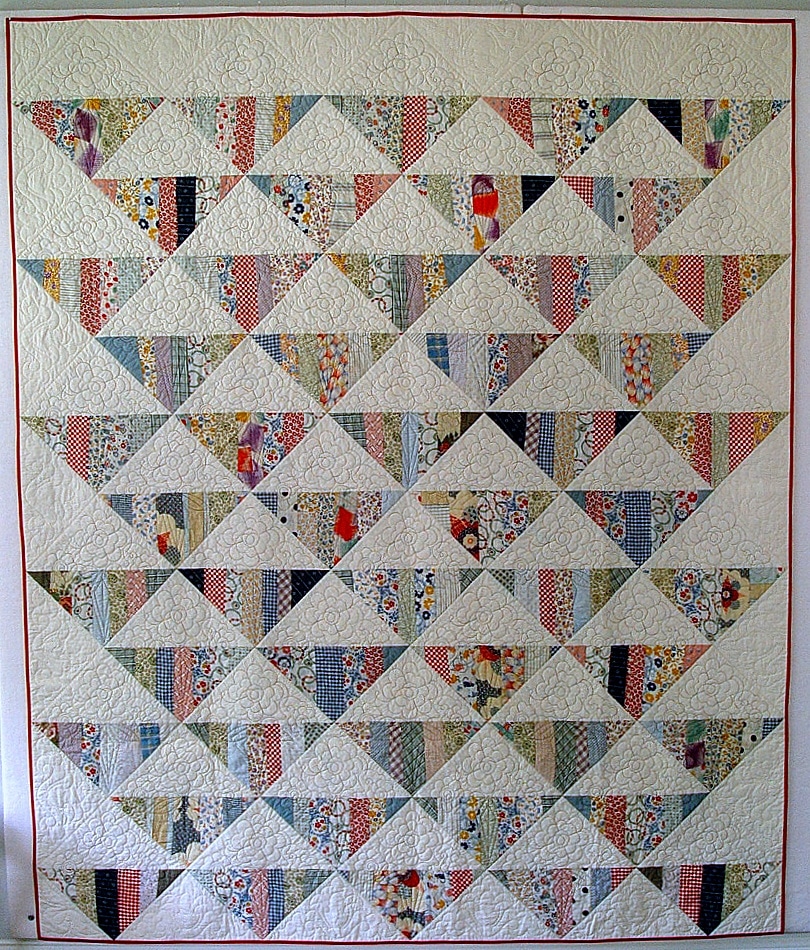
String Quilt
|
|
It's hard to imagine that this is the before and after of the same quilt.
It went through several drastic steps to get where it is today.
It went through several drastic steps to get where it is today.
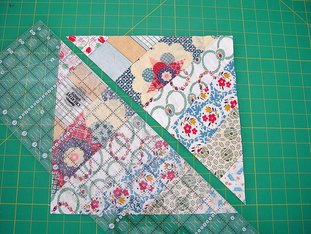
Individual blocks were cut apart and then cut in half on the diagonal.
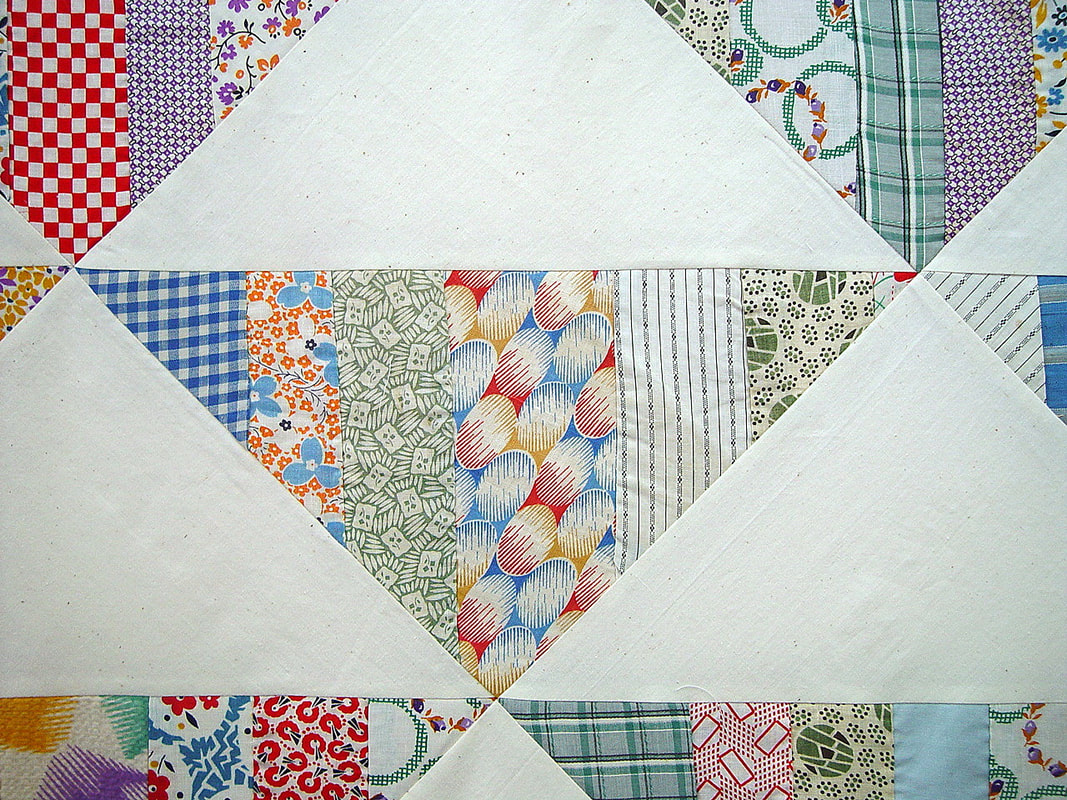
Blocks were set on point in
flower basket fashion. |

A muslin triangle was added to each one.
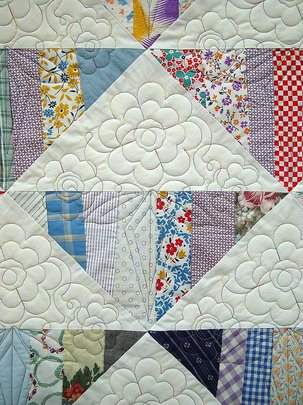
And the uilt was customquilted
with flowers. What a change! |
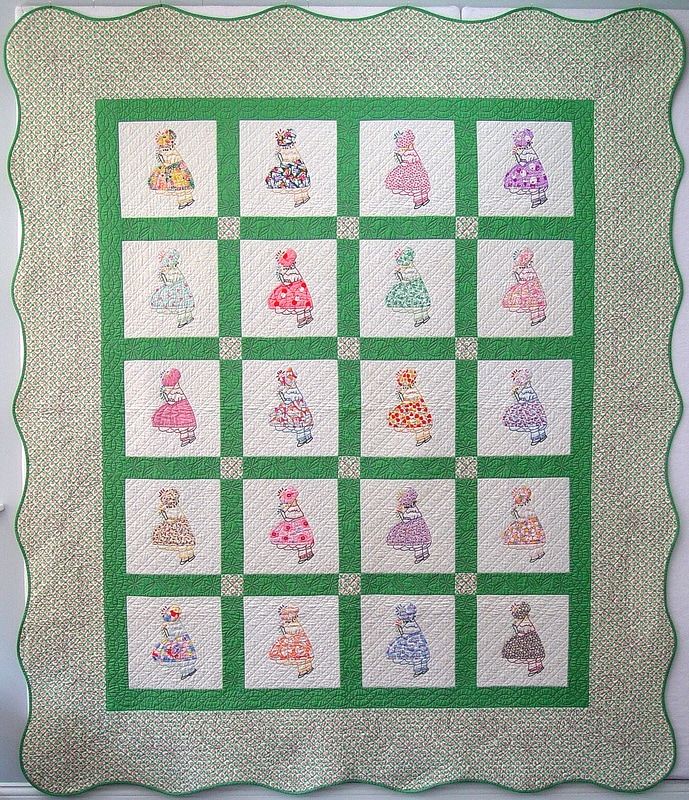
Taking the Top Apart and using only the Blocks
I bought this sweet Sunbonnet top in 2009 from eBay. Shopping on line is always more of a risk than looking at a quilt top hands-on. I try to study the pictures carefully to understand both quality and condition of a quilt top that I don’t actually have in my hands. If you are unsure about an item you are thinking of buying, don’t be shy about asking questions of the seller. They want you to be informed and be happy with your purchase.
A detail photo of this top showed that the applique and embroidery were both done with a fine stitch and the quilt top in general looked pretty clean. When the top arrived, it was very much as presented, but it still needed a lot of work. I knew it would be worth the time and work to rescue.
The appliqued blocks had been set together with wide pink sashing and white cornerstones. There was also a row of sashing across the top edge, but not on the sides or bottom. I considered this top row of fabric might be useful for replacing other sashings - one that was pieced, one that had faded, and one with several holes in it.
But, I really felt that the 3" hot pink sashing was too wide, overwhelming the delicate blocks in both size and color. Cutting it smaller was an option and would have kept it closer to the original but even if I had kept the pink, there didn’t seem to be another fabric in this world that would work with it for a border. My solution was to take the top all apart and reset the blocks with a narrower green sashing. I also added a narrow stop border of the same green fabric all around. A 1930s reproduction pink and green plaid fabric and a muslin back completed this piece.
As I was working on the top, I found that the embroidery was not finished on one of the blocks. I used a light box to trace the details from a completed block, chose floss colors to match the originals, and added the missing details. I also found basting stitches remaining in a few places and those were easy to remove.
Even though I was machine quilting, I wanted to keep the quilting style as close to period as I could. I quilted a plaid grid behind the girls and added some custom details in the appliqued dresses. I chose a daisy pattern for the sashes, a classic cable for the stop border, and then repeated the daisy motif in the borders. A curved edge and green binding were the finishing touches.
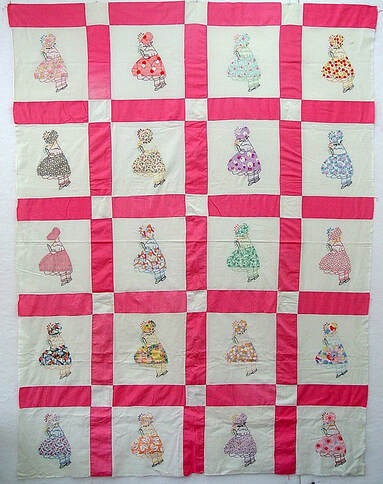
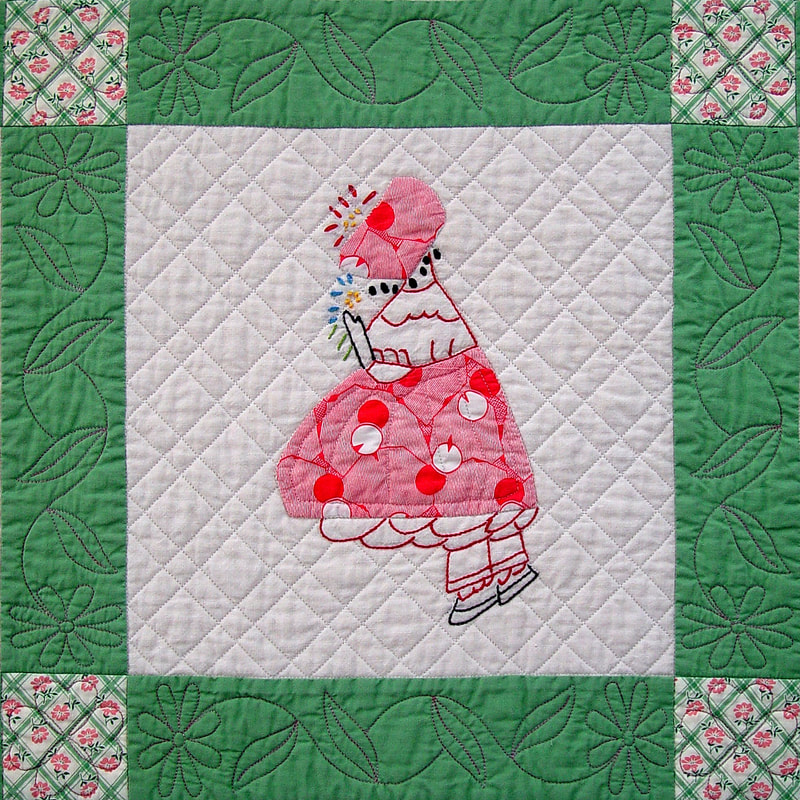
Sunbonnet Ladies
|
|
These Sunbonnet Girls are beautifully appliqued and embroidered. I felt the quilt needed a border, but there was just NO fabric to match that hot pink sash. Good thing, really. The 5" sash was much too wide and the color overpowered the sweet girls. Taking it all apart was tedious work, since they had been pieced together by machine with a very small stitch.

|
|
I set them back together with a 2" green sash and found a pretty pink and green reproduction floral&plaid fabric to use as cornerstones and borders. The quilting is floral and plaid, too :) I thought the shaped edge would add the perfect finishing detail.
Quilting in an Unexpected Style
c.1940 Flower Applique
I added borders to this mid 20th century quilt top to make it feel more finished and then I quilted it in a Modern style. It was fun to think of an antique top quilted in a different way.

|
|
Quilting Period Style
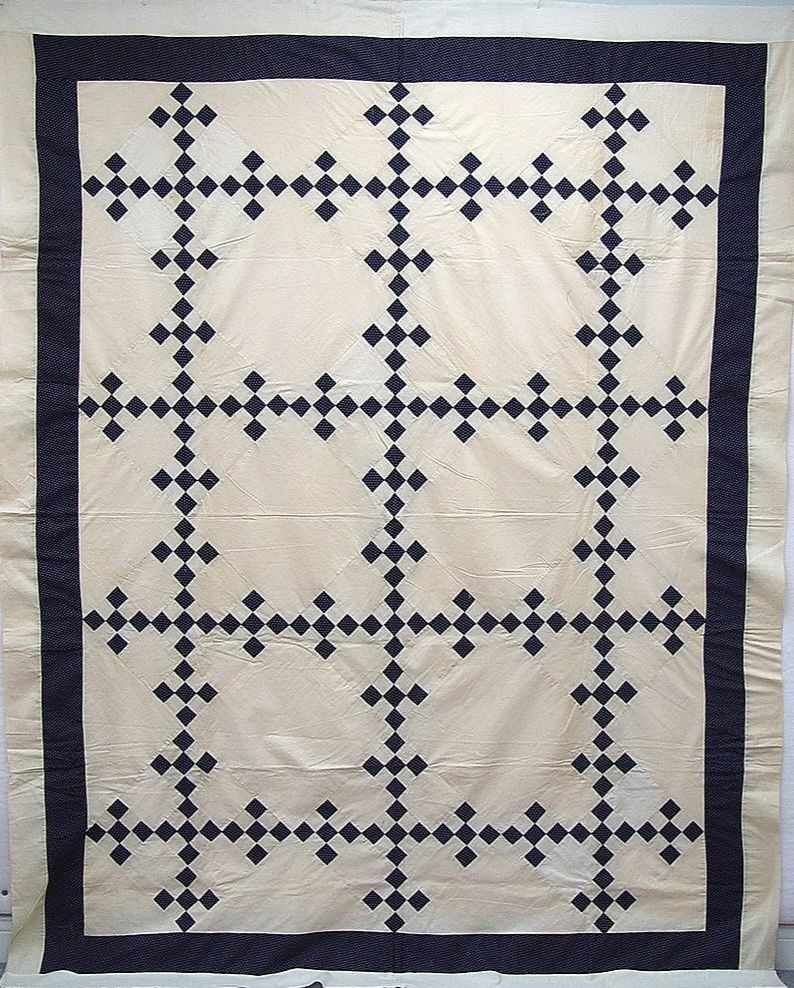
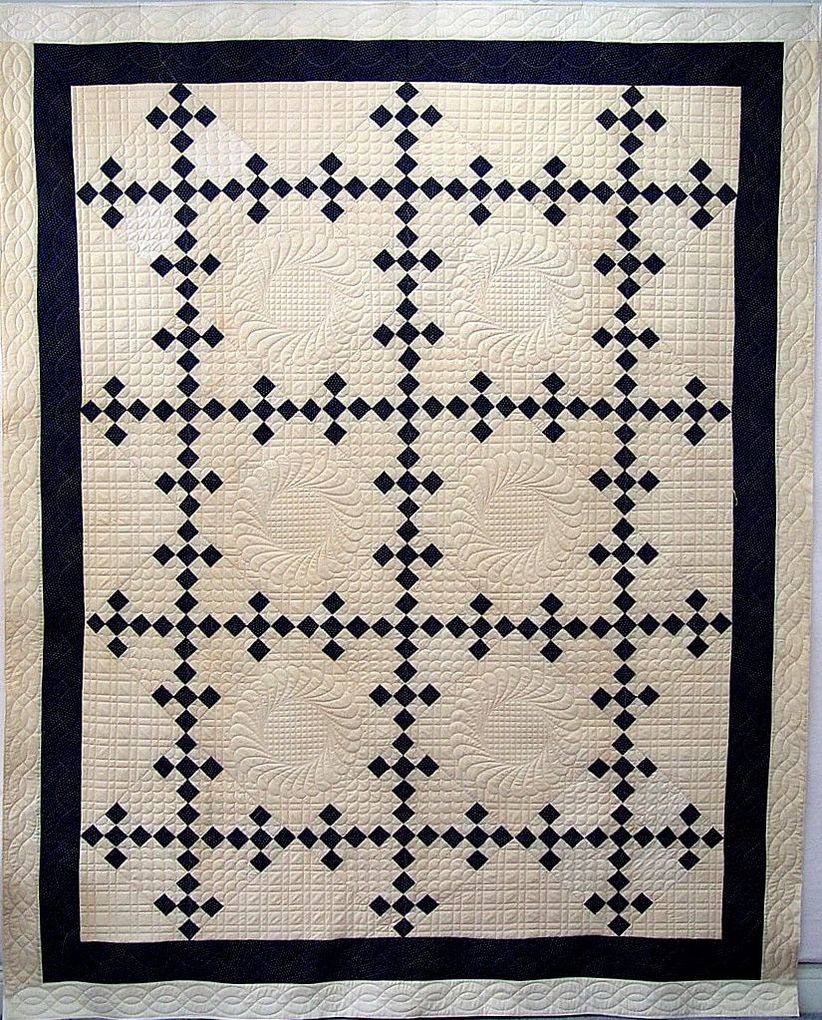
Late 19th Century Double Nine Patch
Finding a great quilt top, ready to quilt, can be pretty exciting. Then the next question might be...how to quilt it? Would it be best to quilt it as it would have been done, or would it be interesting to do something unexpected?
|
|
|
Here's a great 19th century Double Nine Patch in dark blue and muslin. Although the borders seem a little full, I didn't make any adjustments before quilting it.
|
I wanted to keep this as true to period as possible, so it is quilted with large feather wreaths with simple grid inside, plaid grid in the backgrounds and setting triangles, clamshells in the nine-patch blocks and cables in the borders.
|
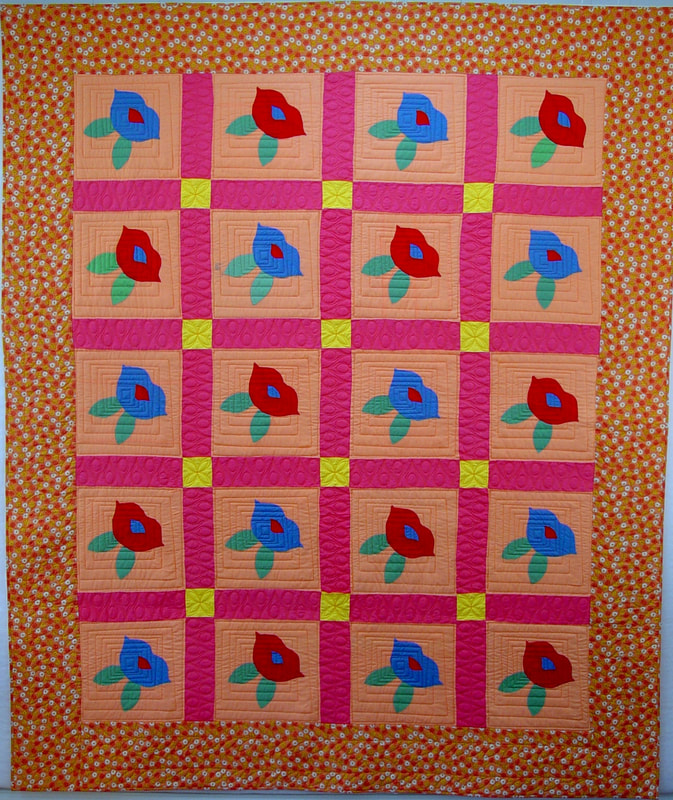
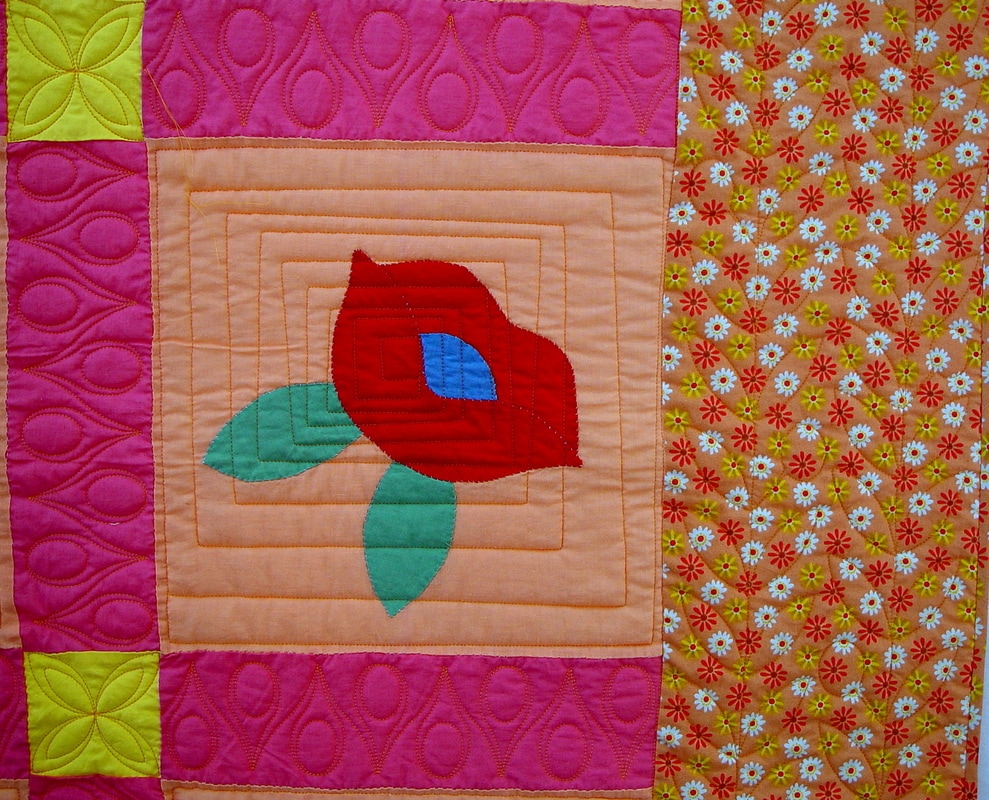
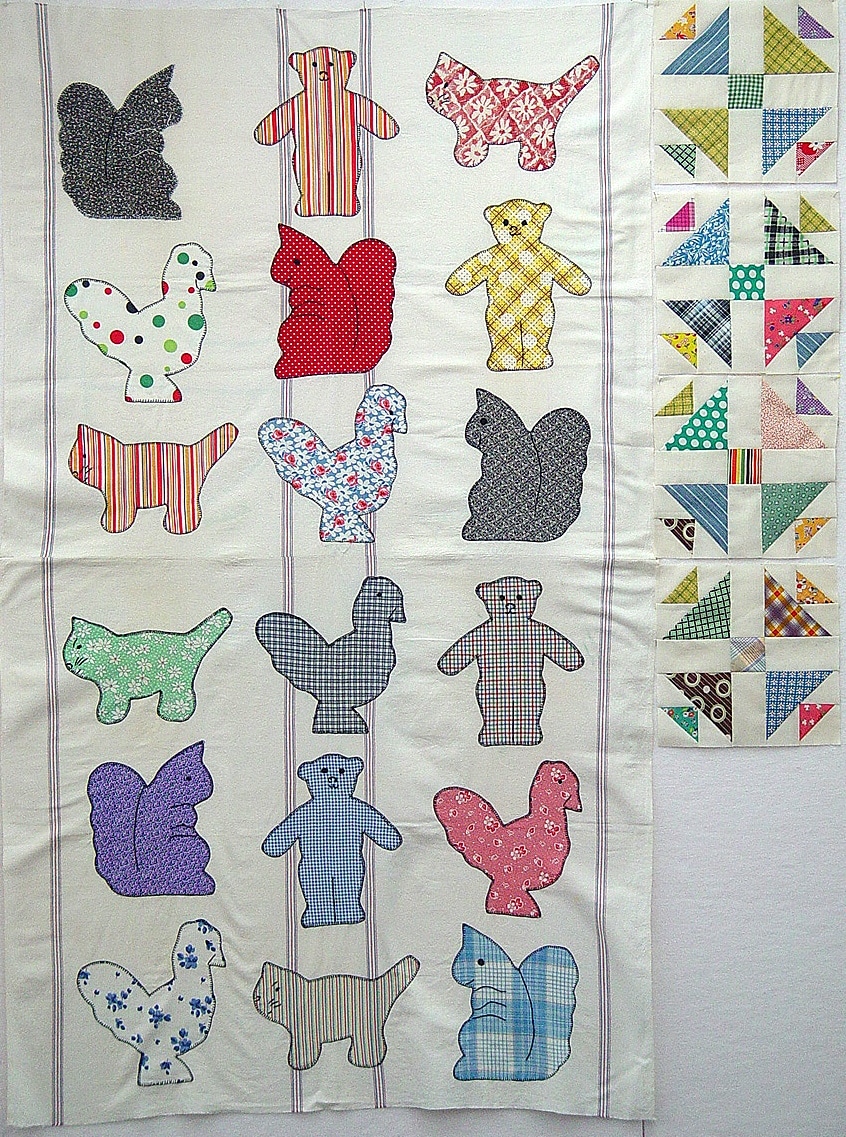
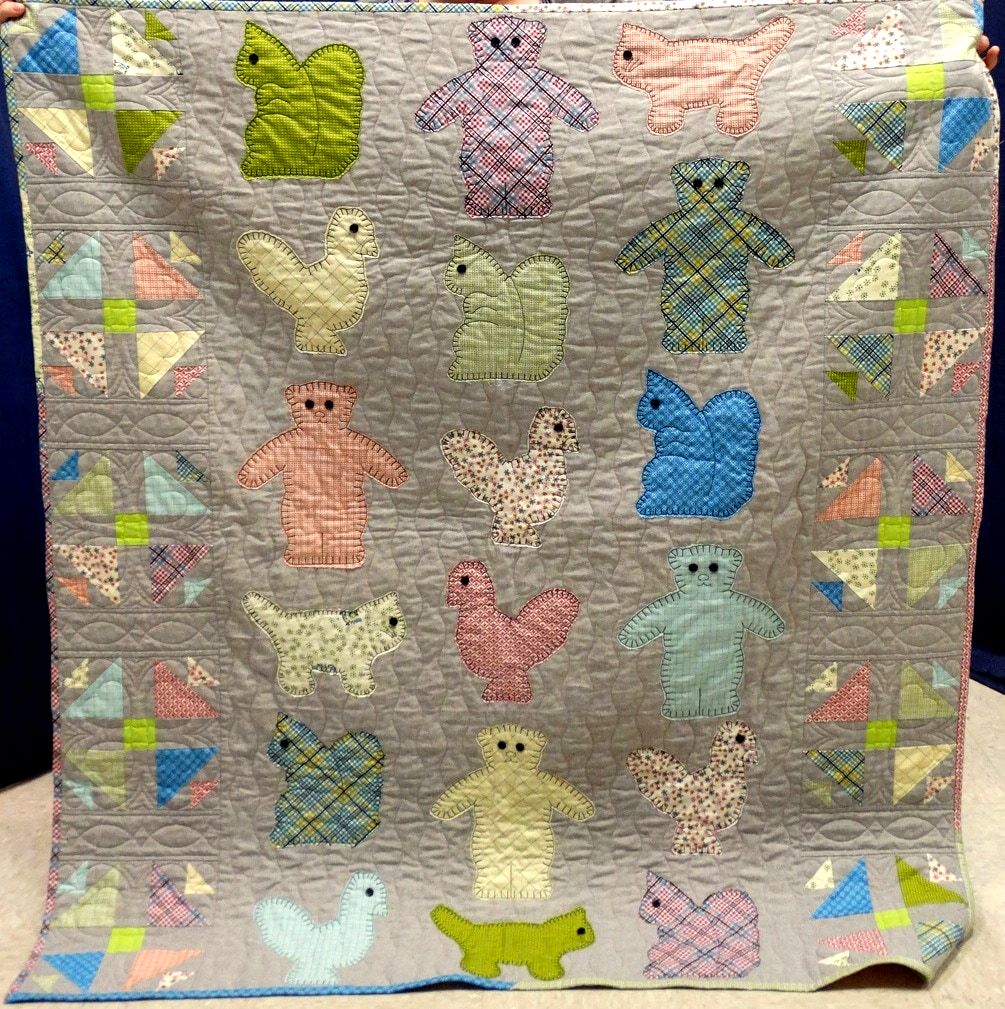
Cookie Cutter Quilt
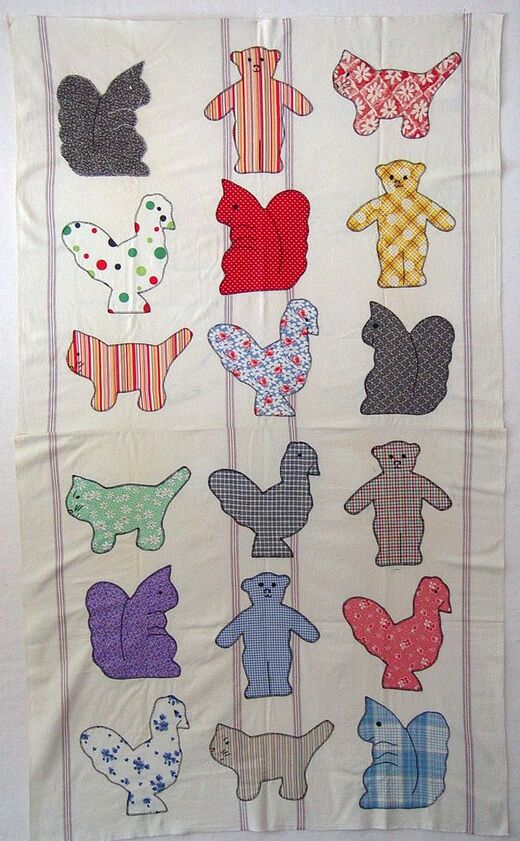
The original top with animal appliques.
I think these animals look like they were inspired by cookie cutter shpaes, although some of them are 8"-10" in size. They were appliqued with a hand blanket stitch onto 100 lb sugar sack. A look at the printing (on the inside of the quilt) shows a bridge logo and the words Cane Sugar refined by Arbuckle Bros, New York, N.Y.
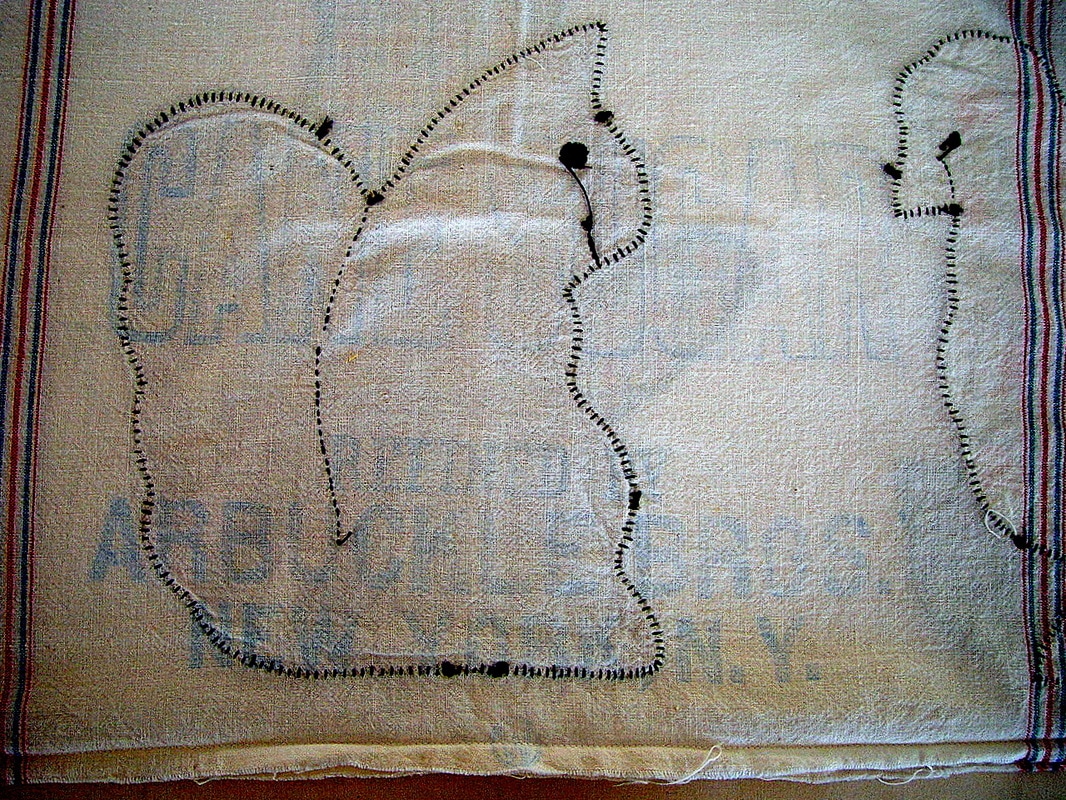
Sugar sack was turned over so the printing would be hidden on the inside
of the quilt. |

Very nice embroidery for both applique and detail stitching. Most fabrics are geometric prints rather than florals.
|
I thought the quilt top could use something to bring it out to better proportions, so I drafted this Hens and Chicks block to coordinate with the animal theme.

|
|
|
10" block, drafted on graph paper.
|
Then, to the stash to find prints and plaids that would work well with the applique fabrics.
|
No worry about matching colors; scrappy was the way to go with the blocks for this quilt.
|
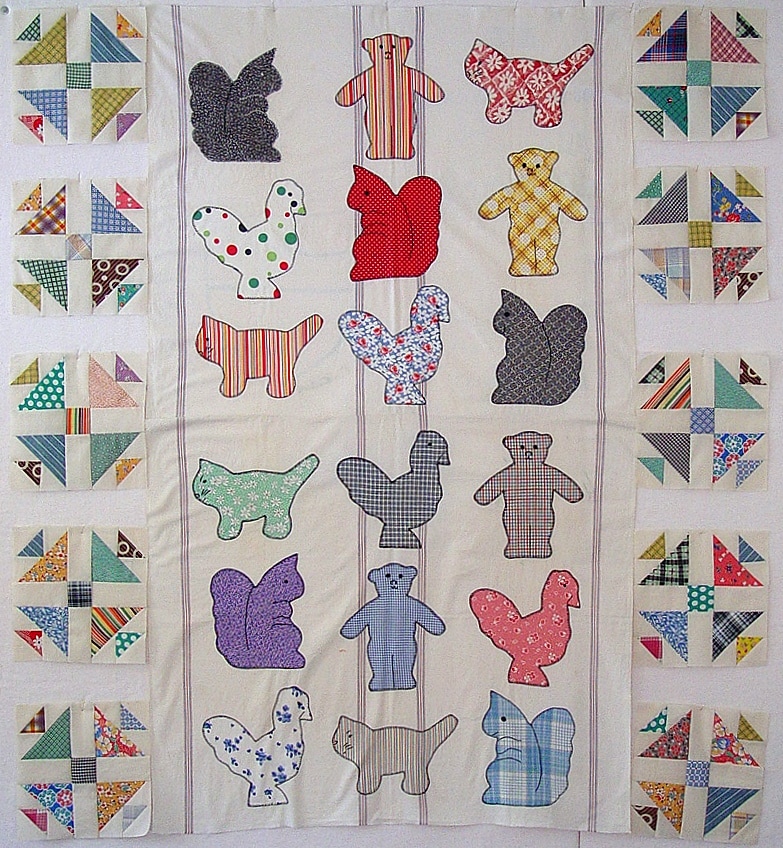
After the blocks were made I needed to measure and find what was needed for sashing to make the length come out even.
|

Here's the finished quilt - original center, scrappy patchwork, and muslin sashes. I quilted the blocks with my Statler Stitcher and quilted freemotion behind the appliques.
This is one of the most popular quilts in my Quilt Rescue trunk show.
This is one of the most popular quilts in my Quilt Rescue trunk show.
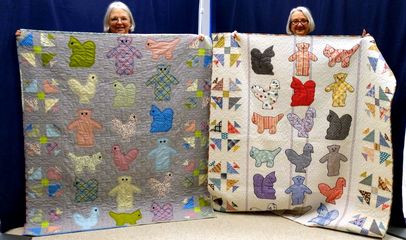
Kathy O. asked me to make a pattern for the Cookie Cutter quilt. We got to show them both at Show and Tell during our recent Southern Belle retreat.
|
|
For traditional applique and patchwork, buy the pattern here:
www.anitashackelford.net/books-and-patterns.html
For applique with the Statler Stitcher:
www.anitashackelford.net/statler-projects.html
www.anitashackelford.net/books-and-patterns.html
For applique with the Statler Stitcher:
www.anitashackelford.net/statler-projects.html
One Thing Leads to Another
1923 Bluework Embroidery Quilt
Sometimes, what looks like a simple project requires many more steps, depending on how far you want to take it.
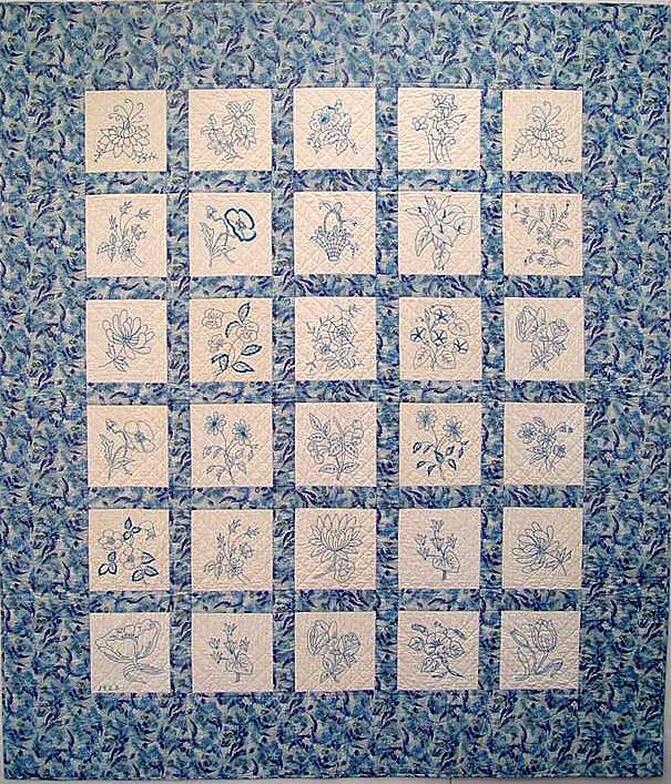
I'm sorry I don't have the before photo of this piece to show to you. It was a tied comforter; blocks set with a solid 1920s blue. The problem was that it had been washed and the batting was pulled into big lumpy cotton balls. The embroidery is beautifully done and dated 1923, so I though it was worth saving.
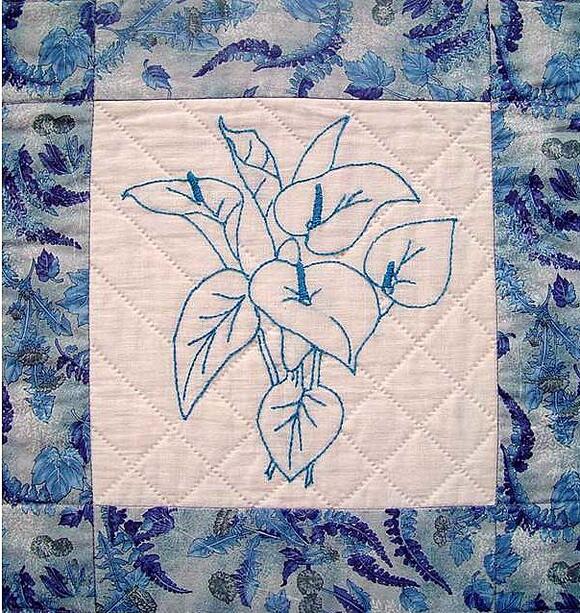
I thought I would simply take out the ties, put in a new batt, and re-tie it. But the blue fabric was faded and I thought it deserved something fresher. After taking it all apart, I found that the blocks varied in size by as much as 3/4" in either direction. I trimmed them all to the same size and reset them with new fabric, The extra work gave me a beautiful, flat, square quilt top to quilt. Definitely worth it. It is machine pieced; hand and machine quilted.
The Quilting
Many people will argue that antique tops should only be hand quilted. Will you invest the time to do that? Or might it be OK to machine quilt an old top? This topic is the one that always brings the strongest opinions. I've done both and have always been happy with the results.
How important is it to quilt in a style appropriate to the period of the piece? Should we use a traditional thread color, an invisible thread, for an antique look, or can we step away from tradition and allow the thread to make its own contemporary statement? Again, I have done both, depending on the piece. I hope you'll take a look at the quilting style as part of these rescued quilts and see what you think works or doesn't work.
How important is it to quilt in a style appropriate to the period of the piece? Should we use a traditional thread color, an invisible thread, for an antique look, or can we step away from tradition and allow the thread to make its own contemporary statement? Again, I have done both, depending on the piece. I hope you'll take a look at the quilting style as part of these rescued quilts and see what you think works or doesn't work.
19th Century quilting might include straight line (single, double, triple), grid, hanging diamonds, cables, feathers, fans, and clamshells.
|
|
|
|
20th Century quilts would more likely be quilted by the piece, and include echoes around applique, feathers, flowers, and ribbons.
Late 19th Century Churn Dash
A friend of my mother gave me these little Churn Dash blocks because she knew I might be interested in them. They are turn of the century and hand pieced.
|

|
I found a dark blue print that was a close match and a gray that I thought looked like a mourning print from the same period. Using the correct fabrics is important if you want to maintain a vintage look.
Butterflies on Sugar Sacks
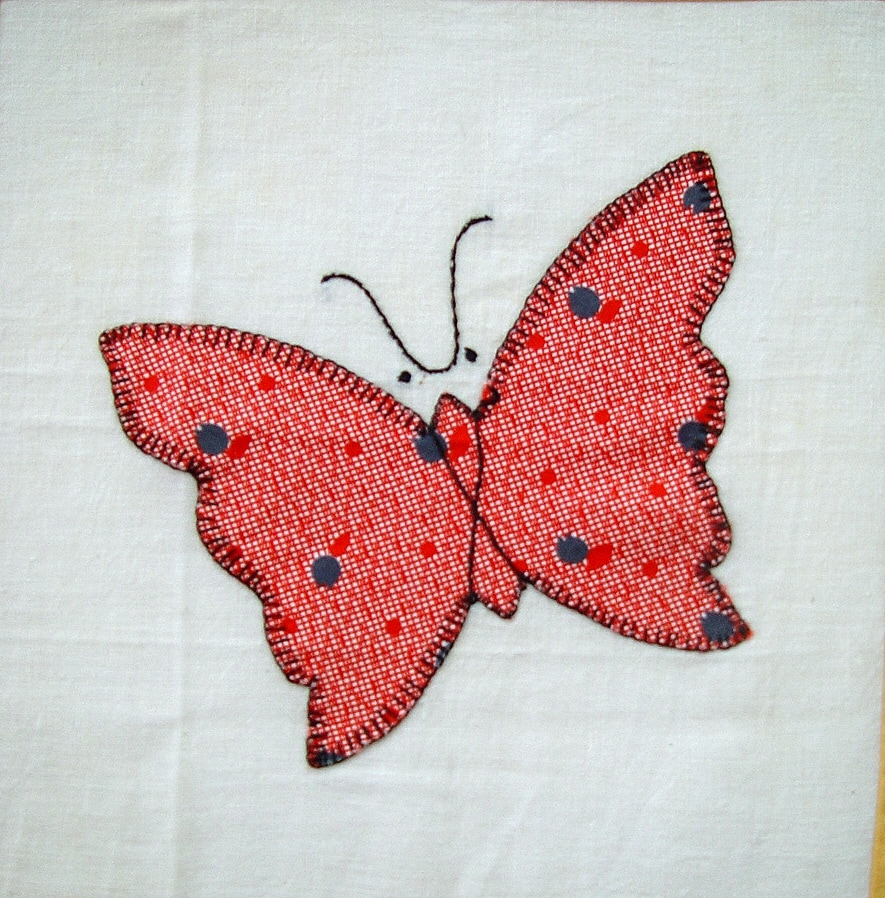
I bought 9 little butterfly blocks at an antique store in Paducah more than 20 years ago. Cute pattern and nicely stitched.
|
Even more interesting to me was the printing that was still visible on the sugar sacks that had been used as background blocks.
|
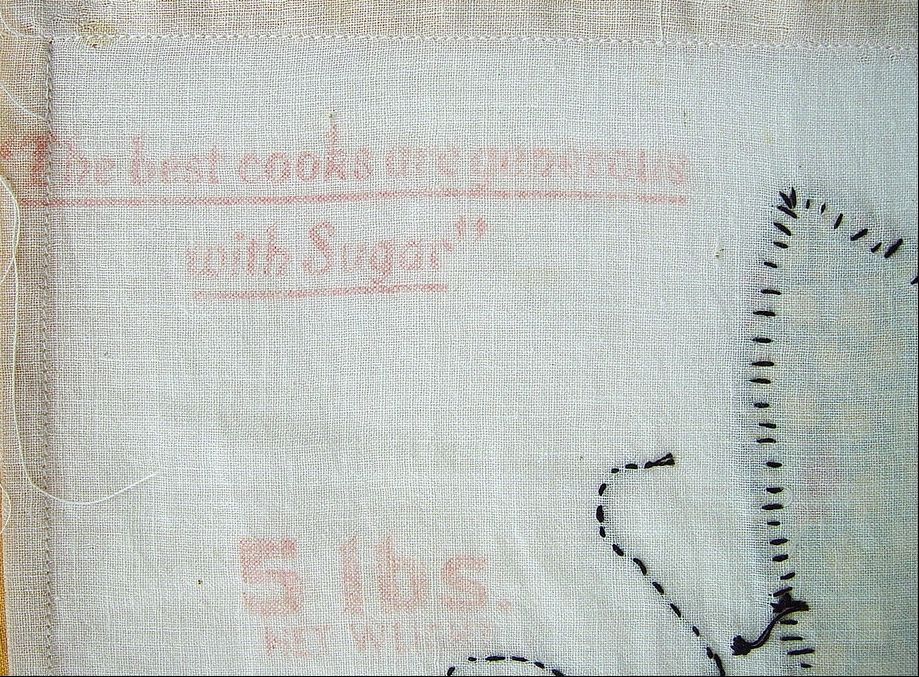
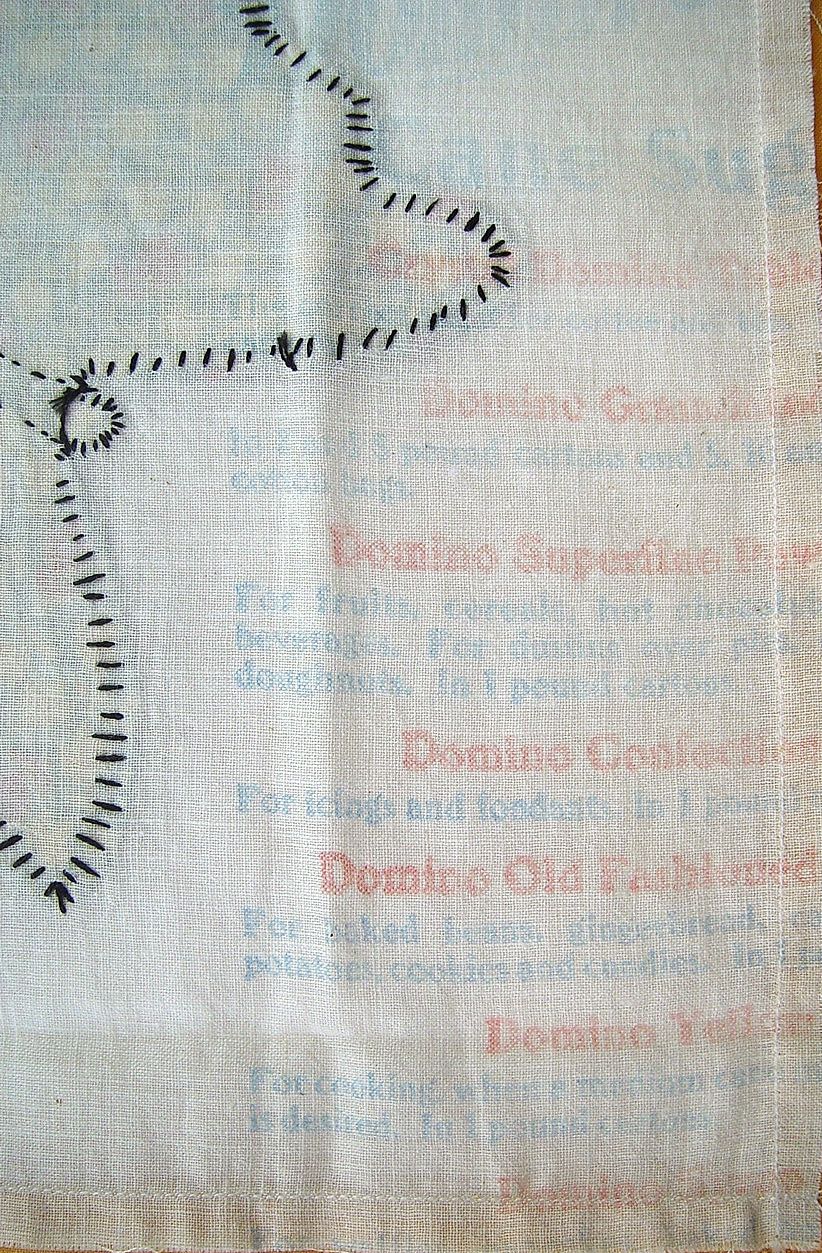
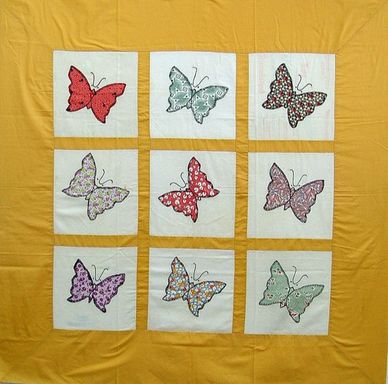
I set the blocks together with this solid yellow, but I have not quilted it because I think the real value in this piece is being able to see the sugar advertising.
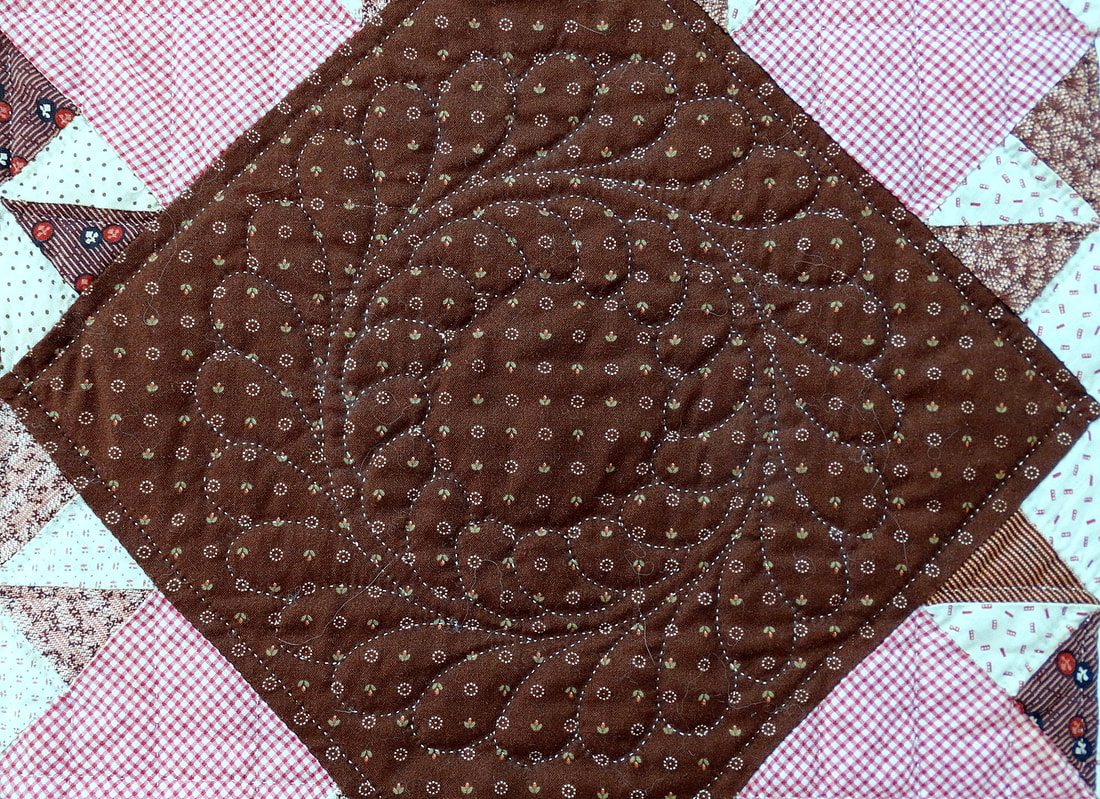
Pinwheel Blocks in Nine Patch setting
Finding a set of finished blocks, ready to put together, is another good way
to get into a Quilt Rescue Project.
to get into a Quilt Rescue Project.
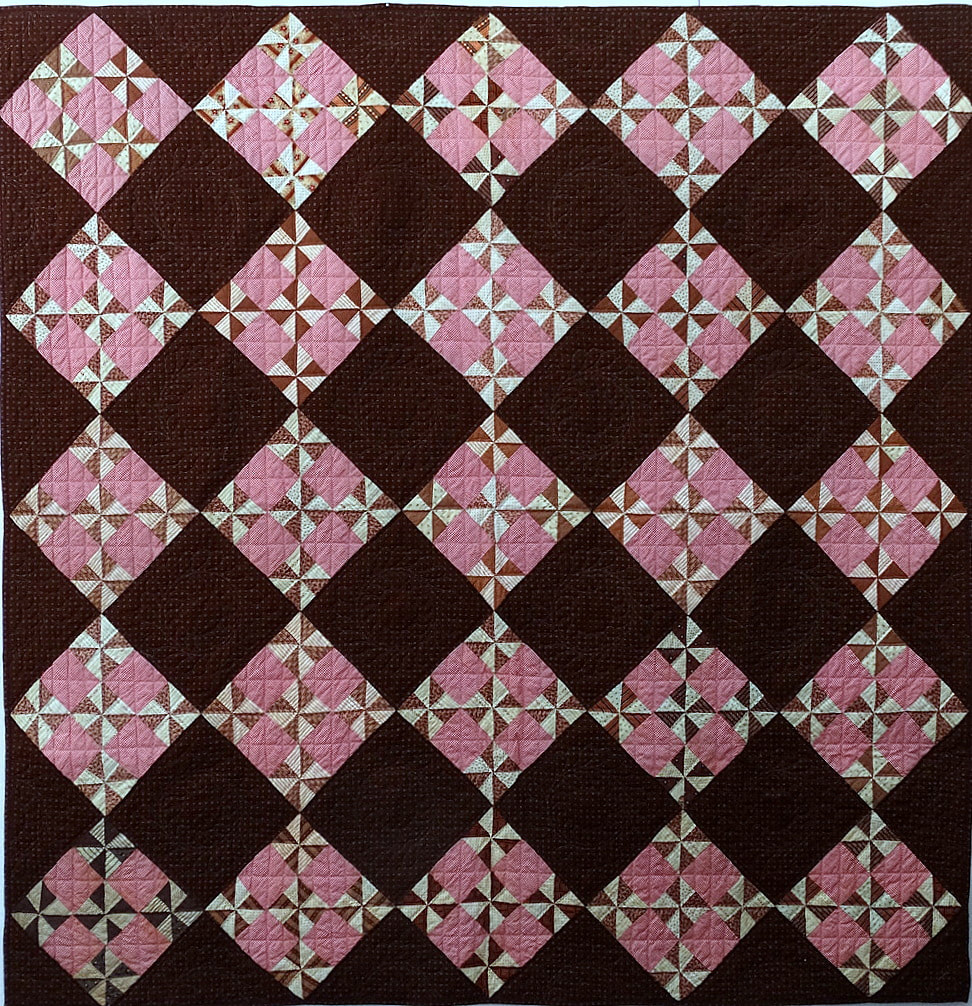
|
I found this set of 25 pinwheel blocks at a garage sale in 1986. I set them together with the dark brown print and quilted it in traditional 19th century style with grid lines and feather wreaths.
|
|
Getting Started
Quilting a completed top is a good way to get started.
Quilting a completed top is a good way to get started.
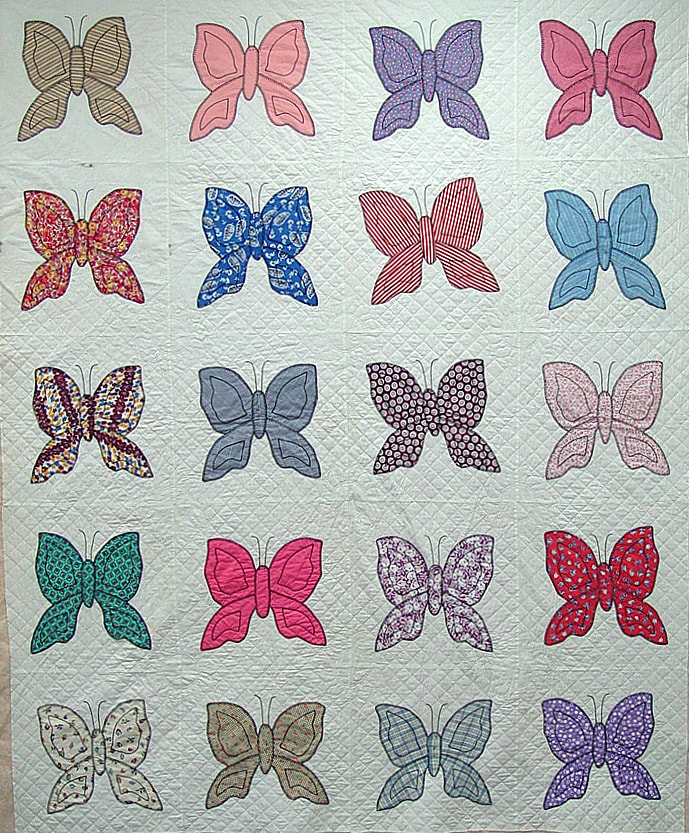
These big 1930s butterflies seemed like an easy one. I bought the appliqued top and marked it for hand quilting.

|
The only issue I had was that the blocks were not square and so my grid did not run true through the intersections. Dropping a sunflower motif there not only added interest, but it camouflaged the irregularities. Win - Win :)
|
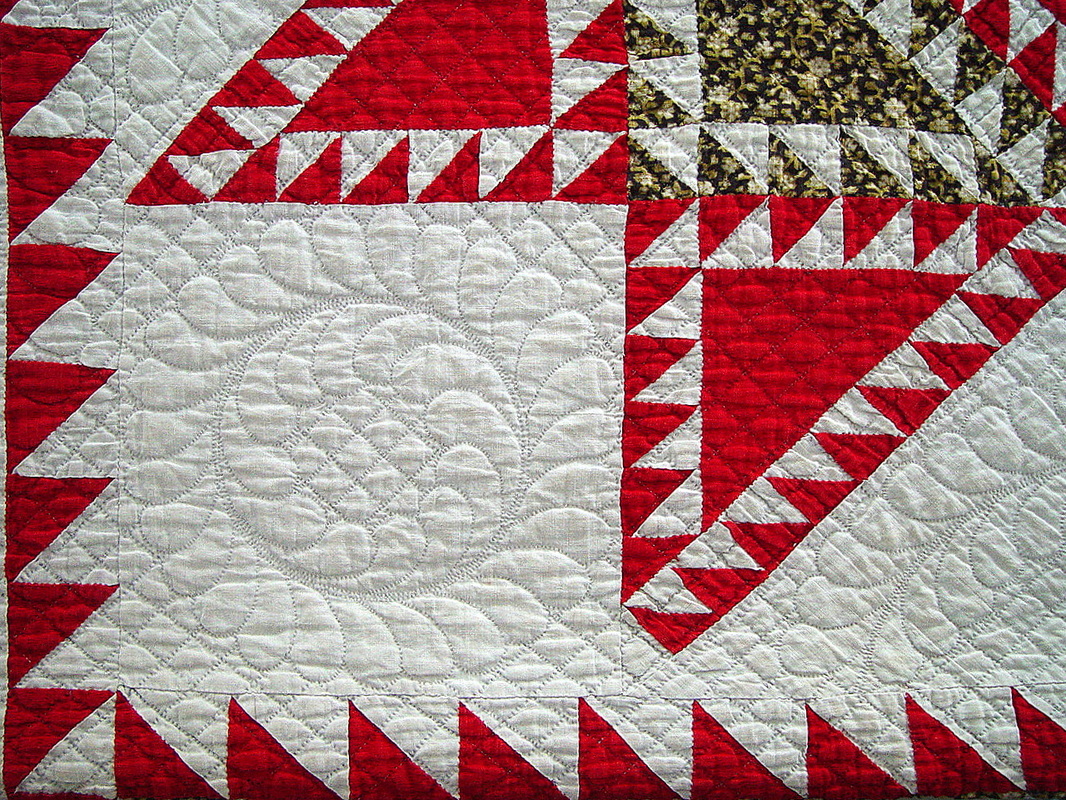
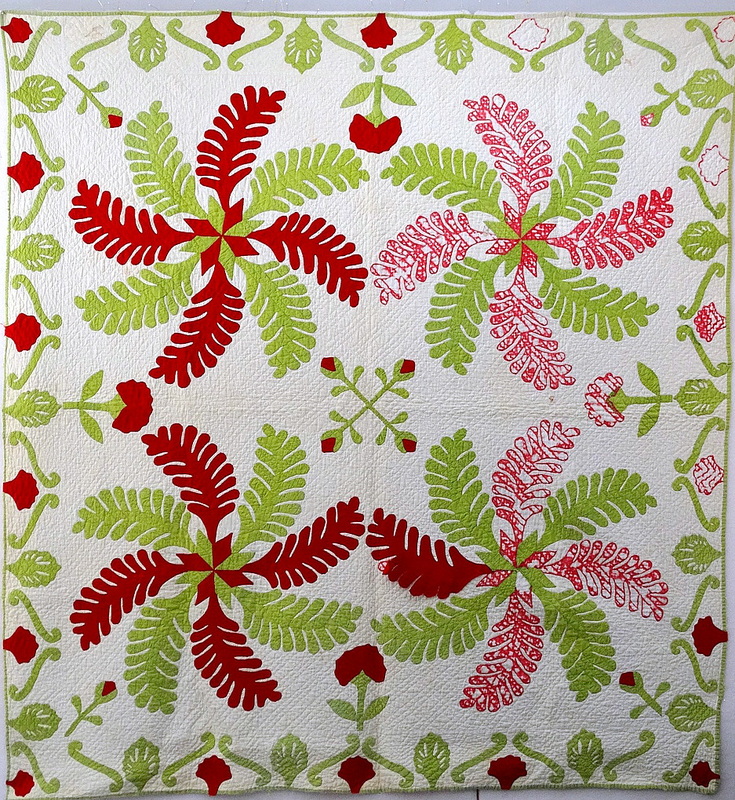
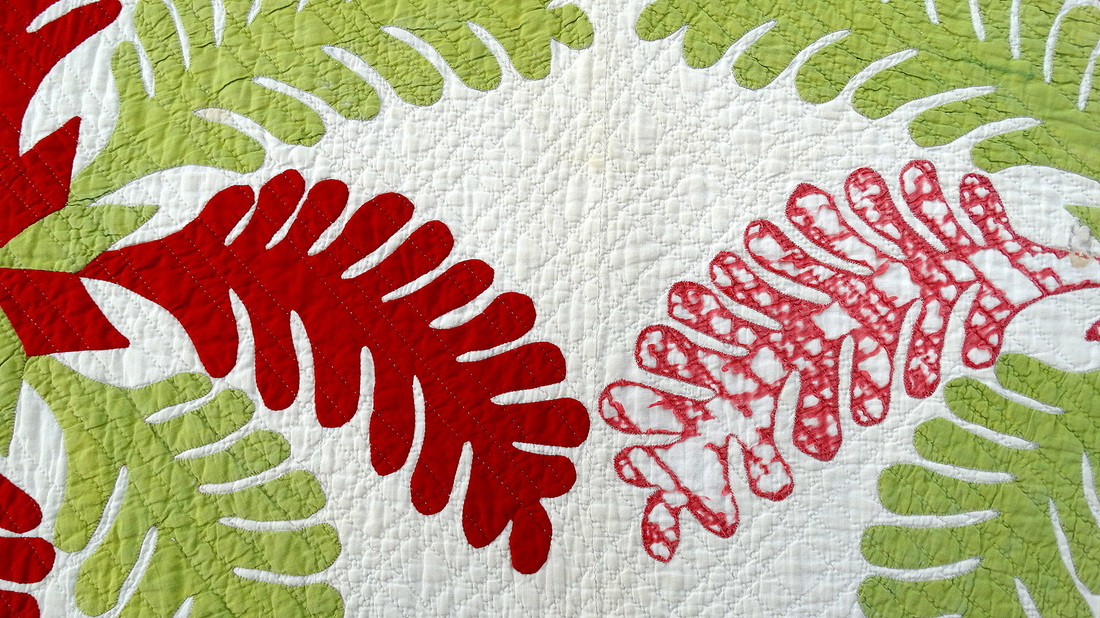
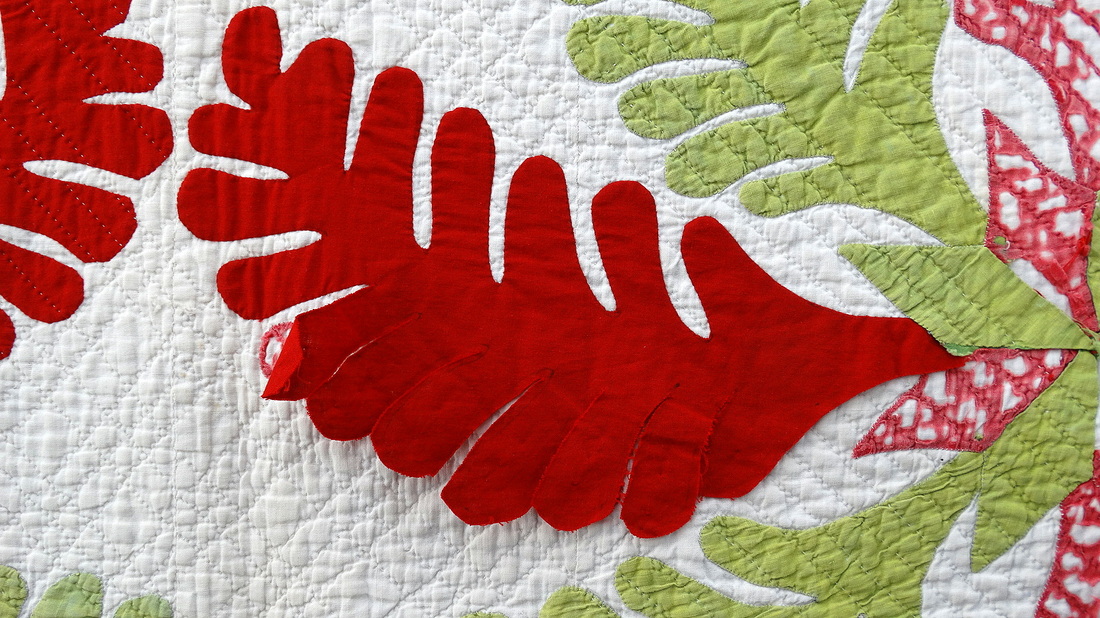
Princess Feather
As I was thinking about how many antique quilts I've rescued or where to start writing about this adventure, I remembered this mid 19th century Princess Feather in the closet. As it turns out, this is the earliest rescue quilt I have documented. It seems like an ambitious first project, but I remember that it was very rewarding to work on.
I found this quilt at a fairgrounds flea market in 1984. As you will see, the applique was in very bad condition. The price was $25. I also remember that the seller wanted to know what I was going to do with it. She said if I was going to cut it up, she wouldn't sell it to me. I said, "I think I can save it..."
The body of the quilt, and the quilting stitches were in tact and the green applique fabric was faded, but still strong in most places. The red fabric had deteriorated, with only shreds of it remaining where the quilting lines held it in place.
I did not remove the red appliques. I traced each piece, one at a time, to make templates, and appliqued over top of the originals. Then I re-quilted, following the original lines, but not quilting through the back, so the maker's stitches are the only ones showing there.
This quilt has been shown several times, as part of my Red & Green collection. Some have asked why it's not finished after all these years. My reply is that it's a better teaching sample unfinished. But, now i wonder...should I continue?
|
|