Borders
I love quilts with borders. For me, borders add a frame to wall quilts and add the perfect finishing touch to traditional bed quilts.
On this page, you will find a variety of styles and sizes to fit almost any need. Take some time to look through all of the choices and see what will complement the style of quilt you are ready to quilt.
Most have separate corner patterns. Others can be used in a butted, or log cabin style set up. There are also instructions on some for mitering or cropping the pattern so that it will turn the corner smoothly.
Enjoy,
Anita
Link to the Store is at the bottom of the page.
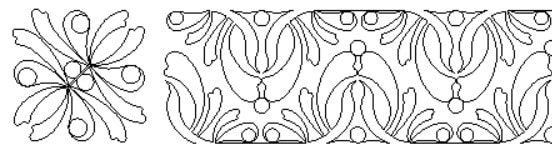
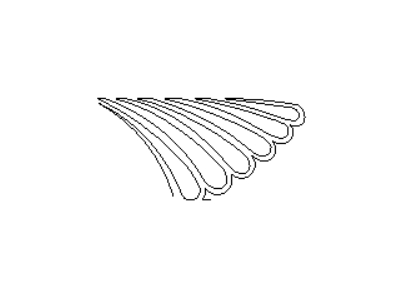
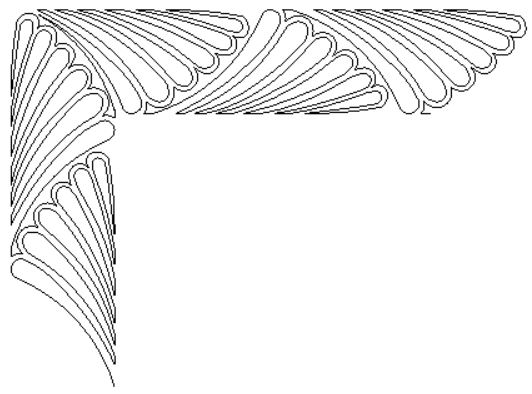
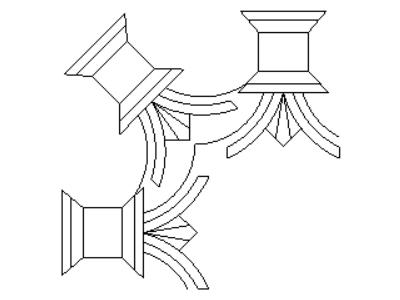
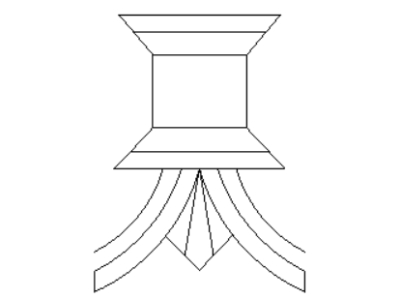
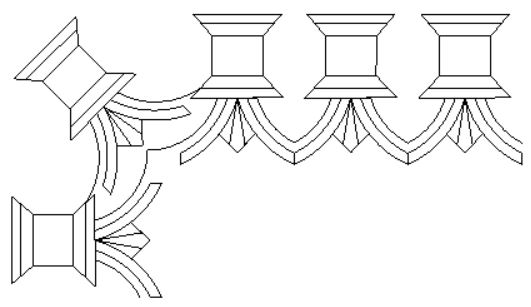
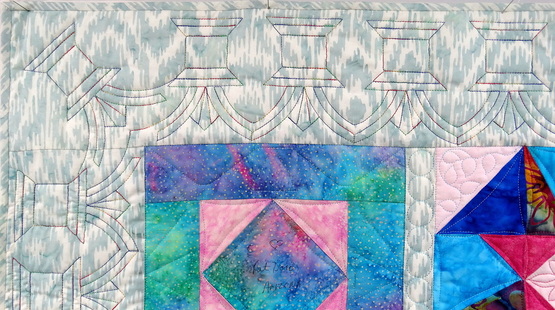
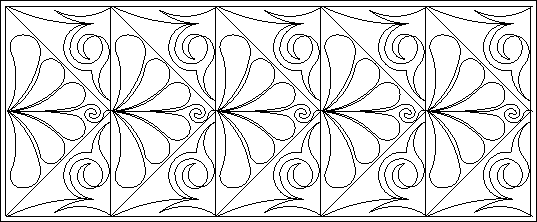
Amish Feathers

Amish Feathers Corner
Amish Feathers Base
|
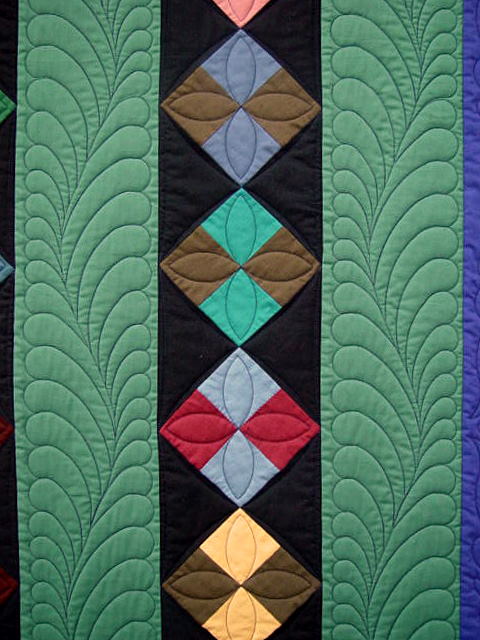
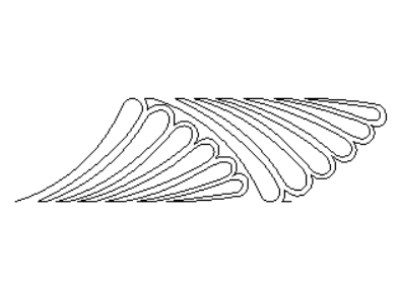
Amish Feathers Border
Amish Feathers Tip
|
Amish Feathers Collection available as a set.
Four patterns: Corner, Border, Base and Tip
Four patterns: Corner, Border, Base and Tip
Funky Feather Corner
|
Funky Feather Border
|

Feather and Star Corner

|

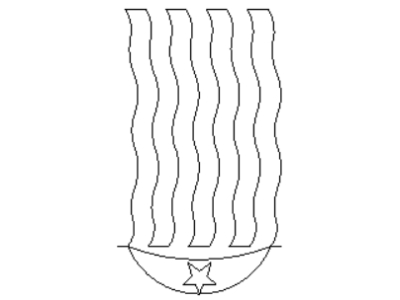
Feather and Star Border
|
Straight Feathered Corner
Straight Feathered Border
|
|
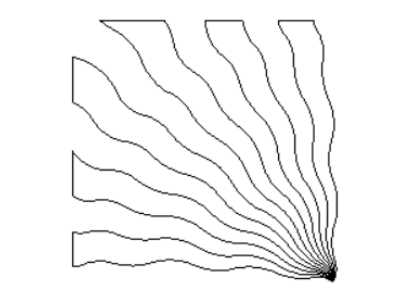
Piano Keys Corner
|
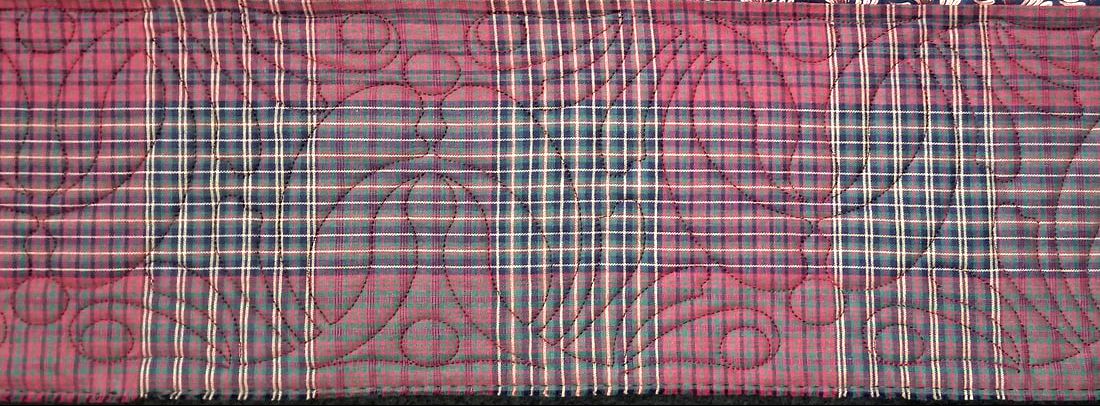
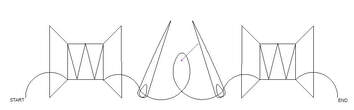
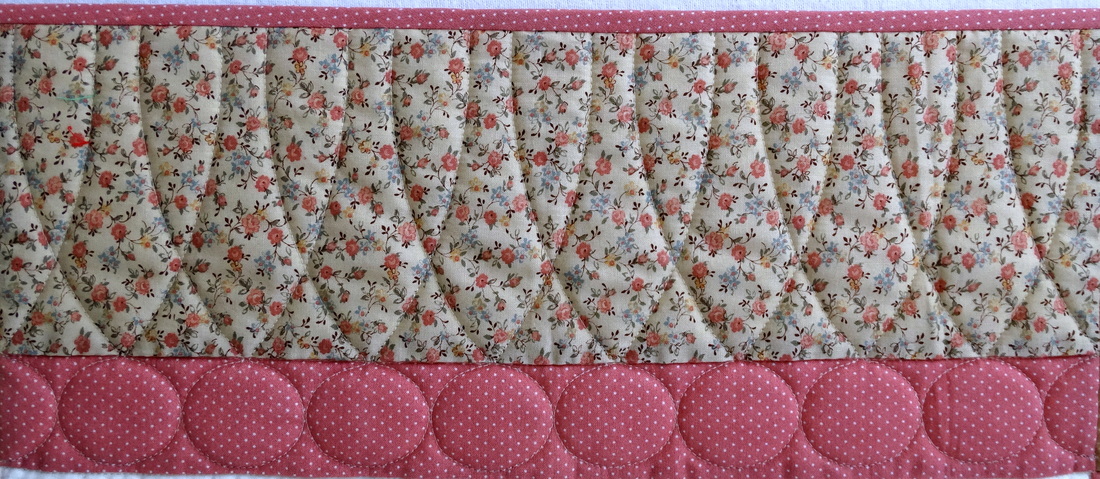
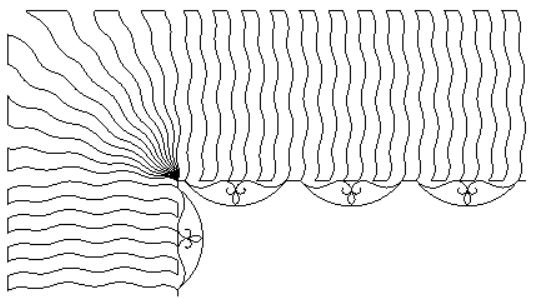
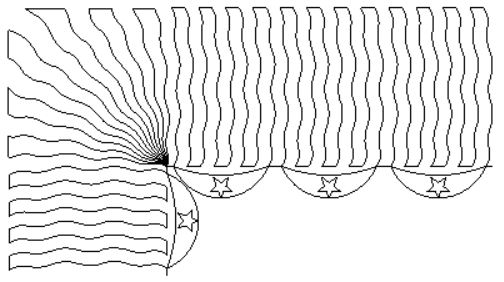
Feather Swag with Piano Keys
|

Sample: Feathered Swag with Corner
Please note: the pattern will overlap the piano key lines somewhat at
the beginning and end of each repeat in order to stitch continuously.
Be sure to uncheck Connect when using Border/Corner set up.
Please note: the pattern will overlap the piano key lines somewhat at
the beginning and end of each repeat in order to stitch continuously.
Be sure to uncheck Connect when using Border/Corner set up.
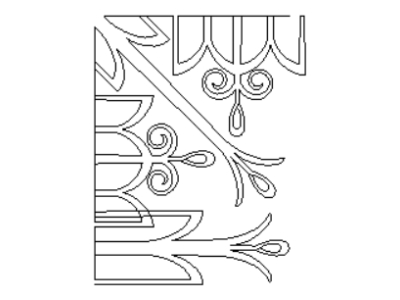
Leaf and Feather Double Border and Corner
Full border pattern is 8" x 82" or 8" x 98" when corners are included
Full border pattern is 8" x 82" or 8" x 98" when corners are included
Spool Border 1
3 1/4" x 13" |
Spool Border 2
3 1/4" x 14" |

Spool Borders can be used as border or E2E
|
|
|
Bars and Bubbles Border and Corner Default size 6" H
|
|
|
Braided Feathers and Corner Default size 8" H
|
|
|
Deco Bars and Bubbles Default size 7" H
|
|
|
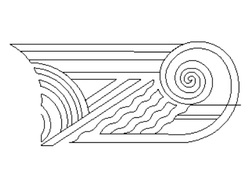
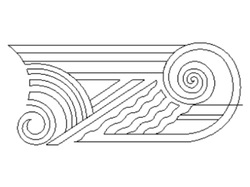
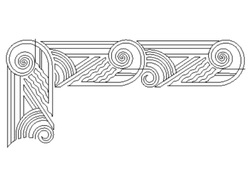
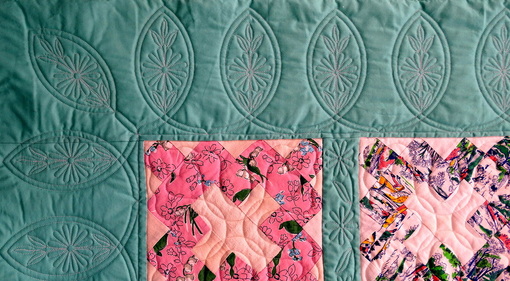
Deco Curls Border and Corner Default size 10" H
Please note: This corner pattern has a no-sew line from the corner to help position it correctly. It also does not connect to the border pattern to stitch continuously. Set the corner patterns first, then add border patterns to fit and fill the length of the border. The left side border pattern is shown to demo placement, but it will be too long to stitch between the bars. You will need to turn the quilt to quilt the two side borders.
|

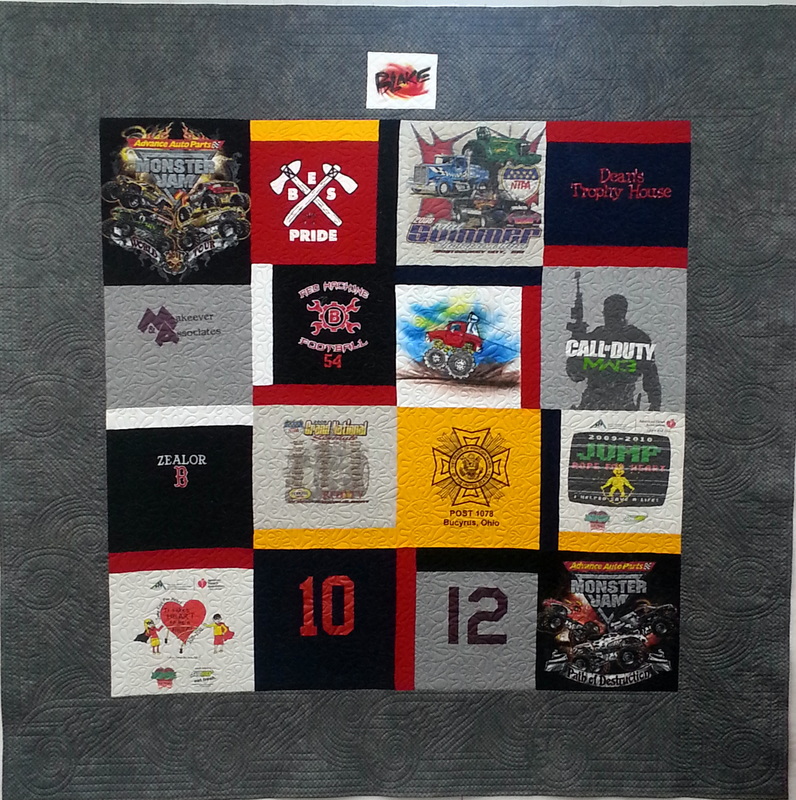
I thought this border worked especially well with the monster truck motifs in this quilt.
|
|
|
|
Deco Spools Border and Corner Default size 6" H
Please note: This corner pattern does not connect to the border pattern to stitch continuously.
Set the corner patterns first, then add border patterns to fit and fill the length of the border. Set the sew order to stitch all of the patterns continuously.
Set the corner patterns first, then add border patterns to fit and fill the length of the border. Set the sew order to stitch all of the patterns continuously.
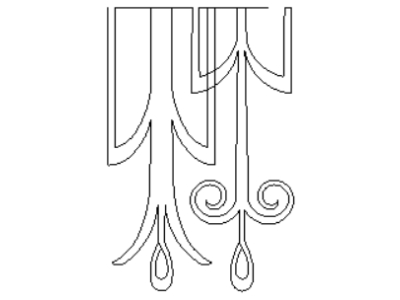
Filigree Border and Corner Default size 12" H
|
|

|
The next four borders can be used in wide borders. Or, use Apply to position the P2P patterns along the seam line between a narrow border and a wide outer border at the same time. Size the small motif to fit the inner border. Larger motif can be cropped along the binding edge to fit the quilt.
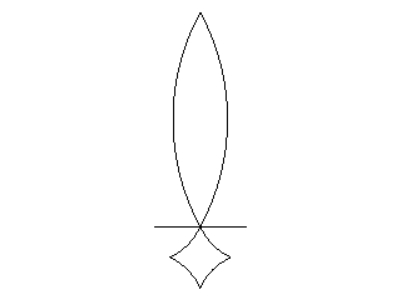
Double Border with Diamonds Default size 9" H
If Diamond is sized to 2", Leaf is 10"
If Diamond is sized to 2", Leaf is 10"
|
|
|
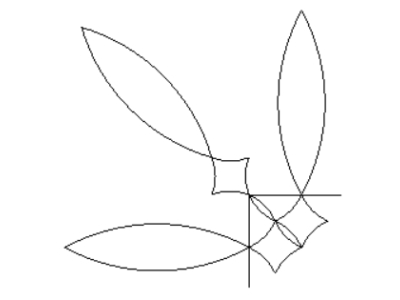
Olive and Leaf Border and Corner Default size 12" H Olive 2", Leaf 10"
|
|
|
|

|
|
Ripples and Curl Swag Default size 12" H Swag 2", Ripples 10"

|
|
|
Ripples and Star Swag
These patterns fill part or most of a border and would
look beautiful with a Fill Border pattern behind them.
look beautiful with a Fill Border pattern behind them.
Rope Swag Border with Fill Border Triple Line Diagonal behind it.
Rope Swag Border and Corner Default size 6" H
|
|
|
Diamond Swag Border and Corner Default 6" H
|
|
|

Pearl Swag Border and Corner Default size 6" H
|
|
|
Channel Swag with Beads Border and Corner Default size 6" H
|
|
Skinny Swag Border and Corner Default size 3" H

|
|
|
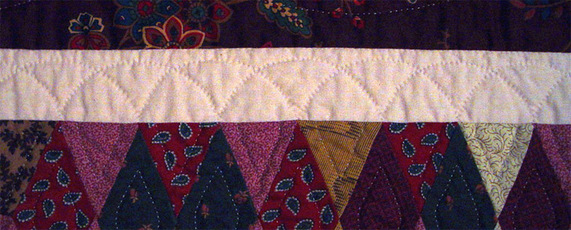
Tear Drop Swag Border and Corner Default size 4 3/4" H
|
|
|
Pleated Swag and Tassel Border and Corner Default size 4 3/4" H
|
|
|
Formal Swag with Leaves Border and Corner Default size 6" H
|
|
|
|
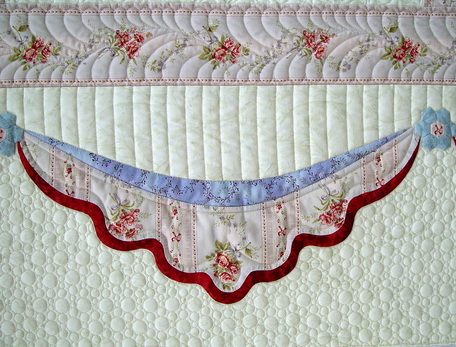
Swag with Pearls Border
and 2 Corners Default size 10" H 
|
There are two corner options with this border,
for slightly different looks. The edge of the quilt could be left straight, or it could be trimmed to follow the shape of the quilting lines. |

Here are some Border Patterns that hug the seam line.
Choose any Fill Border pattern to fill the background space.
Choose any Fill Border pattern to fill the background space.
|
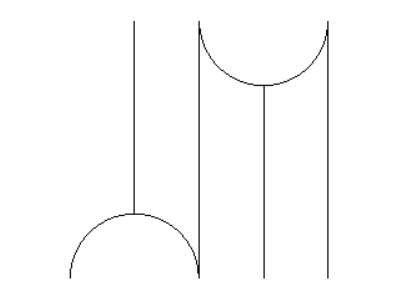
Clamshell Border
Default size 4 1/2" H 

|
Example of the Clamshell Border with
Fill Border Dew Drops Curved behind it. |
|
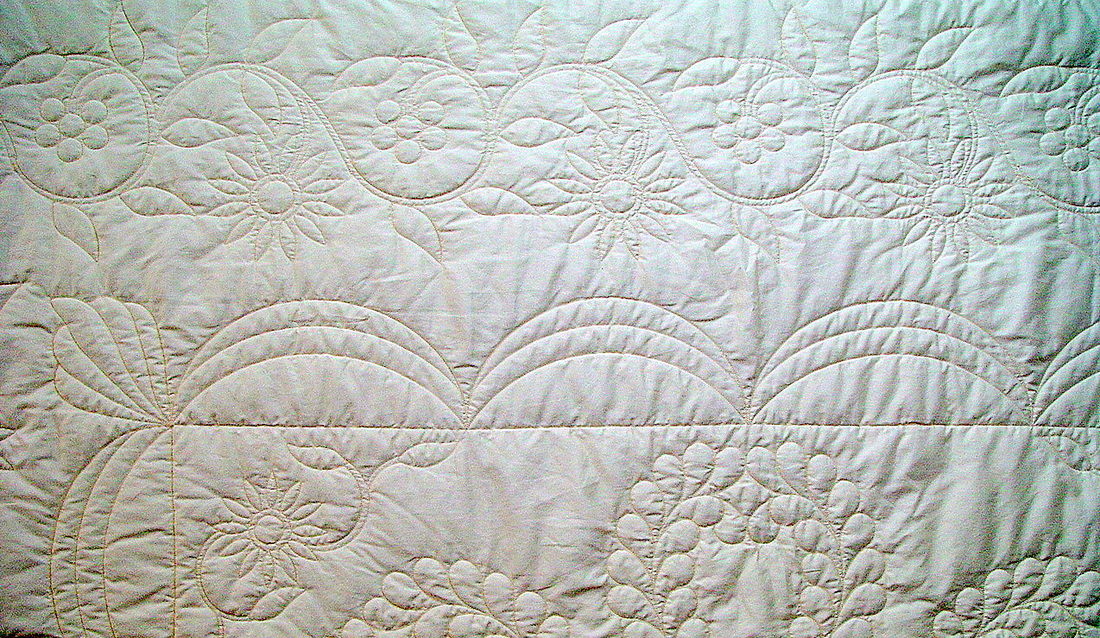
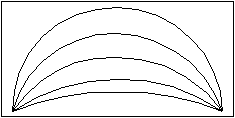
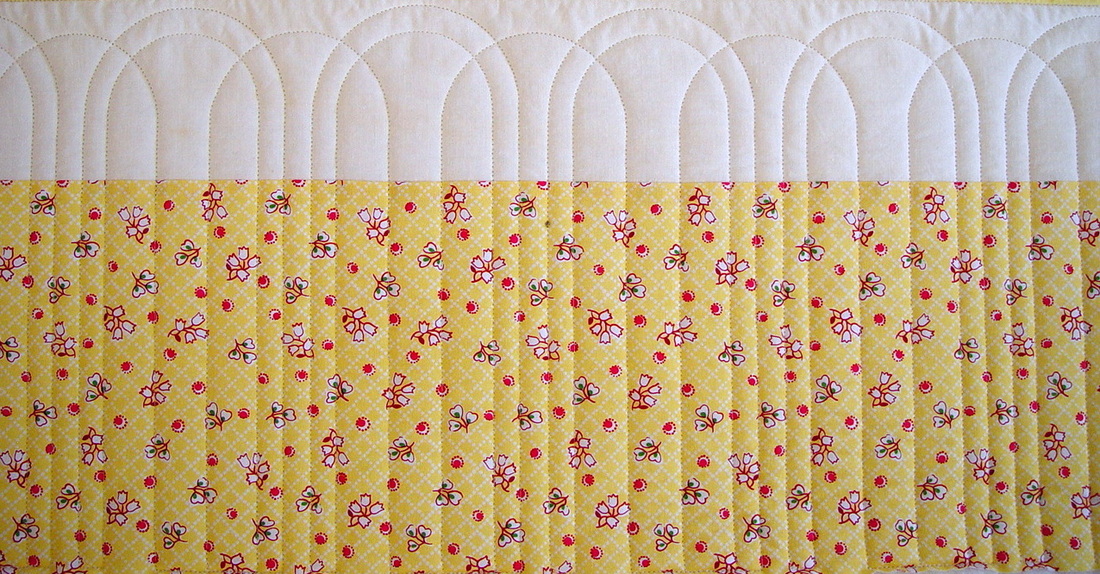
Arches Border
Default size 3 1/2" H 
|


Example of the Arches Border with
Fill Border Mirrored 2 behind it. |
|
Triangle Channel with Swirls Border
Default size 6 1/2" H 
|
Example of the Triangle Channel
with Swirls Border with Fill Border Modern Lines behind it. |
Border patterns that run along the center of the border
space can use a Fill Border pattern above and below.
space can use a Fill Border pattern above and below.
Feather Quill Border and Corner Default size 6" H
|
|
|
|
Note: because of the stitching path
of this corner pattern, it will not endsnap to both borders. Simply position the patterns close together and CS will continue to stitch. |
Example of the Feather Quill Border with Fill Border Diamonds behind it.
Diamond and Flower Border and Corner Default size 11" H
|
|
Note: because of the stitching path of this corner pattern, it will not endsnap to both borders. Simply position the patterns close together and CS will continue to stitch.
|
Example of the Diamond and Flower Borderwith Fill Border Modern Lines behind it.
These Border patterns are designed to fit the full height of a border.
|
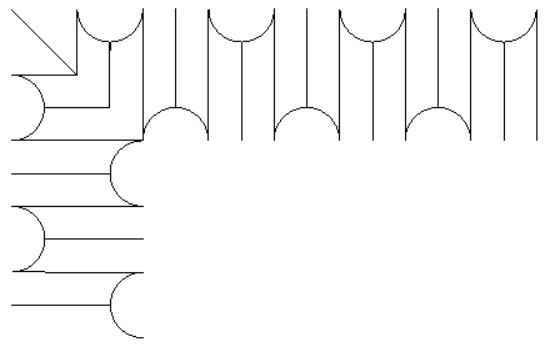
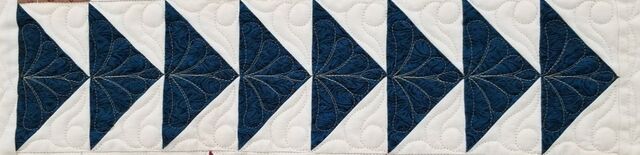
New Fan Border Default size 4" H

Here's a Modern take on the Baptist Fan pattern. Crop the beginning and end of the borders,as you like, to fit the corners.
|
|
|
Oyster Shell Border and Corner
|
|

Crystal Border and Corner Default size 5" H

|
|
|
Drop Leaf Border and Corner Default size 5" H
|
|
|
Loop and Daisy Border with 2 Corners Default size 6" H
|
Corner with Motif
to the outside 
|
Corner with motif
to the inside 
|
Shield Swag, Filled, Border and Corner Default size 5" H
|

Note: because of the complexity of this corner pattern, it will endsnap to only one border. Simply position the patterns close together and CS will continue to stitch.
|
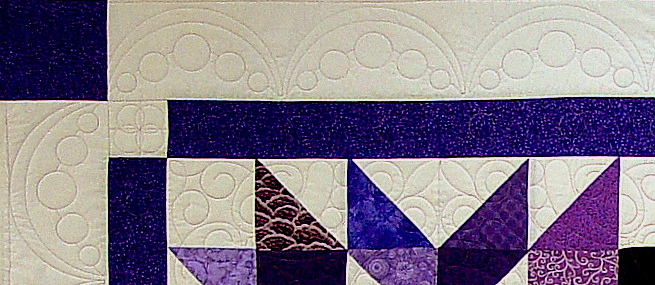
Patterns for Flying Geese Borders
Here are patterns to fit Flying Geese patchwork. The first 4 are Goose only,
the next 5 include a background pattern, and the last 2 pictures are examples of
Geese with Joyce Lundrigan's HST in the backgrounds.
Here are patterns to fit Flying Geese patchwork. The first 4 are Goose only,
the next 5 include a background pattern, and the last 2 pictures are examples of
Geese with Joyce Lundrigan's HST in the backgrounds.
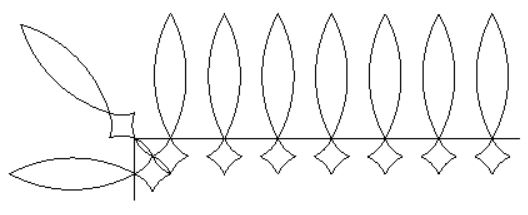
Flying Geese Feather
|
|
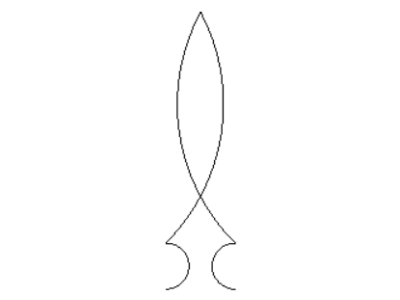
Flying Geese Bud
|
|
Flying Geese Feather and Swirl
|
|
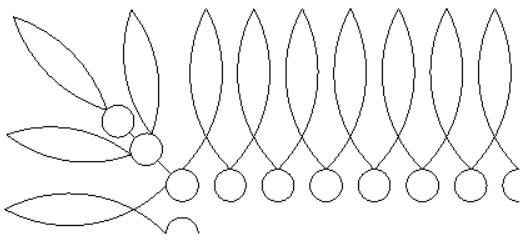
Flying Geese Feather and Pearl
|
|
Flying Geese Bud
and Ribbed Background |
|
Flying Geese Feather and Ribbon
|
|
Flying Geese Feather and Swirls
|
|
Flying Geese Feather
and Pearl with Lines |
|
Flying Geese Ribbed with Bubbles
|

|
Add a different background to Flying Geese
with any P2P Triangles
with any P2P Triangles

P2P Flying Geese in a Dutchman's Puzzle block
Background is P2P for Patchwork - Leaves
Background is P2P for Patchwork - Leaves
Borders that make their own corners
|
African Leaf Default size 4" H
|
|

|
Bud and Leaf Border
Default size 3" H 
|
|
|
Blocks Border
|
|
Simple Leaf and Flower Borders
|
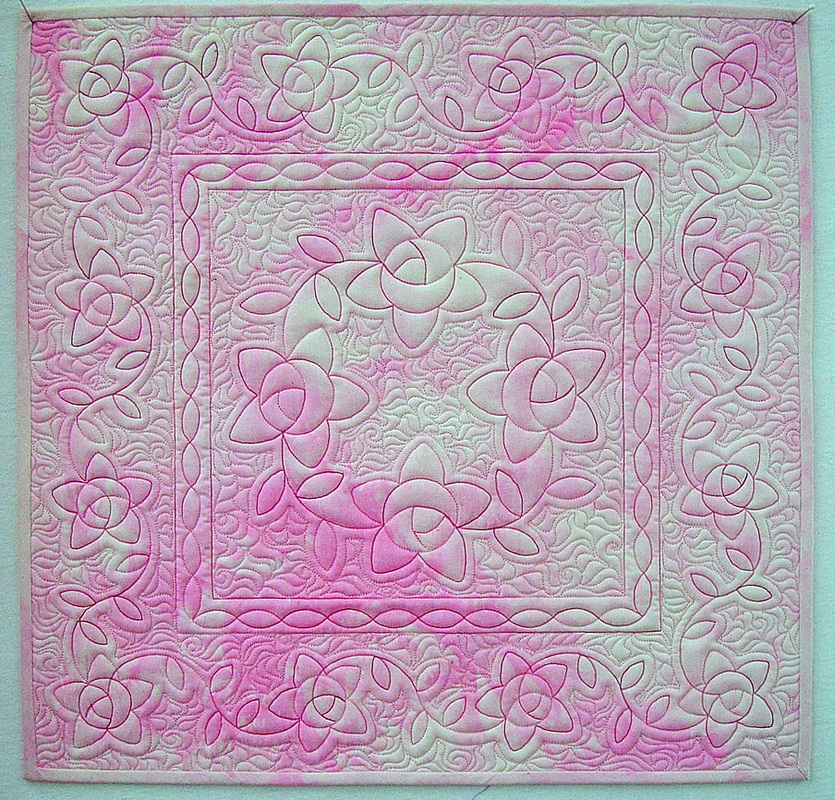
Cabbage Rose Border and Corner
Default size 4" H 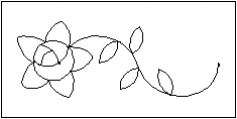
|
|
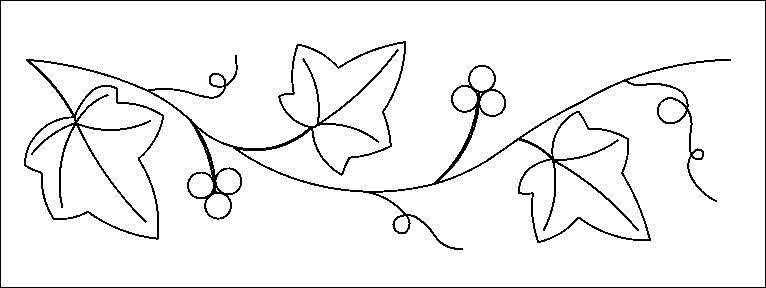
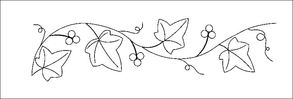
Ivy Vine Border and Corner Default size 4 3/4" H
|
|
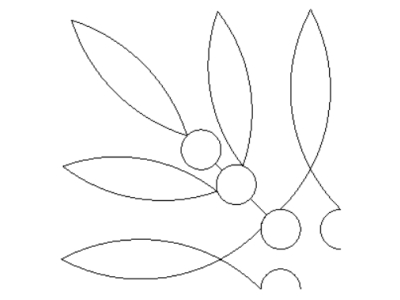
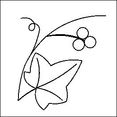
Ivy and Berries Border and Corner Suggested size 6" H
|
|
|
Holly Border and Corner Default size 4" H
|
|

|
Sweet William Border and Corner Default size 5" H
|
|

|

|
Heart Vine Border and Corner Default size 4" H
|
|
|
|
Oak Leaf Border Default size 6" H
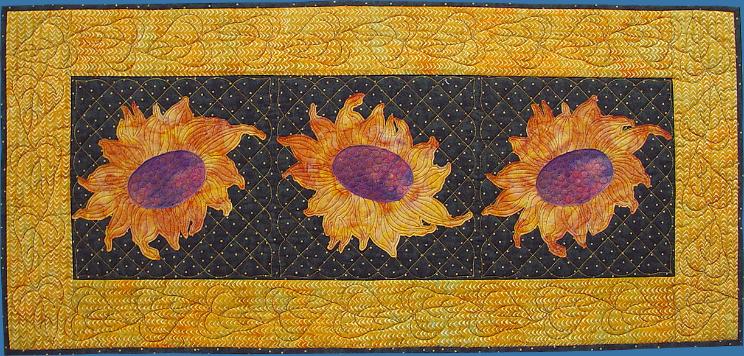
Complex Floral Borders
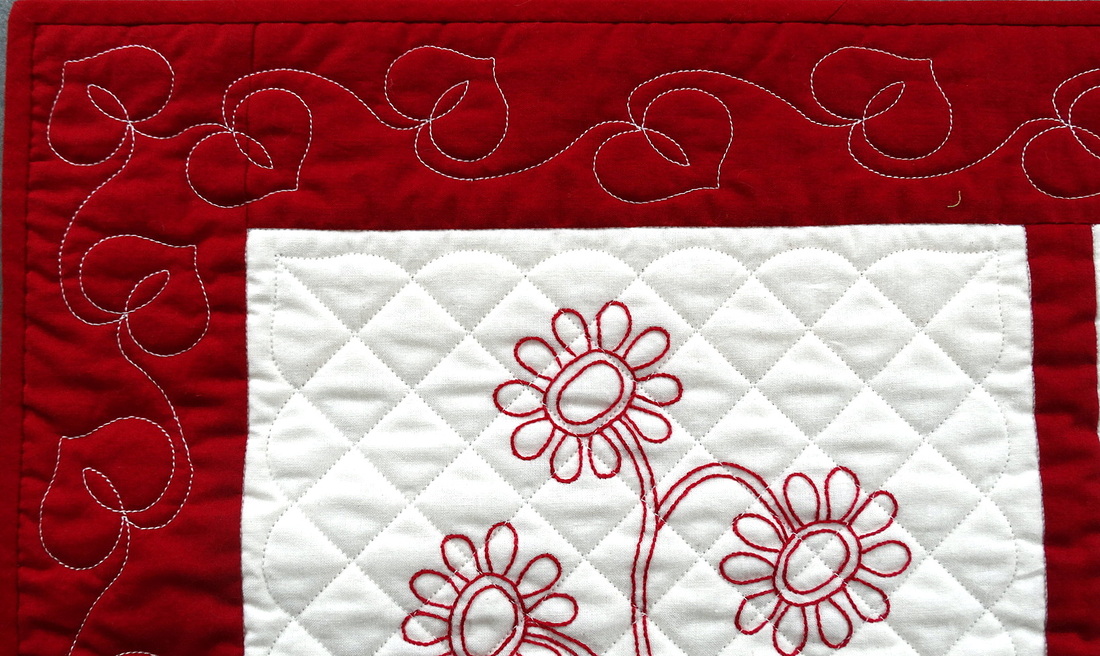
Sunflower Border and Corner Default size 9" H
|
|
|
|
Sunflower Leaf Border
Default size 6" H |
|
Daisy Border and Corner Default size 7 1/2" H
|
|

Daisy Border Straight
Suggested size 6" H 
Daisy Sash Default size 3" H
|
Daisy Sash Double Default size 3" H
|
Daisy Sash Triple Default size 3" H
Wildflower Border and Corner Default size 8 1/2" H
|
|
|
|
Retro Flower Border and Corner Default size 6 3/4" H

|
|
|
Fern Border and Corner Suggested size 8 - 10" H
|
|
|
|
Cables and Swags
|
Star Cable Border and Corner
Suggested size 4 - 6" H 
|
|
|
|
Almond Cable Suggested size 8 - 10" H
Almond Cable Border, Corner and End, Set of Three
|
Almond Cable Corner
|
Almond Cable Border
|
Almond Cable End
|
Border and End finish like this
|
Swag and Feather Plume Suggested size 8 - 10" H
Corner Plume
|
|
Swag
|

Swag Ruffled
|
Geometrics
Double Spiral Border and Corner Suggested size 4 - 6" H

|
|
|

|
P2P Swirl Border Suggested size 4 - 6" H
|
|
|
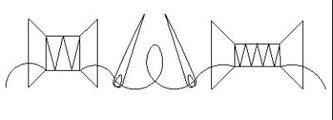
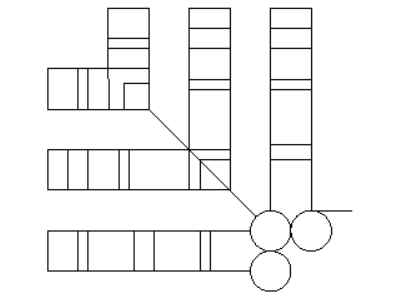
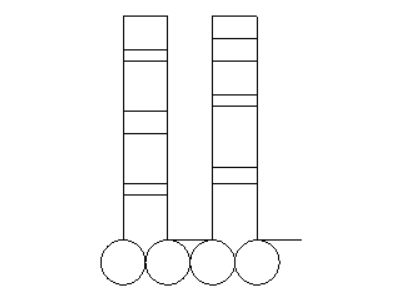
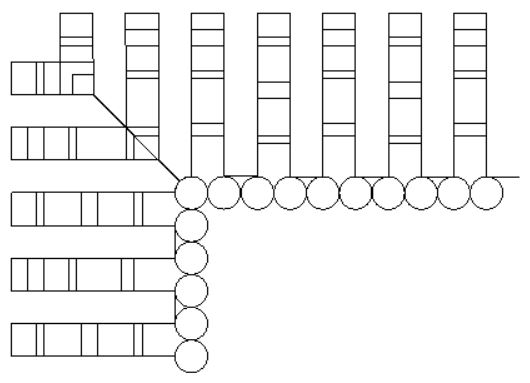
Hoopty Border
Suggested size 6 - 10" H 
Note: pattern is asymmetrical. To make the beginning and the end of the border repeats the same, use Divide to remove the single hoop on the end. Travel stitches run in the border seam or the binding edge.
|
Border repeats
Divide to remove single hoop.
Double hoop on both ends.
|
|
Cathedral Arch Border
Suggested size 2 - 4" H 
|
Cathedral Arch works well as a narrow
stop border between custom quilted blocks and a wide outer border. |