Anita Shackelford
Contact me  
  • Home
  • Digitized Patterns
  • Short Arm Patterns
  • Made by Hand - Books, Templates, Needles
  • Needles
  • For sale
  • Quilt Rescue
  • Statler Tutorials
  • Red and Green Quilts
  • Kids at Work
  • About Anita
  • Contact
  • What's New
  • Store

My Meatless Monday Menus

3/26/2021

0 Comments

 
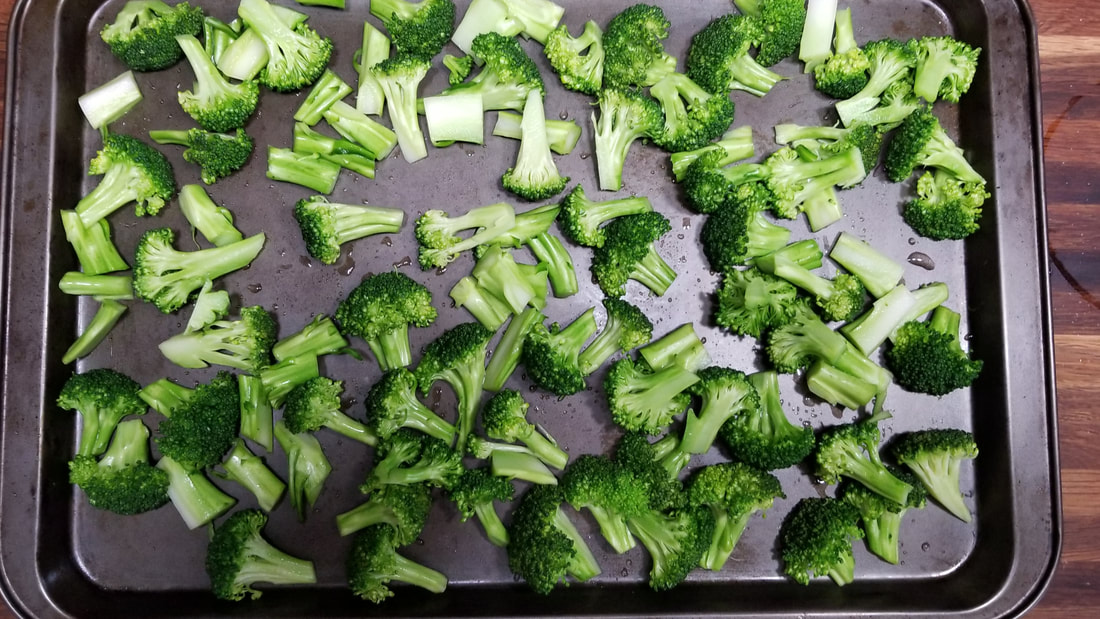
Probably everyone has a favorite Mac and Cheese recipe. Here's one we like. I think the smoked cheese makes it seem more than just a side dish. Simply add a side veggie or a green salad and it's a great meatless meal.
Smoky Macaroni and Cheese
​

1/2 lb macaroni
2 cups of half-and-half
1/4 cup flour
1 cup Fontina cheese
1/2 cup Smoky Gruyere or Sharp Cheddar
1/2 t. salt
1/4 t. black pepper
Bread crumbs
Favorite mixed grill spice seasoning


Cook the macaroni and drain well. Pour into a greased casserole dish.

Mix the flour into the half-and-half and whisk to remove any lumps. Cook slowly to thicken. Add the grated cheeses and stir until melted. Pour over the macaroni and fold in until well coated.

Top with bread crumbs and a light sprinkle of seasoning. Bake at 375 for 30-35 minutes, until bubbly and beginning to brown.

0 Comments

Irish Chain Quilts

3/24/2021

1 Comment

 
Picture

Before March is over, I thought I'd take a minute and talk about patterns for an Irish Chain quilt. People often are in search of a pattern designed to fit inside the blank square, with all of it's pointy edges. The patterns shown below, are drawn to fit that way.

Picture
Jen's Irish Chain is a typical block with pattern extending into all of the little corners.
Picture
The Irish Chain Fill block extends into the corners and has an open center to accommodate blocks with applique or embroidery in the center.

But when I quilted the quilt shown here, I wanted to use more traditional feathers. By quilting straight lines through the chain and another line into the white areas, I changed the open space from pointy to a simple square and my Square Feather block fit perfectly. And since my Amish Feather Border matches it, I only had to make two design decisions for the whole quilt. Using a block and a border from the same set is a Quick Custom idea and I'm very happy with the traditional look of this quilt.
Picture
Picture

Here are the patterns I used in this quilt.
Picture
Infinite Feathers
​Large Square Feather
Picture
Infinite Feathers Amish Feather Border and Corner

These two would work as well.
Picture
Leaf and Feather Set
large block
Picture
Leaf and Feather Border

I hope you'll keep this idea in mind for when an Irish Chain quilt top comes your way.
​Anita

1 Comment

My Meatless Monday Menus

3/21/2021

0 Comments

 
Creamy Asparagus Soup
We have a large asparagus bed and always look forward to enjoying this first spring vegetable. When I cut the spears for fresh eating or freezing, I rarely think of making soup. If you also hate to give up a "good vegetable" for soup, consider this...Cut only the top few inches to eat as a side dish and save the remaining long stems for this recipe.
 
Stems can be woody near the bottoms, but with this pureed recipe, almost all of the stem can be used.

Picture
We grow both green and purple asparagus. Both are green after they are cooked, but green is probably better for this soup.
Picture

Creamy Asparagus Soup
​
1 1/2 T olive oil

1 onion, peeled and chopped
2 - 3 cloves garlic, peeled and chopped
1 - 2 stalks celery, chopped
1/4 cup white wine
2 cups chicken or vegetable broth
1 bay leaf
8 oz. fresh asparagus
4 oz. Neufchatel (low fat cream cheese) 
1/2 cup milk
1/4 cup dry bread crumbs
1/3 cup shredded Parmesan or Romano cheese


In a medium saucepan over medium heat, heat the olive oil, then add the onion, garlic and celery and saute until soft. Stir in the wine and continue to cook until the wine is dissipated.

Stir in the broth, water, asparagus, and the bay leaf. Bring to a simmer and cook for 10 - 15 minutes, until asparagus is tender.

Remove the bay leaf and blend vegetables, along with remaining ingredients until smooth. Add more broth or water if needed for desired consistency. Taste, and adjust seasonings, as desired.

Enjoy!
Anita


0 Comments

20th Century Bindings

3/19/2021

0 Comments

 
Moving into the 20th century, we can find quilt bindings that are the same as in earlier times and some that are different.

Shaped edges were popular on Double Wedding Ring and Grandmother's Flower Garden quilts. Other quilts were shaped simply as a design statement.

Most bindings I've seen from this period were finished by hand, but machine stitching can also be seen on some.

In 1987, I finished an Amish style quilt with a faced edge, wrapped around to create a border on the front. I don't remember now why I did it that way, and I'm pretty sure I had never seen the technique, but it worked well for me. As I was looking through quilts to photograph for this blog, I was surprised to see this same finish on an early quilt in my collection.

You will also see a rescue quilt that I set together in the 1990s. I was sure I saved fabric for binding, but... I didn't want to add a different fabric to it, so I added a narrow facing strip and turned it to the back.

And finally, there is a photo of a wide blanket style edge finish. Again, I don't know why I did it, but it did give me the opportunity to repeat all of the fabrics used in the body of the quilt, so that worked ok, from a design standpoint. 

So many ways to finish our quilts and Hurray! when they are actually finished :)


Straight Edges

Picture
Simple straight edge, straight grain binding, square corners, finished by hand.
Picture
1930s Ocean Waves with straight edges, bias binding, slightly rounded corners, finished by hand.
Picture
1930s Rescue quilt, straight edge, bias binding, mitered corners, finished by hand.
Picture
1920s sateen applique, with straight edges, intentionally rounded corners, bias binding, finished by hand.

Shaped Edges

Picture
1930s Double Wedding Ring with curved edges, bias binding, applied by machine.
Picture
Rescue 1970s DWR quilt with curved edges, bias binding, finished by hand.
Picture
1930s Grandmother's Flower Garden with shaped hexagon edge, bias binding, finished by hand.
Picture
1929 pieced quilt with deeply curved edges, bias binding, finished by hand.
Picture
1930s Rescue GFG quilt with shaped hexagon edge, bias binding, finished by hand.
Picture
1930s Rescue quilt with new border, curved edges, bias binding, finished by hand.
Picture
1930s Texas Star Rescue quilt with a pieced border, bias binding, shaped and mitered corners, finished by hand.

Faced Edges

Picture
Picture
Applique quilt with wide facing strips, turned to the front to create a border with mitered corners, finished by hand on the front.
1987 Amish style quilt with a wide facing strip, turned to the front to create a border with square corners, finished by hand on the front.
Picture
1940s Rescue quilt with a new border, bias facing strip, turned to the back, finished by hand.

Blanket Edge

Picture
1988 wall quilt with a wide pieced strip, stitched to the front, turned to the back with equal amounts showing, finished by hand on the back.
0 Comments

Quick Freeze for Vegetables

3/18/2021

0 Comments

 
At the grocery this week, I found good prices on two vegetables we like, so I bought extra; more than we could fit into menus right away. I have the equipment to blanch and freeze large amounts of vegetables when we are bringing them in from our garden, but today I want to share a quick idea I use to prep vegetables for freezing when I have only a small amount.
Picture
Picture
Beautiful asparagus and broccoli from the market, washed and ready to cut into smaller bites.
Picture
After veggies are prepped, the next step is to bring a large bowl of water to boiling, in the microwave.
I added the asparagus to the hot water and blanched (cooked) it on High for 3 minutes. This process is important because it stops the enzymes that cause food to spoil.
Picture
Also have ready, a bowl of ice water. Make sure the bowls you use are stoneware or other ceramics that will tolerate the sudden change of temperature for this technique.
Use a slotted spoon and lift the veggies out of the hot water and into the ice water to stop the cooking process.
Picture
Let the veggies chill for several minutes to be sure they are cold all the way through.
​After cooling, lift the vegetables out and drain them in a colander to remove excess water.

Picture
Spread them out on a baking sheet and place them in the freezer until they are completely frozen.
Picture
Frozen spread out like this, the asparagus was easy to pick up and put into a freezer bag.
​Label and date are a good idea if you do very many packages.


Picture
Picture
The broccoli went through similar steps, although I blanched these pieces for 5 minutes because they were larger and had thicker stems.
You can read on line for suggestions on blanching and freezing other vegetables. If you have the freezer space to do this, you can count on having just what you need to make a favorite recipe. 
P. S. Some of the fresh asparagus is going into tonight's dinner. Watch for that recipe later.

0 Comments

19th Century Bindings

3/16/2021

3 Comments

 
A question arose this morning about how vintage quilts were bound. I decided to photograph and share some of my earliest quilts here. I think you might be surprised at the variety of ways quilt edges were finished. Clearly, there was no one right answer. I'm sure they vary somewhat by date, region, family influence, skill and preference of the maker. I hope you enjoy seeing them. I'll take a look at 20th century quilts another time.
Picture
c1840 Chintz. 1/8" binding rolled back to front.
Picture
Early Trapunto quilt.  Knife edge with cording.
Picture
Red and green applique with straight grain binding and rounded corners
Picture
Turn of the century with bias binding and rounded corners
Picture
Mid 1800s Applied straight grain binding, square corners
Picture
Mid century red and green Knife edge and quilted twice
Picture
Red and green pieced with straight grain binding and rounded corners

Picture
Late 19th century with bias binding and mitered corners
Picture
Early 20th century with a straight grain applied facing, turned to the back.
Picture
Late 19th century with bias binding, mitered corners, applied by machine.
3 Comments

My Meatless Monday Menues

3/15/2021

0 Comments

 
Several years ago, we decided to eat a vegetarian diet. We followed that plan for 3 years, we ate well, and I amassed a large file of vegetarian recipes. We have now added meat back into our diet on some days, simply because there were meals that I missed making. But we grow a large garden and I still make meatless meals several times a week. We know it's good for us and I hope by sharing some ideas here I can encourage you to try it too.
I was sorting through the freezers today, to see what was left from last summer and to decide what to eat for lunch today. This is what we had:
Best Tomato Soup*

​7 quarts cut up tomatoes
7 celery stalks
4 onions
8 whole cloves
4 bay leaves
1 cup sugar
4 t. salt
a little black pepper


Use food processor to chop tomatoes, celery and onions. Boil until tender and then puree. Put spices in a bag and boil with pureed ingredients. When soup is well seasoned, add sugar, salt, and pepper.

You can see this makes a big batch; I freeze it in pint containers, which makes a cup of soup for each of us. We won't have fresh tomatoes for a long time, but I know some of you do now or will soon. 
It's easy to cut the recipe in half if you want to try a little smaller amount. 


Picture
Picture
Carrot-Zucchini Veggie Burger

​1 1/2 cups carrots, shredded 

1 1/2 cups zucchini, shredded 
1/4 cup flour
1/3 cup Parmesan cheese
1/4 t. salt
1/4 t. ground black pepper
1 1/4 t. ground chili powder
2 green onions, thinly sliced
2 large eggs, whisked

Microwave the vegetables for about 2 minutes. Let cool slightly.

Add flour, cheese, salt, pepper, chili powder, green onions and eggs. Stir mixture until well combined. The chili powder is the secret for great flavor in these.

Heat 1T of oil in a skillet. Drop 1/4 cup fritter mixture into the skillet and flatten it into patties. Cook the fritters, 3-4 minutes on each side, until golden brown.


I serve these with a slice of Provolone cheese and a fresh tomato slice if we have one. They also freeze well and can be microwaved for a minute or so to serve any time of year.
Picture
Even if your veggies come from the market, I encourage you to give these recipes a try. They are both delicious!
Watch for more recipes each week and let me know what you think.

0 Comments

How Long Did That Take?

3/13/2021

4 Comments

 
I found myself reflecting on the most common question quilters are asked about their work whenever it is shown - “How long did that take?” I rarely keep track of the number of hours that go into the making of a quilt. Watching the clock and keeping tabs on my quilting makes it seem like work. Even though I make my living with my quiltmaking and teaching, I want the quilting time to be relaxing and enjoyable. But still, the question continues.
 
It would be simple, perhaps, to answer in “calendar time.” I made it in a week, or it took six months, or I worked on it for years. But with several quilts in progress all of the time and pieces overlapping (or “resting”), this is not a very accurate measure of the work involved.
 
Years ago, in an effort to answer this question and to make the point to a group of non-quilters, I used this analogy: “I quilt an average of ten stitches to the inch and I used a little over two and a half spools of thread in this quilt. There are 250 yards of thread on a spool so that would be about 700 yards of thread in this quilt. If you want to consider how long that would take....imagine quilting ten stitches every inch, along the full length of a football field, seven times.”
 
Or.......Even more interesting and perhaps more obsessive.......how many stitches are in the quilt? Again beginning with the figure of ten stitches to the inch and considering a few inches lost in knot and tails, a reasonable figure would be ten times 30 inches or 300 stitches made from each yard of thread. I know that I put between two and five spools of thread into my large quilts; let’s take an average of three spools, times 250 yards or 750 yards of thread. Multiplying the 750 yards times 300 stitches per yard will give us the grand total of 225,000 stitches per quilt. Nearly a quarter million!
 
Multiply that times the number of quilts that have been made by you, by your friends, by quilters around the world....The answers will be staggering!
 
I’ve heard it suggested that the time it takes to finish a quilt should be measured from the time one first learned how to quilt. Every quilt teaches us something, develops a new skill, a fresh approach, a better appreciation for this art we love. And this new quilt is the culmination of all that we know right now.
 
How long did it take? Any way you measure it, it’s long, it’s wonderful and it’s worth it.
Picture
Although I wrote this piece for QNM many years ago; this is the quilt that inspired it.
The Shackelford Family Album Quilt
1989
Original design, hand appliqued, and hand quilted
4 Comments

Invest in Yourself

3/12/2021

0 Comments

 
Picture
It seems the first comment we hear about longarm custom quilting is always “you can’t make a living doing custom work” and that may be true. Most longarm quilters are quilting to make a living or to add something to the family income. In the short view, it doesn’t make sense to spend a week on one quilt, instead of finishing one or more every day.
 
Unless, we want to consider a challenging quilt an investment in skill building. Most quilters feel challenged by the opportunity to do some custom quilting and hopefully more confident about it when it is finished. My earliest custom quilts included a lot of stitch in the ditch, and I felt more comfortable with it after each one. I think the same holds true for each new skill we try. I can't say “practice makes perfect” but time spent does improve the process and hopefully each time is faster/easier/better.
 
Even if the dollar per hour appears to be a loss, I’m going to challenge you to invest the time. Perhaps once a month, take on a new challenge. Make yourself learn how to do something new.
 
In the end, you’ll gain confidence, not only in using a new skill, but the reputation for a new level of work, and finally, the confidence to charge what that new skill is worth.
Picture
0 Comments

Interpretations

3/11/2021

0 Comments

 
The album blocks shown here are the result of a challenge issued to a group of friends. It began with a pattern for a traditional vase of flowers and the idea of seeing how many different ways we could interpret a single design. A study of period styles and other specific design elements helped us to discover what colors, fabrics and techniques were key to each style. Working as a group helped us to see results more quickly and provided a good learning experience for all of us. And, of course, working with friends is always fun!

I will be offering this challenge to my Journal subscribers at a later date. Full descriptions of fabric choices, colors, and techniques used will be included in the workshop. Who's ready for a challenge? 
Picture
Traditional Baltimore style made by Rebecca Whetstone

Picture
Dimensional Red and Green made by Janet Hamilton

Picture
Folk Art style made by Sheila Kennedy

Picture
​1930's style made by Jo Ann Lischynski

Picture
Realistic shapes and colors made by Anita Shackelford

Picture
​Non-traditional colors made by Glenda Clark

Picture
Non-traditional fabrics made by Connie St. Clair


​Before you begin your next appliqué project, think about the look that you want to achieve. Choose your fabrics to set the mood. Make adjustments in stem sizes and flower shapes to create the look you want. Add dimensional techniques and embroidery embellishments to make the quilt what you want it to be. And, most of all, have fun!

Picture
Picture
The techniques used in creating these blocks can be found in my Three-Dimensional Applique book, published by AQS in 1992. 
0 Comments
<<Previous

    Author

    Anita has a long background rooted in traditional handwork and quiltmaking, which she still enjoys.

    Often, these days, you'll find her digitizing patterns for the Statler Stitcher and other computerized longarm quilting machines. 
     
    Her summer days are spent in the garden and she loves finding new ways to prepare good veggie-based meals.


    She's always in search of a way to balance all of those activities and find time to share with others who are passionate about the same things.

    This page is a sneak peek into what's happening in her world right now.

    Archives

    July 2021
    June 2021
    May 2021
    April 2021
    March 2021
    February 2021
    January 2021
    December 2020

    Categories

    All
    Binding
    Christmas
    Country Living
    Handmade
    Kitchen Garden
    Landscape
    Meatless Monday
    Pottery
    Quilting
    Quilt Rescue

    RSS Feed